
You’ll troubleshoot small miniature print failures by optimizing bed adhesion with proper leveling and temperatures (PLA at 0-50°C, ABS at 80-90°C), calibrating extrusion flow rates between 0.93-0.96, fine-tuning hotend temperatures 5-10°C above recommendations, implementing strategic support placement for overhangs exceeding 45 degrees, reducing print speeds for intricate details, maintaining filament quality through moisture-free storage with desiccants, and setting layer heights at 0.1mm or lower for peak detail capture. These thorough strategies will transform your miniature printing success.
Optimize Bed Adhesion for Miniature Base Layers
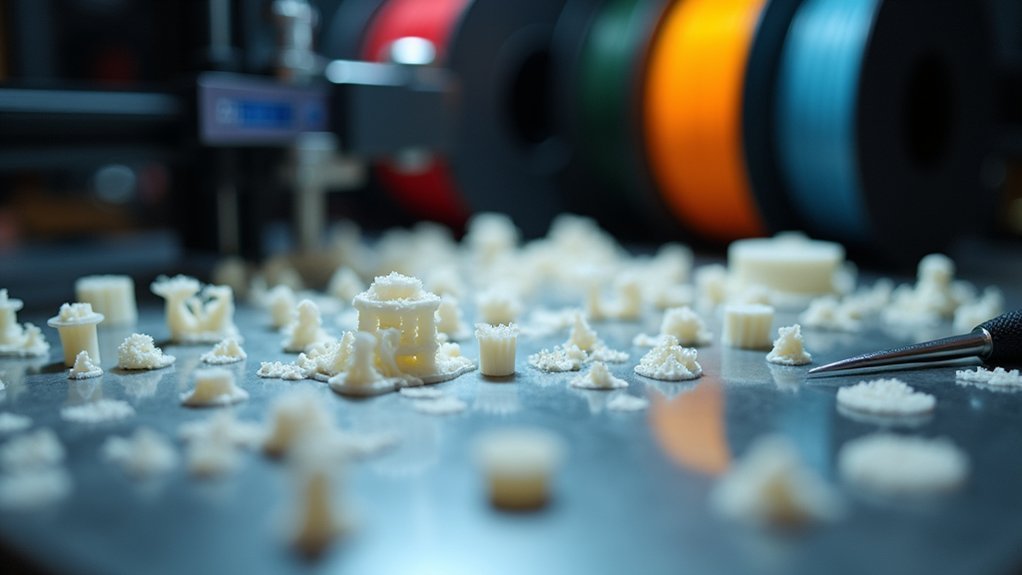
When your miniature prints fail to stick to the bed, you’ll waste hours of printing time and materials on disappointing results. Proper bed leveling is crucial—even slight misalignments prevent miniature base layers from bonding correctly.
For PLA prints, set your bed temperature between 0-50°C and apply PET tape or Elmers Glue for improved adhesion to the build surface. ABS requires higher temperatures of 80-90°C with similar surface treatments.
Increase your first layer extrusion width by 120% to create a thicker foundation that grips better, especially for miniatures with small footprints. Reduce print speed during initial layers and add wait time before lifting to guarantee ideal bonding and prevent detachment.
Calibrate Extrusion Settings to Prevent Detail Loss
Since miniature details vanish when your extruder pushes too much or too little filament, you’ll need to calibrate your flow rate between 0.93 and 0.96 for ideal material output.
Verify your nozzle diameter matches your filament diameter—mismatches cause under-extrusion and lost fine details. Clean your nozzle regularly since minor clogs disrupt flow and damage intricate designs.
Adjust print speed based on model complexity; slower speeds provide better extrusion control for enhanced detail retention.
If you detect under-extrusion causing adhesion issues, increase nozzle temperature in 5°C increments to guarantee adequate filament melting.
These calibration steps directly impact print quality by maintaining consistent material flow throughout your miniature’s delicate features and preventing the common failures that plague small-scale printing projects.
Fine-Tune Temperature Controls for Small Features
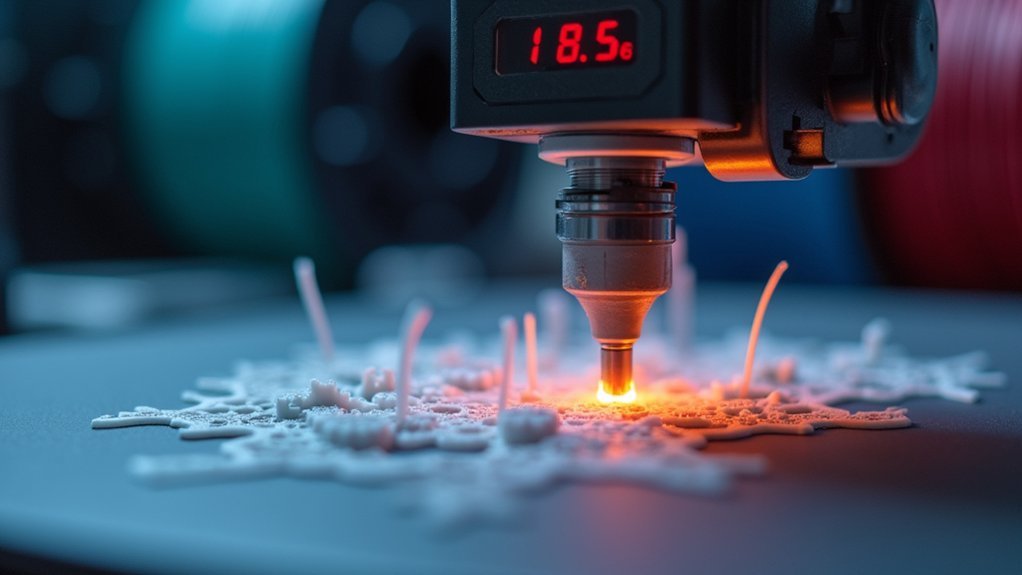
You’ll need to adjust your temperature settings specifically for miniature features since standard settings often cause detail loss or poor adhesion.
Start by increasing your hotend temperature 5-10°C above your filament’s recommended setting to guarantee proper flow through fine nozzle movements.
Don’t forget to calibrate your bed temperature and cooling fan speed, as these work together with hotend temperature to determine how well small features form and solidify.
Optimal Hotend Temperature Settings
Three critical factors determine whether your miniature prints will showcase crisp details or suffer from frustrating defects: hotend temperature, filament type, and layer height.
You’ll need to set your hot end between 190°C and 220°C depending on your material. PLA performs best at 200-210°C, while ABS requires around 220°C for proper adhesion.
Fine-tune your temperature in 5°C increments to identify the best setting for sharp details. If you’re using a layer height of 0.1mm or less, consider slightly increasing temperature to improve flow without risking stringing.
Too low temperatures cause under-extrusion and poor detail, while excessive heat creates stringing and oozing. Always calibrate against your specific filament manufacturer’s recommendations, as material formulations vary greatly.
Bed Temperature Calibration
While hotend temperature affects filament flow, your bed temperature directly impacts whether those tiny details actually stick to the build surface. For PLA prints, start around 50°C to prevent warping, then increase by 5°C increments if adhesion issues occur.
ABS and PETG need higher temperatures—calibrate between 60-70°C since these materials warp at lower settings.
Before printing, clean the plate thoroughly and apply a thin layer of adhesive like Elmer’s glue or hairspray for intricate details.
Verify your bed’s properly leveled using paper to gauge nozzle height at each corner.
Monitor your first layer closely. If filament won’t adhere to the build surface or appears too squished, adjust bed temperature incrementally until you achieve ideal adhesion without compromising miniature detail quality.
Cooling Fan Adjustments
Once your bed temperature is dialed in, cooling fan adjustments become critical for preserving those intricate miniature details. Set your cooling fan speed between 70-100% for small features to guarantee rapid solidification before the next layer deposits. This prevents drooping and warping while maintaining crisp detail resolution.
Balance cooling with your hotend temperature carefully. Excessive cooling causes under-extrusion, while insufficient airflow creates stringing and poor print quality. Consider varying fan speeds throughout different layers based on feature complexity—delicate overhangs need maximum cooling, while solid sections require less.
Monitor your ambient temperature closely, as cooler environments enhance cooling efficiency. In warmer rooms, you’ll need higher fan speeds to achieve the same results and prevent overheating of small features.
Implement Strategic Support Placement for Overhangs
Strategic support placement can make or break your miniature print, especially when dealing with challenging overhangs that threaten structural integrity.
You’ll need supports wherever your model exceeds 45 degrees to prevent print failure. Choose appropriate support types for your geometry—tree supports work best for complex miniature shapes, while block supports handle simple overhangs effectively.
For larger models, increase support density and thickness to bear the additional weight.
Position supports strategically to minimize contact points with your miniature’s surface, reducing post-processing time and preserving detail quality.
Use your slicing software to experiment with different configurations before printing. Test various placements to find what works best for each unique overhang situation, ensuring consistent results across your miniature collection.
Adjust Print Speed for Intricate Miniature Details
Because intricate miniature details demand precision above all else, you’ll need to slow down your print speed to 30-50 mm/s for ideal results. This reduced pace allows your nozzle to melt and deposit filament more evenly, which is essential for capturing those delicate features that make miniatures impressive.
Precision miniature printing requires slowing down to 30-50 mm/s for even filament deposition and capturing delicate details.
To maximize your detail quality, consider these adjustments:
- Set your layer height to 0.1 mm or lower for superior fine details representation
- Increase cooling fan speed to solidify filament quickly and reduce stringing
- Calibrate your extrusion multiplier to prevent over-extrusion that obscures small features
When you’re printing miniatures, patience pays off. Slower speeds give each layer proper time to adhere correctly, ensuring your tiny warriors emerge with crisp armor details and defined facial features.
Maintain Consistent Filament Quality and Storage
You’ll achieve better miniature prints when you maintain high-quality filament through proper storage and handling practices.
Store your filament in airtight containers with desiccants to prevent moisture absorption, which causes bubbling and poor layer adhesion that ruins fine details.
Before each print session, inspect your filament for tangles, diameter inconsistencies, or surface defects that could clog your nozzle mid-print.
Proper Filament Storage Methods
When moisture infiltrates your filament, it creates bubbling, poor layer adhesion, and inconsistent extrusion that’ll ruin even the most carefully planned miniature prints.
Implementing proper filament storage methods prevents moisture absorption and maintains consistent printing quality.
Store your filaments using these essential techniques:
- Airtight containers with desiccants – Place silica gel packets inside sealed containers to actively remove humidity and prevent degradation.
- Vacuum-sealed bags for long-term storage – Minimize air exposure and lock out moisture for filaments you won’t use immediately.
- Room temperature environments – Keep storage areas at approximately 20°C/68°F for ideal material stability.
Label each container with filament type and purchase date to track shelf life.
If you’ve exposed filaments to high humidity, dry them using a filament dryer or low-temperature oven before printing your next miniature project.
Moisture Prevention Techniques
Beyond basic storage practices, implementing thorough moisture prevention techniques protects your filament investment and eliminates print defects before they occur. You’ll want to monitor humidity levels consistently, keeping them below 30% for best results during the printing process.
| Prevention Method | Frequency | Equipment Needed | Expected Results |
|---|---|---|---|
| Airtight containers with desiccants | Daily storage | Sealed containers, silica gel | Prevents moisture absorption |
| Filament dryer usage | Before each print | Dedicated dryer or food dehydrator | Removes existing moisture |
| Environmental monitoring | Weekly checks | Hygrometer | Maintains ideal humidity |
| Regular inspection | Monthly | Visual examination | Early detection of damage |
Label containers with purchase and drying dates, as older filaments absorb moisture faster than common resin materials. These moisture prevention techniques promote consistent print quality and reduce miniature failures.
Quality Control Checks
Although proper storage forms your first line of defense against filament degradation, implementing systematic quality control checks guarantees you catch potential issues before they compromise your miniatures.
Quality control checks should become routine before every print session. Start by examining your filament’s physical condition—look for knots, tangles, or surface irregularities that’ll disrupt feeding.
Next, measure filament diameter using calipers at multiple points along the spool. Diameter variations directly impact layer exposure and extrusion consistency.
Essential pre-print quality control checks include:
- Visual inspection for knots, tangles, or surface damage
- Diameter measurement using calipers to verify consistency
- Moisture assessment checking for brittleness or unusual flexibility
These proactive measures prevent mid-print failures and guarantee your miniatures maintain crisp detail and dimensional accuracy throughout the printing process.
Perfect Layer Height Settings for Surface Finish
Since layer height directly controls how your printer builds each successive layer, you’ll find it’s the most critical setting for achieving smooth surface finishes on miniature prints. You’ll want to use 0.1 mm or lower for peak detail capture, ensuring your build plate is perfectly level for consistent adhesion.
| Nozzle Diameter | Recommended Layer Height | Maximum Layer Height |
|---|---|---|
| 0.2 mm | 0.05-0.1 mm | 0.15 mm |
| 0.3 mm | 0.1-0.15 mm | 0.225 mm |
| 0.4 mm | 0.1-0.2 mm | 0.3 mm |
| 0.6 mm | 0.2-0.3 mm | 0.45 mm |
| 0.8 mm | 0.3-0.4 mm | 0.6 mm |
Frequently Asked Questions
Why Are All of My 3D Prints Failing?
You’re likely experiencing bed adhesion issues, incorrect extrusion settings, poor filament quality, inadequate cooling, or mechanical problems. Check your bed leveling, calibrate extrusion, guarantee dry filament, adjust cooling fans, and maintain your printer regularly.
Why Do My Resin Prints Keep Failing?
Your resin prints likely fail due to poor build plate adhesion, incorrect exposure times, or cold resin temperatures. Recalibrate your build plate, increase bottom layer exposure, and make certain your resin’s at room temperature.
How Do I Troubleshoot Printing Issues?
Start by checking your printer’s bed leveling and temperature settings. Examine the nozzle for clogs, verify extrusion rates, and guarantee you’re using proper supports. Clean your build surface regularly.
What Are the Signs of Over Exposure in Resin Prints?
You’ll notice rough, orange-peel textured surfaces and excessive brittleness in overexposed prints. Parts break easily during handling, show pronounced layer lines, and you’ll find cured resin debris floating in your vat.


Leave a Reply