You’ll dramatically accelerate your 3D printing by implementing adaptive support patterns that adjust densities from 10-30% based on model complexity, orienting parts to keep overhangs under 45 degrees, and utilizing tree supports that reduce print times by 30%. Configure Z-distances between 0.2-0.3mm for easy removal, enable support roof layers with 0.5mm thickness, and use breakaway materials like PVA for intricate designs. Lower resolution settings (0.3mm) for supports while maintaining detail quality will further optimize your workflow and uncover additional time-saving techniques.
Choose Adaptive Support Patterns for Complex Geometries
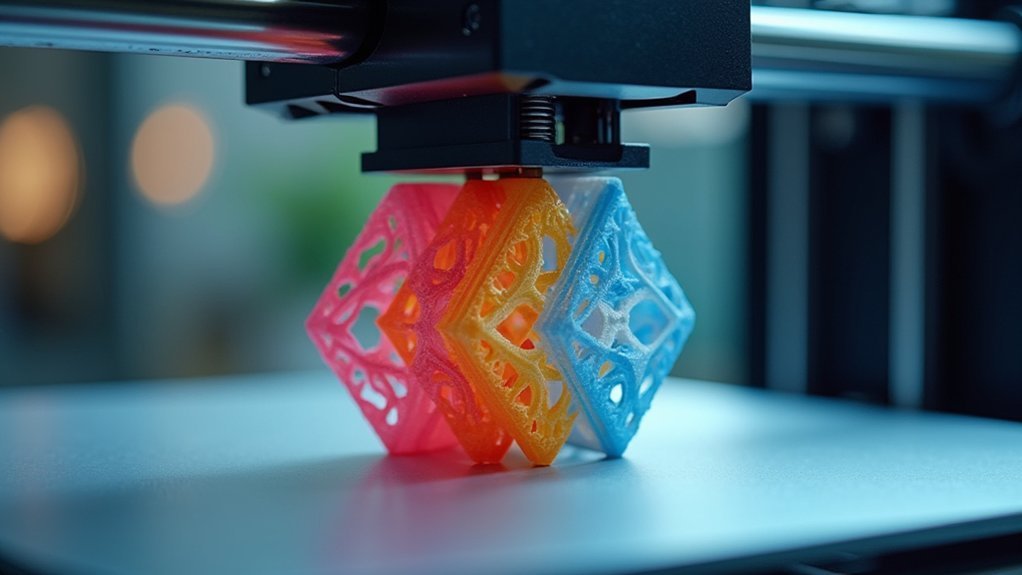
When you’re dealing with intricate models that feature complex overhangs, bridges, and detailed geometries, adaptive support patterns offer a smart solution that adjusts to your model’s specific needs.
Unlike traditional uniform supports, these intelligent structures analyze your model’s complexities and place material only where it’s truly necessary. You’ll notice varying densities and configurations that provide ideal stability while using less material overall.
This targeted approach means you’ll save time and money while maintaining print quality. The strategic placement enhances overhang stability without excessive material waste.
When it’s time to remove the support structures, you’ll find the process much simpler. Advanced slicing software generates these patterns automatically, making support structures when printing more efficient.
The result? Less post-processing work and supports that are easier to remove from your finished prints.
Optimize Support Density Settings for Material Conservation
You’ll find that selecting the right support density percentage directly impacts both material usage and print success rates.
When you adjust your density settings between 10-15%, you’re striking an ideal balance that conserves filament while maintaining structural integrity for overhangs.
The pattern type you choose—whether grid, lines, or trees—works in tandem with density percentage to determine how efficiently your supports perform their job.
Density Percentage Selection
Support density settings directly control how much material your printer uses while maintaining structural integrity for overhangs and bridges.
You’ll want to select 10-15% for lightweight or simple models to minimize material usage while providing adequate support. When printing denser models with significant overhangs, increase to 20-30% support density to balance conservation with structural needs.
Finding your ideal percentage requires testing different densities on small-scale prints first. This approach helps you identify the minimum density that maintains quality without wasting filament.
Consider implementing adaptive support structures that vary density based on specific model areas, providing targeted support only where necessary.
Remember that filament type affects density requirements—PLA typically needs less dense supports than heavier materials like ABS, allowing further material usage optimization.
Pattern Type Impact
Beyond adjusting density percentages, the specific pattern you choose fundamentally shapes how much material your printer consumes during support generation.
Different support patterns create varying amounts of contact with your model while affecting layer adhesion and removal ease.
Grid patterns offer excellent stability but consume more filament than linear alternatives. Tree supports branch strategically to contact only necessary points, dramatically reducing material usage while maintaining structural integrity. Linear patterns use the least material but may compromise support quality for complex overhangs.
Consider these pattern selection strategies:
- Grid patterns – Use for heavy models requiring maximum stability during Printing Supports
- Linear patterns – Choose for simple overhangs to minimize filament consumption per layer
- Tree supports – Select for complex geometries needing targeted support placement efficiency
Strategic Model Orientation to Minimize Support Requirements

When you position your model thoughtfully on the build plate, you’ll dramatically reduce support requirements and accelerate your printing process. Orient your model to keep overhangs at 45 degrees or less, creating self-supporting features that eliminate unnecessary supports.
Place the largest flat surface directly on the build plate for maximum stability and minimal elevated sections. Analyze your print path in slicing software to identify orientations that reduce support generation while maintaining quality.
As each model layer builds layer by layer, proper orientation guarantees cleaner results you can easily remove from the build plate. Test different orientations with sample prints to discover the most efficient setup for each specific model, optimizing your support usage and improving overall printing efficiency.
Implement Tree Supports for Faster Print Times
You’ll find tree supports revolutionize your printing speed by branching strategically from your model rather than creating dense grids of material.
These adaptive structures reduce print times by up to 30% while using considerably less filament than traditional support methods.
Understanding tree support fundamentals, mastering speed optimization techniques, and implementing material reduction strategies will transform how you approach complex overhangs and intricate geometries.
Tree Support Fundamentals
Although traditional support structures often consume excessive material and printing time, tree supports offer a revolutionary approach that considerably reduces both while maintaining structural integrity.
You’ll discover that tree supports create branching structures that provide targeted assistance only where necessary, minimizing material waste and accelerating your printing process.
Tree supports deliver three key advantages for speed printing:
- Reduced material volume – The branching geometry uses considerably less filament than grid or line supports.
- Faster removal – Fewer contact points mean quicker post-processing and cleanup.
- Improved airflow – Better cooling around your model enables faster layer curing times.
When configuring support settings in your slicing software, make sure you’re adjusting branch density and angles to optimize the balance between effectiveness and printing speed for your specific geometry.
Speed Optimization Techniques
Tree supports transform your printing workflow through strategic implementation that maximizes speed gains across every phase of production.
You’ll dramatically reduce print time by replacing dense grid structures with branching supports that originate from single points. This approach uses considerably less filament while creating fewer contact points with your model, enabling faster layer deposition rates.
Fine-tune your support density and interface settings to achieve ideal speeds without sacrificing structural integrity for overhangs and complex geometries. The printer’s nozzle follows more efficient paths, accelerating the printing process greatly.
You’ll also cut post-processing time since tree supports remove more easily than traditional structures. This streamlined removal process lets you shift quickly to finishing tasks, completing your entire project faster from start to finish.
Material Usage Reduction
When implemented effectively, tree supports slash material consumption by up to 40% compared to traditional grid patterns while maintaining essential structural integrity.
You’ll experience faster print times since fewer support structures need printing, accelerating layer progression markedly. Tree supports create wider gaps between your model and supports, making removal effortless while reducing filament waste.
The branching design enhances airflow around supported areas, preventing overheating and improving overall print quality.
You can achieve even greater efficiency by adjusting specific settings:
- Lower support density to 10-15% while maintaining structural strength
- Optimize branch angles to 45-60 degrees for maximum material efficiency
- Increase support distance to 0.3-0.4mm for easier removal and less material contact
These adjustments deliver substantial material savings without compromising your print’s structural integrity.
Adjust Z-Distance Settings for Easy Removal
Since proper Z-distance configuration directly impacts how easily you’ll remove support structures from your prints, mastering this setting becomes essential for efficient post-processing.
Mastering Z-distance configuration is crucial for efficient post-processing and effortless support structure removal from your 3D prints.
You’ll want to adjust your Z-distance to around 0.2mm to 0.3mm to create ideal gaps between supports and your model. This range facilitates easier removal without damaging your print’s surface.
Avoid setting Z-distance too tight at 0.1mm, as this creates excessive adhesion that makes support extraction difficult and potentially harmful to your model. Instead, use a Z-distance higher than your nozzle diameter to reduce contact area between support and model.
Test various Z-distance values on smaller prints first to identify the most effective settings for different overhangs.
Proper calibration combined with optimal layer height greatly enhances print quality and simplifies support removal.
Use Lower Resolution for Support Structures Only
While maintaining high-resolution settings for your main model guarantees exceptional detail quality, you can considerably reduce print time by applying lower resolution settings exclusively to support structures.
You’ll achieve faster completion by setting support layer heights to 0.3 mm or higher, compared to your model’s 0.1 mm layers. This approach creates thicker support layers that require less precision and enable faster extrusion rates.
Here’s how to maximize efficiency with lower resolution supports:
- Increase layer height to 0.3 mm or higher for supports while keeping your model at standard resolution
- Boost print speeds up to 60 mm/s specifically for support structures
- Reduce filament consumption through thicker layers that minimize material waste and costs
Your main model retains perfect detail while supports print considerably faster.
Enable Support Roof Layers for Better Surface Quality
You can dramatically improve your print’s surface quality by enabling support roof layers, which create a solid barrier between supports and your model’s overhanging surfaces.
Configure these roof layers to around 0.5mm thickness using 2-3 layers to achieve the ideal balance between surface finish and material efficiency.
This simple adjustment prevents sagging between support points while maintaining clean, professional-looking undersides on your overhangs.
Roof Layer Configuration
When you’re aiming for professional-quality surface finishes on overhanging sections, enabling support roof layers becomes one of your most effective tools.
These solid upper surfaces create a smooth foundation that dramatically improves your model’s aesthetic quality while minimizing visible support marks.
Configure your roof layers with these essential settings:
- Set thickness to 0.5mm – This provides ideal bridging capability without excessive material usage or extended print times.
- Increase density for stability – Higher density prevents sagging and deformation during printing, especially on complex geometries.
- Choose appropriate infill patterns – Grid or line patterns maximize material usage while maintaining structural integrity throughout the printing process.
Combine these configurations with 0.1mm Z-distance settings to facilitate effortless support removal without damaging your model’s surface finish.
Surface Finish Optimization
Although support structures serve their primary function of preventing overhangs from collapsing, they often leave behind rough, scarred surfaces that compromise your model’s professional appearance.
You can dramatically improve surface quality by enabling support roof layers, which create a solid barrier between your model and the underlying support structure. Set your roof thickness to around 0.5 mm for ideal balance between strength and removability.
Adjust the support interface layer height to minimize gaps, ensuring better adhesion during printing. Increase the infill percentage for support roofs to enhance their robustness and stability.
Don’t hesitate to experiment with these settings, as different materials and model designs require tailored configurations to achieve the smoothest possible finish.
Configure Minimal Support Interface Settings
Since excessive support material can greatly slow down both printing and post-processing, configuring minimal support interface settings becomes essential for speed enhancement.
You’ll want to set your support interface layer thickness to at least 0.5mm to balance adhesion with easy removal. Additionally, adjust your support Z-distance between 0.2mm and 0.3mm to create adequate separation without compromising print quality.
Here’s how to refine your minimal support interface settings:
- Reduce support density to 10-15% – This minimizes material usage while maintaining adequate structural support for overhangs and complex geometries.
- Incorporate 0.5mm separation gaps – These gaps between support structures and your model reduce bonding strength, making removal considerably easier.
- Experiment with support patterns – Try grid or tree supports to find the best balance between stability and minimal interface contact.
Apply Breakaway Support Materials for Dual Extrusion
Moving beyond single-extruder support optimization, breakaway support materials offer the most efficient solution for dual extrusion setups.
You’ll dramatically reduce post-processing time by using specialized filaments like PVA or BVOH that bond effectively during printing but separate easily afterward. These materials won’t damage your main model during removal, ensuring cleaner surface finishes on complex geometries with significant overhangs.
Configure your breakaway material’s temperature and layer height settings carefully to optimize removal ease. The material should bond sufficiently for structural support while maintaining simple mechanical separation.
You’ll eliminate the tedious cutting and sanding typically required with traditional supports. This approach works particularly well for intricate models where manual support removal risks breaking delicate features.
Your printing workflow becomes more efficient, requiring minimal effort to achieve professional-quality results.
Automate Support Placement With Ai-Powered Slicing Software
Modern AI-powered slicing software revolutionizes support placement by analyzing your model’s geometry in real-time and automatically generating ideal support structures.
These intelligent tools eliminate manual adjustments, saving you valuable setup time while optimizing your printing workflow.
Streamline your 3D printing process by letting smart automation handle tedious support calculations while you concentrate on bringing your designs to life.
Machine learning algorithms predict overhangs and bridge requirements with precision, creating efficient support patterns that minimize material waste and reduce post-processing work.
You can input specific parameters like overhang angles and quality preferences to customize support density for your exact needs.
Key benefits of AI-powered support automation:
- Adaptive generation – Software dynamically adjusts supports based on model complexity during slicing
- Reduced planning time – Automated placement lets you focus on design creativity instead of technical adjustments
- Optimized efficiency – Smart algorithms balance print quality with speed enhancement
Frequently Asked Questions
What Is the Fastest Support Pattern for Printing?
You’ll find tree support patterns are fastest for printing. They use minimal material and create branching frameworks that adapt to your model’s geometry, reducing both print time and material consumption compared to denser grid supports.
What Is the Best Support Setting for PLA?
You should use a Z-distance of 0.2-0.3mm with 15-20% density for PLA supports. Set your layer height to 0.2mm and choose grid patterns for easy removal while maintaining stability.
What Is the Best Support Angle for 3D Printing?
You’ll want to aim for 45-60 degrees as your ideal support angle. This range minimizes support material while maintaining print stability. Angles below 45 degrees typically don’t need supports at all.
What Are the Best Support Patterns in Cura?
You’ll find Tree supports work best for complex models with minimal contact points, while Grid patterns provide stability for large overhangs, and Line supports offer easy removal for simpler geometries.


Leave a Reply