
You can fix 3D printer support failures by adjusting your tree support settings to use 6mm branch diameter with 3mm spacing for ideal strength. Set your detection angle to 80 degrees and guarantee proper bed adhesion with correct temperatures—80-90°C for ABS, 50°C for PLA. Use wall loops for reinforcement and maintain stable environmental conditions without vibrations. Consider PETG or specialized support materials like PVA for better performance. Master these techniques to transform challenging prints into successes.
Understanding Support Structure Mechanics
When your 3D printer struggles with complex geometries, support structures serve as the critical foundation that prevents overhangs and intricate features from collapsing mid-print. These temporary scaffolds work by distributing weight and providing essential contact points beneath suspended elements that would otherwise fail under gravity.
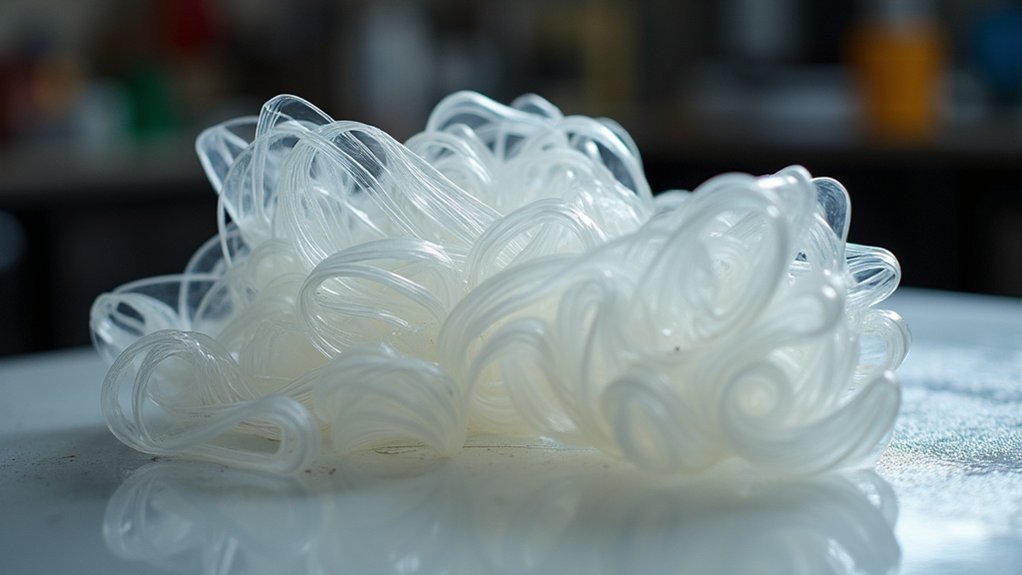
The mechanics behind effective support structure design involve several key parameters. Tree supports offer superior efficiency by branching outward from minimal contact points, reducing material waste while maintaining structural integrity.
You’ll need to refine branch diameter and spacing—typically 6mm diameter with 3mm distance for ideal stability. Wall loops around your supports notably enhance strength by creating reinforced perimeters. Increasing these loops reduces failure risk during printing.
Additionally, setting your support angle detection to 80 degrees maximum ensures adequate coverage without unnecessary material consumption.
Optimizing Tree Support Settings
While tree supports excel at reducing material waste, fine-tuning their specific parameters transforms good prints into exceptional ones. You’ll want to increase your branch diameter to 6mm for enhanced structural integrity, paired with 3mm branch spacing for ideal stability. Setting your wall thickness to one layer strikes the perfect balance between strength and easy removal.
| Parameter | Recommended Setting | Benefit |
|---|---|---|
| Branch Diameter | 6mm | Enhanced stability |
| Detection Angle | 80 degrees | Better placement |
| Wall Thickness | 1 layer | Easy removal |
Boost your detection angle to 80 degrees for superior support placement while maximizing horizontal reach for thorough coverage. Consider adopting slim tree support styles to minimize material usage without sacrificing performance on overhangs and complex geometries.
Adjusting Branch Diameter and Wall Thickness

When your tree supports keep failing, you’ll need to fine-tune two critical parameters that directly impact their structural integrity.
Setting your branch diameter to around 6mm greatly improves strength and stability during printing, while reducing wall thickness to 1mm maintains structural support with better filament adhesion.
These adjustments work together to create supports that won’t collapse under pressure yet remain easy to remove once printing’s complete.
Optimal Branch Diameter Settings
Although many users overlook branch diameter settings, you’ll find that adjusting these parameters greatly impacts your support structure’s reliability. Setting your branch diameter to 6mm markedly enhances support stability by creating stronger structural connections throughout your tree supports. This diameter provides the perfect balance between material usage and structural integrity.
When you’re configuring ideal branch diameter settings, you’re fundamentally determining how much load your supports can bear. Thicker branches distribute weight more effectively across the entire support network, preventing catastrophic failures during printing.
You’ll notice improved performance with complex overhangs and bridging sections.
Key benefits of proper branch diameter configuration:
- Enhanced structural strength for heavy or complex geometries
- Reduced support failure rates during long print jobs
- Better weight distribution across support networks
- Improved adhesion between support branches and build plate
Wall Thickness Configuration
Branch diameter works hand-in-hand with wall thickness to create robust support structures that won’t collapse mid-print. When you reduce wall thickness to one layer, you’ll minimize material consumption while maintaining adequate support strength for most geometries.
This single-wall approach prevents excessive material waste and reduces post-processing time. Your branch diameter should complement this thin wall configuration. Setting branches to 6mm provides the structural backbone needed when walls are minimal.
This combination creates supports that are strong enough to handle overhangs yet thin enough for easy removal. You’ll find this pairing particularly effective for complex prints with multiple overhanging features.
The reduced wall thickness keeps supports lightweight, while the optimized branch diameter guarantees they won’t buckle under the weight of successive layers above.
Configuring Detection Angles and Reach
Configuring your support detection angles and reach settings forms the foundation of reliable 3D printing success.
When you adjust your detection angle to 80 degrees, you’ll enhance your support structure’s ability to provide stability exactly where it’s needed most. This precise calibration guarantees overhangs receive adequate reinforcement without excessive material waste.
Your horizontal reach settings determine how far supports extend to cover challenging geometries. Maximizing this parameter allows supports to reach further, providing thorough coverage for heavy sections and complex overhangs that might otherwise fail mid-print.
- Set detection angle to 80 degrees for ideal overhang recognition
- Increase branch diameter to 6mm for enhanced structural integrity
- Configure 3mm branch distance to balance strength with material efficiency
- Maximize horizontal reach for thorough overhang coverage
Bed Adhesion Solutions for Supports

Perfect support detection angles won’t deliver successful prints if your supports fail to stick to the print bed. Implementing effective bed adhesion solutions starts with setting the correct bed temperature: 80-90°C for ABS and 0-50°C for PLA.
You’ll want to enhance adhesion by applying adhesion aids like PET tape, Elmer’s Glue, or hair gel directly to your print bed surface.
Before each print, conduct thorough bed leveling since incorrect leveling causes poor adhesion and support failures. Increase your brim settings to provide additional surface area for supports, considerably improving their adherence.
Don’t overlook environmental factors – verify your printing area remains stable and vibration-free, as movement disrupts the delicate bond between supports and the print bed, compromising your entire print’s success.
Filament Preparation and Drying Techniques
You’ll need to identify moisture in your filament before it causes support failures that compromise your entire print.
Start by listening for popping or crackling sounds during extrusion, which indicate water vapor escaping from heated filament.
Once you’ve detected moisture, set your dryer to the appropriate temperature—typically 50-60°C for PLA and higher for materials like PETG or ABS.
Moisture Detection Methods
Why does your filament produce popping sounds and bubbled extrusions that compromise support structures? These telltale signs indicate moisture contamination that’ll ruin your printed parts before your printing software can adjust.
Effective moisture detection methods help you identify compromised filament before it damages your supports:
- Listen for audio cues – Bubbling or popping sounds during extrusion reveal water vapor escaping from heated filament.
- Perform heat tests – Cut a small piece and heat it; sizzling or bubbling confirms moisture presence.
- Inspect extrusion quality – Look for inconsistent flow, rough surfaces, or visible bubbles in extruded material.
- Monitor print performance – Poor layer adhesion and weak supports often indicate wet filament.
Catching moisture early prevents support failures and guarantees your structures maintain their intended strength throughout the printing process.
Optimal Drying Settings
Once you’ve detected moisture contamination, selecting the right drying temperature and duration becomes critical for restoring your filament’s performance.
For PLA filaments, set your dryer to 40-50°C and run it for 4-6 hours to eliminate moisture-related issues. This moderate heat effectively removes water without damaging the material.
Nylon and other hygroscopic filaments need more aggressive treatment—use 70-80°C for 6-12 hours to achieve ideal results.
Monitor your drying setup regularly to guarantee consistent performance.
After drying, immediately store your filament in airtight containers with desiccants to prevent reabsorption.
Proper drying temperature selection directly impacts your print quality, reducing bubbling and improving layer adhesion. This foundation creates stronger support structures and more reliable printing outcomes.
Manual Support Painting Methods
When automatic support generation fails to provide adequate stability for complex geometries, manual support painting gives you precise control over support placement. You’ll paint supports layer by layer directly onto your model before printing, targeting critical areas where overhangs need extra stability. This approach reduces reliance on automatic algorithms that often add unnecessary material.
Use the same filament type as your model to guarantee proper bonding and easier removal. While manually painted supports can be harder to remove than breakaway materials, you’ll achieve better adhesion and print quality. Adjust thickness and density to prevent breakage during printing.
Using identical filament for both model and supports ensures optimal bonding while maintaining superior print quality despite requiring more effort during removal.
- Experiment with honeycomb patterns for lightweight yet strong support structures
- Vary branch diameters to optimize material usage and removal difficulty
- Target specific overhang angles that automatic supports typically miss
- Test different density settings for complex architectural features
Nozzle Collision Prevention
When your nozzle crashes into supports during printing, you’ll need to adjust several key movement settings to prevent future collisions.
Start by optimizing your z-hop settings to create adequate clearance above support structures as the nozzle travels between print areas.
You’ll also want to fine-tune retraction distances and examine how your slicer plans travel paths to avoid problematic routes through dense support zones.
Z-Hop Settings Optimization
Although nozzle collisions with supports rank among the most frustrating causes of print failures, you can prevent them by optimizing your z-hop settings.
Setting your z-hop type to “normal” creates essential clearance between your nozzle and support structures during travel moves. You’ll want to increase your z-hop distance to 1-2 mm for adequate protection, especially when printing tall supports that require extra vertical clearance.
Consider these optimization strategies:
- Set z-hop type to “normal” for consistent collision prevention
- Increase z-hop distance to 1-2 mm for enhanced clearance
- Uncheck “reduce infill retractions” to minimize support interference
- Adjust settings based on your specific filament and support requirements
Higher z-hop heights prove particularly beneficial for complex geometries with extensive support structures, ensuring your nozzle maintains safe distance during all travel movements.
Retraction Distance Adjustments
Beyond z-hop adjustments, fine-tuning your retraction distance provides another powerful method to prevent nozzle collisions with support structures.
You’ll need different settings depending on your extruder type: direct drive systems typically require 1-2 mm, while Bowden setups need 4-6 mm. Proper retraction distance maintains print integrity by preventing the nozzle from dragging through supports during travel moves.
Increase your retraction speed to 30-60 mm/s to minimize oozing and stringing, which can cause support failures when excess material accumulates.
Remember that different filaments respond uniquely to retraction settings, so you’ll need to calibrate based on your specific material and printer configuration.
Regular testing guarantees ideal support adhesion and prevents costly print failures from inadequate retraction adjustments.
Travel Path Planning
While retraction settings form the foundation of collision prevention, strategic travel path planning represents your most critical defense against nozzle strikes during support printing. Your slicer’s path algorithms determine whether your nozzle safely navigates around delicate structures or crashes through them.
- Enable z-hop with “normal” type and increase z-hop distance to lift your nozzle above supports during travel moves.
- Uncheck “reduce infill retractions” to guarantee smoother travel paths without unnecessary retraction complications.
- Activate travel path planning features that specifically minimize movement over fragile support structures.
- Reduce print speed during support layers for enhanced precision and controlled nozzle movement.
Consider upgrading to advanced slicers like OrcaSlicer, which offer superior travel path planning algorithms that intelligently route your nozzle away from vulnerable supports.
Environmental Factors Affecting Support Stability
When your 3D printer sits on an unstable surface like carpeting, vibrations and resonance can cause support structures to fail mid-print. Proper printer placement on a solid, level desk minimizes movement and greatly improves print accuracy.
You’ll notice better support performance when vibrations are eliminated from your printing environment.
Environmental temperature fluctuations directly affect support adhesion, so you should maintain consistent ambient temperatures throughout your prints. Temperature variations can cause supports to detach or become unstable as materials expand and contract.
Humidity levels also play an important role in filament performance. Store your filaments in dry conditions to prevent moisture absorption, which weakens both your main print and support structures.
Consider using an enclosure to control temperature, humidity, and airflow for more reliable results.
Material Selection for Better Support Performance
Since your choice of filament directly impacts support quality, you should prioritize materials with superior layer adhesion properties like PETG or ASA over standard PLA for challenging geometries.
Your material selection greatly affects support performance, especially with complex overhangs and bridges.
Material choice is critical for support success, particularly when printing complex overhangs and bridging geometries that demand optimal filament performance.
Consider these key strategies for ideal filament properties:
- Use specialized support materials – PVA dissolves easily in water, making support removal effortless when paired with compatible main materials.
- Select high glass softening temperature filaments – These maintain stability during high-heat applications and complex structure printing.
- Choose contrasting support colors – Different colors help you identify and assess support effectiveness throughout the printing process.
- Dry filaments before use – Moisture causes bubbling and poor adhesion, particularly affecting humidity-sensitive materials.
Post-Processing and Support Removal Strategies
After your print finishes, proper support removal technique becomes essential for achieving professional-quality results. Allow your model to cool completely on the build plate before attempting removal – this prevents damage and reduces print time waste from broken parts.
| Tool Type | Best Use Case | Technique |
|---|---|---|
| Pliers/Tweezers | Accessible supports | Gentle twisting motion |
| Heated knife | Stubborn materials | Careful cutting strokes |
| Warm water | PVA supports | Complete dissolution |
Use specialized support removal tools to minimize stress on delicate features. For water-soluble supports, soaking simplifies the process considerably. When dealing with rough contact areas, sand or file surfaces smooth after removal. Experiment with heated cutting tools for particularly stubborn connections, ensuring you don’t damage the underlying print surface.
Frequently Asked Questions
How to 3D Print Without Supports?
Design overhangs at 45 degrees or less, use bridging techniques, optimize cooling settings, and create built-in supports within your model. You’ll minimize support needs while maintaining print quality and structural integrity.
Why Are My Supports Not Printing?
Your supports aren’t printing because you’ve likely got insufficient support density, wrong placement settings, or weak branch diameter configurations. Check your slicer’s support settings and increase wall thickness for better stability.
Why Do Supports Fail?
Your supports fail because you’ve got poor bed adhesion, insufficient support density, vibrations affecting your printer, incorrect slicer settings, or you’re using filament with weak layer adhesion that creates fragile structures.
How to Break 3D Print Support?
You’ll break 3D print supports most effectively using pliers or tweezers for controlled removal. Start with larger sections, work toward smaller details, and twist gently to avoid damaging your main print.


Leave a Reply