
Creating sterilizable 3D printed medical components requires you to choose biocompatible materials like MED610 and PEEK with proven sterilization resistance. You’ll need to optimize print parameters by reducing layer heights and increasing infill density above 50% to minimize porosity. Design components with rounded corners and open geometries that facilitate complete sterilization coverage. Select appropriate sterilization methods—ethylene oxide for heat-sensitive materials or gamma irradiation for robust ones. Implement thorough pre-sterilization cleaning protocols and validate dimensional stability post-sterilization. The complete process involves additional critical considerations.
Choose Biocompatible Materials With Proven Sterilization Resistance
When developing sterilizable 3D printed medical components, you’ll need to start with materials specifically engineered for medical applications.
Select biocompatible materials like MED610 and PEEK that demonstrate proven resistance to sterilization methods including gamma irradiation and autoclave sterilization. These specialized polymers maintain their mechanical properties and structural integrity throughout repeated sterilization cycles.
You’ll also want to take into account resins such as Formlabs™ white resin that meet USP Class VI standards, ensuring safety for medical device applications.
Materials like PC-ISO, Nylon PA, and ULTEM 1010 offer excellent high-temperature resistance while preserving performance characteristics.
Pay attention to moisture absorption rates when selecting materials, as excessive humidity during sterilization can cause structural deformation and compromise your component’s reliability and effectiveness.
Optimize Print Parameters to Minimize Porosity and Surface Irregularities
You’ll achieve superior sterilization outcomes by fine-tuning your 3D printer’s core parameters to eliminate surface defects and internal voids.
Start by reducing layer heights to create smoother surfaces with fewer bacterial harboring points. Then increase infill density to minimize internal porosity.
Complete your optimization process with post-processing smoothing techniques that’ll further enhance surface quality and sterilization effectiveness.
Reduce Layer Height Settings
Layer height represents one of the most critical parameters you can adjust to minimize porosity and surface irregularities in sterilizable medical components.
Reducing layer height considerably improves your printed materials’ suitability for medical applications by creating denser, more uniform surfaces that enhance sterilization processes effectiveness.
Key benefits of finer layer resolution include:
- Enhanced surface uniformity – Minimizes microscopic grooves where bacteria can harbor
- Improved mechanical strength – Maintains tensile properties and reduces deformation during sterilization
- Better layer adhesion – Creates denser structures less susceptible to microbial infiltration
- Lower fluid infiltration rates – Reduces porosity for superior sterility assurance
You’ll find that adjusting from standard 0.2mm to 0.1mm layer heights dramatically improves your sterile parts’ performance while limiting contamination risks.
Increase Infill Density Parameters
Beyond layer height adjustments, infill density serves as your second most powerful parameter for eliminating porosity in sterilizable medical components.
You’ll want to increase infill density to 50% or higher to greatly reduce fluid and bacteria infiltration while enhancing mechanical strength for demanding surgical applications. This adjustment creates better layer adhesion and improves structural integrity throughout your printed parts.
When you optimize infill density alongside print speed and temperature settings, you’ll achieve superior surface uniformity that reduces contaminant-harboring irregularities.
Higher infill densities help guarantee your 3D printing process meets strict sterilization requirements by minimizing potential failure points. A well-calibrated printer consistently producing high-density parts reduces device failure risks during critical medical procedures.
Smooth Surface Finishing Techniques
Surface finishing techniques work hand-in-hand with ideal infill density to create medical components that meet rigorous sterilization standards.
You’ll need to implement smooth surface finishing techniques that drastically reduce surface roughness on your 3D printed components. Proper post-processing guarantees your medical devices can withstand sterilization protocols effectively.
Here’s how you’ll optimize surface quality:
- Utilize smaller layer heights – This reduces porosity and creates smoother finishes that resist bacterial contamination.
- Apply vapor smoothing – Enhances surface smoothness while minimizing moisture absorption during sterilization cycles.
- Calibrate print speeds and temperatures – Optimized extrusion eliminates surface irregularities that compromise sterility.
- Maintain printer calibration regularly – Consistent quality prevents surface defects that create contamination points.
These techniques transform rough surfaces into sterilization-ready components.
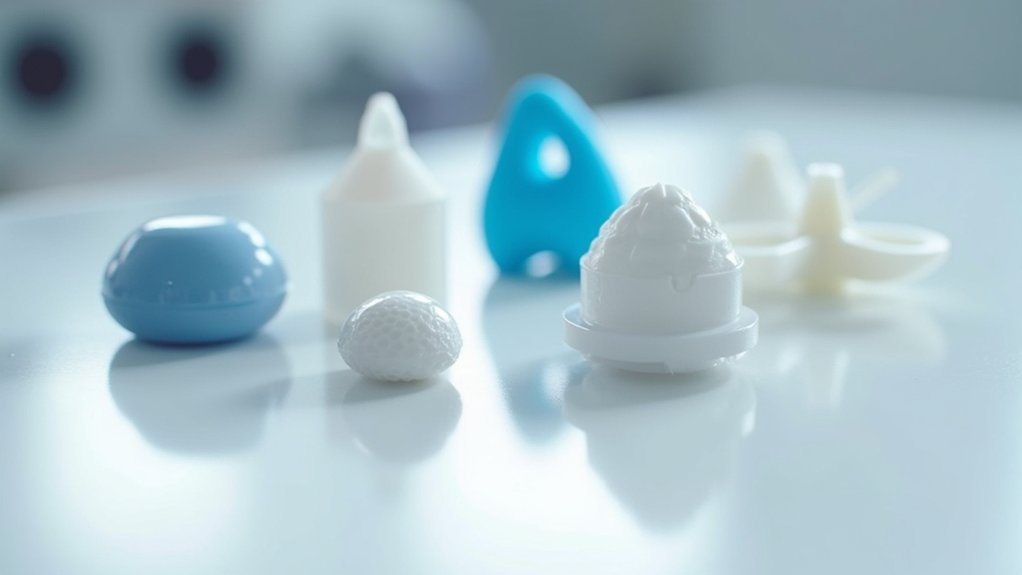
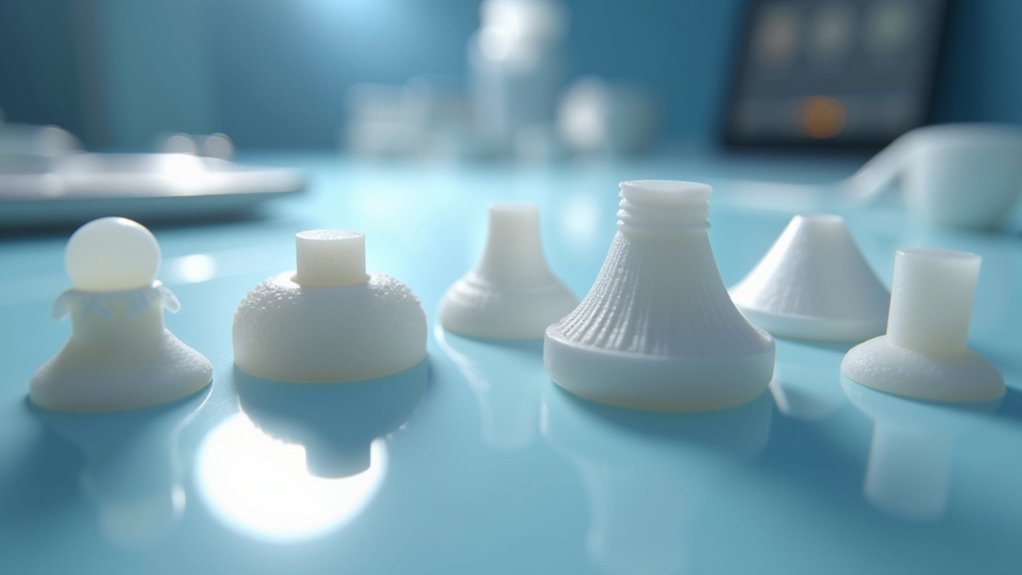
Design Geometries That Facilitate Complete Sterilization Coverage
When designing 3D printed medical components for sterilization, you must prioritize geometries that allow complete penetration and coverage of sterilization agents. Complex geometries with sharp corners and deep recesses create stagnant areas where sterilization processes can’t reach effectively. You’ll want to implement open structures with rounded edges that promote fluid circulation and eliminate fluid retention.
| Design Feature | Recommended Approach | Sterilization Benefit |
|---|---|---|
| Surface Complexity | Minimize intricate features | Reduces contamination risk |
| Edge Design | Use rounded corners | Enhances fluid flow |
| Internal Channels | Adequate sizing for access | Prevents fluid retention |
| Overall Structure | Open lattice patterns | Improves agent penetration |
| Cavity Design | Avoid deep recesses | Guarantees effective cleaning |
Sterile 3D printing success depends on thoughtful design geometries that prioritize accessibility over complexity.
Select the Appropriate Sterilization Method Based on Material Properties
Material compatibility determines the sterilization success of your 3D printed medical components, making method selection a critical decision point in your manufacturing process.
Understanding how different sterilization methods interact with material properties guarantees you’ll maintain mechanical integrity while achieving complete decontamination.
Consider these sterilization methods based on your material choice:
- Low-temperature sterilization (Ethylene Oxide) for heat-sensitive materials like PLA and ABS to prevent deformation.
- Gamma irradiation for robust materials such as PA12, which tolerates 25-45 kGy doses effectively.
- Autoclaving requires pre-treatment like vapor smoothing for porous materials to prevent moisture absorption and warpage.
- Enhanced cleaning protocols for high-porosity components produced through layer-by-layer manufacturing to guarantee thorough decontamination.
Always evaluate post-sterilization changes in ductility and tensile modulus.
Implement Pre-Sterilization Cleaning and Preparation Protocols
You’ll need to thoroughly clean your 3D printed medical devices using Prolystica 2X Concentrate Neutral Detergent or Prolystica HP Neutral Detergent to remove all contaminants before sterilization.
After cleaning, you must rinse and completely dry the devices to prevent any residues that could interfere with the sterilization process.
These critical preparation steps guarantee you’re following manufacturer instructions and maintaining FDA compliance for safe medical device processing.
Thorough Device Cleaning
Before sterilization can effectively eliminate pathogens from 3D printed medical devices, you must implement rigorous cleaning protocols that remove all contaminants from component surfaces.
Your cleaning process should follow FDA guidance and manufacturer specifications to guarantee compliance.
Follow these essential steps for thorough device cleaning:
- Clean thoroughly using Prolystica 2X Concentrate Neutral Detergent or Prolystica HP Neutral Detergent to eliminate all residues.
- Utilize ultrasonic cleaners when recommended to remove particles from complex geometries and biofilms.
- Rinse and dry completely before placing devices in sterilization equipment.
- Conduct visual inspection after cleaning to confirm no contaminants remain on surfaces.
Load each device single-pouched during processing to maintain sterilization integrity and prevent cross-contamination between different medical components.
Proper Drying Procedures
Complete drying of cleaned 3D printed medical devices forms the foundation of successful sterilization outcomes.
After thorough cleaning, you must eliminate all moisture retention to prevent sterilization failure and maintain device integrity throughout the process.
Follow manufacturer-specific drying procedures tailored to your device’s material composition. Adhere strictly to recommended drying times and conditions outlined in sterilization guidelines to guarantee complete moisture elimination.
Any residual water can compromise effective sterilization and create opportunities for contamination.
You’ll need to verify that all surfaces, including complex geometries and internal channels common in 3D printed components, are completely dry before proceeding.
This critical step directly impacts your sterilization success and helps maintain FDA compliance.
Proper drying procedures greatly reduce infection risk and guarantee ideal patient safety outcomes.
Validate Dimensional Stability and Mechanical Properties Post-Sterilization

After subjecting your 3D printed medical components to sterilization, you’ll need to rigorously test whether the process has compromised their structural integrity and dimensional accuracy.
Post-sterilization validation guarantees your medical devices maintain critical performance standards.
Post-sterilization validation ensures your 3D printed medical devices retain essential performance characteristics and meet stringent quality requirements.
Your thorough testing protocol should include:
- Mechanical property assessment – Conduct tensile strength and elongation tests to identify potential ductility reduction, particularly after irradiation sterilization.
- Dimensional variation monitoring – Measure critical dimensions like hole diameters, targeting changes under 0.015mm to preserve fit and functionality.
- Thermal analysis – Use DSC-TGA to evaluate structural changes that may compromise material integrity.
- Surface characterization – Perform scanning electron microscopy to detect warpage, moisture absorption, or other surface defects.
Implement standardized testing procedures for each sterilization method across different geometries to guarantee consistent dimensional stability and mechanical properties in your 3D printed components.
Establish Quality Control Testing for Sterility Assurance Levels
Since patient safety depends on absolute sterility assurance, you’ll need to establish rigorous quality control testing protocols that verify your sterilization processes achieve required sterility assurance levels (SAL) of 10^-6 or better.
Implement biological indicator testing routines using appropriate spore strips to validate that your sterilization methods effectively eliminate all viable microorganisms from 3D printed components.
You must conduct standardized quality control checks throughout manufacturing to guarantee compliance with FDA requirements and ISO 10993-1 standards for medical applications.
Document all sterilization cycle parameters including time, temperature, and method used for complete traceability.
Additionally, assess mechanical properties post-sterilization to confirm your sterile components maintain structural integrity and performance specifications required for safe medical device operation.
Frequently Asked Questions
How Do You Sterilize 3D Printed Parts?
You’ll clean parts thoroughly with neutral detergent, then select appropriate sterilization methods like ethylene oxide for heat-sensitive materials, gamma irradiation, or autoclaving for heat-resistant polymers while following FDA guidelines.
What Is the Best Method to Sterilize Sensitive Plastic Medical Devices?
You should use hydrogen peroxide plasma or ethylene oxide sterilization for sensitive plastic medical devices. These low-temperature methods won’t deform heat-sensitive materials while effectively eliminating pathogens and maintaining structural integrity.
Is There a Way to 3D Print Medical Grade Silicone?
You can 3D print medical-grade silicone using specialized techniques like Material Jetting or Direct Ink Writing. You’ll need post-processing steps and must guarantee your final products meet FDA and ISO regulatory standards.
What Are the Techniques Used in 3D Printing in a Medical Setting?
You’ll use FDM for basic components, SLA for precise patient-specific devices, SLS for strong orthopedic implants, and PolyJet for multi-material parts with varying hardness levels in medical applications.
Leave a Reply