Your nozzle height directly affects how well layers bond together because it controls filament compression and flow. When it’s too high, you’ll get under-extrusion and gaps between layers since the molten plastic can’t properly squish and intertwine at the molecular level. Too low creates over-extrusion and flow disruptions that prevent adequate thermal interaction. This disrupts the critical process where thermoplastic chains from adjacent layers bond during cooling, and the following sections will show you exactly how to fix it.
Understanding the Relationship Between Nozzle Height and Layer Bonding
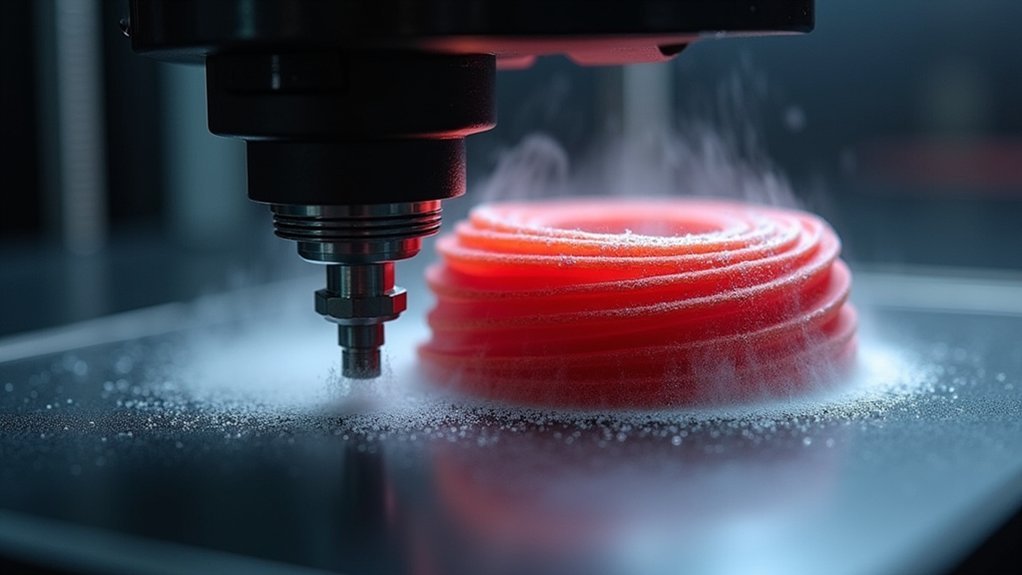
When you’re troubleshooting layer separation issues, the nozzle height emerges as one of the most critical factors affecting your print’s structural integrity.
Your nozzle’s distance from the build platform directly controls how well each layer bonds to the surface below it. If you set the nozzle height too high, the extruded filament won’t receive sufficient pressure against the previous layer, creating weak adhesion points that lead to delamination.
Conversely, positioning your nozzle too low creates excessive pressure that can cause under-extrusion or clogs, compromising layer bonding. The sweet spot typically ranges from 0.1mm to 0.2mm for ideal first layer adhesion.
Setting your nozzle too low creates excessive pressure, causing under-extrusion and clogs that compromise critical layer bonding strength.
Regular calibration guarantees consistent layer bonding, especially with temperature-sensitive materials like ABS and PLA.
How Incorrect Nozzle Distance Affects Filament Flow
Your nozzle’s distance from the print surface directly controls filament flow patterns, and getting this measurement wrong creates a cascade of extrusion problems that compromise your entire print.
When your nozzle height isn’t properly calibrated, you’ll experience these critical flow issues:
- Too high creates under-extrusion – Insufficient pressure prevents proper material deposition, leaving gaps between layers.
- Too low causes over-extrusion – Excessive pressure forces too much filament out, creating bulging and uneven surfaces.
- Inconsistent layer thickness – Variable distances produce unpredictable material flow throughout your print.
- Poor inter-layer bonding – Both scenarios prevent the 20% compression ratio needed for ideal adhesion.
These flow disruptions directly lead to weak layer bonds and eventual separation, making precise nozzle height calibration essential for successful prints.
The Science Behind Proper Layer Adhesion

Because thermoplastic filament behaves like a viscous fluid at printing temperatures, layer adhesion depends on molecular chains from adjacent layers intertwining and fusing together during the brief window when material remains above its glass change temperature.
You’ll achieve ideal bonding when your nozzle height allows proper squishing of the molten filament against the previous layer. This creates the necessary pressure and contact time for molecular diffusion to occur.
When you set incorrect layer heights, you’re disrupting this critical process. Too much distance prevents adequate pressure, while insufficient clearance blocks proper flow.
Your nozzle height directly controls how well each layer compresses and bonds with the substrate below. Regular calibration guarantees you’re maintaining the precise gap needed for consistent molecular fusion throughout your entire print.
Signs That Your Nozzle Height Is Causing Separation
When your nozzle height isn’t properly calibrated, you’ll notice distinct visual cues that indicate layer separation issues.
The most obvious sign is visible gaps between layers where you can actually see space or light between the printed lines.
You’ll also spot horizontal crack patterns running across your print’s surface, creating weak points where layers haven’t bonded correctly.
Visible Layer Gaps
Although proper nozzle height is critical for successful 3D printing, one of the most obvious indicators that something’s wrong is the appearance of visible gaps between layers.
When your nozzle height isn’t calibrated correctly, you’ll notice distinct separation lines where layers should seamlessly bond together.
Here are four key signs of visible layer gaps caused by incorrect nozzle height:
- Horizontal lines running across your print where layers meet
- Weak adhesion between successive layers that you can see with the naked eye
- Inconsistent extrusion creating uneven surface texture
- Poor first layer bonding that cascades into subsequent layer problems
Adjusting your nozzle height can eliminate these gaps, ensuring proper filament flow and stronger layer adhesion for higher-quality prints.
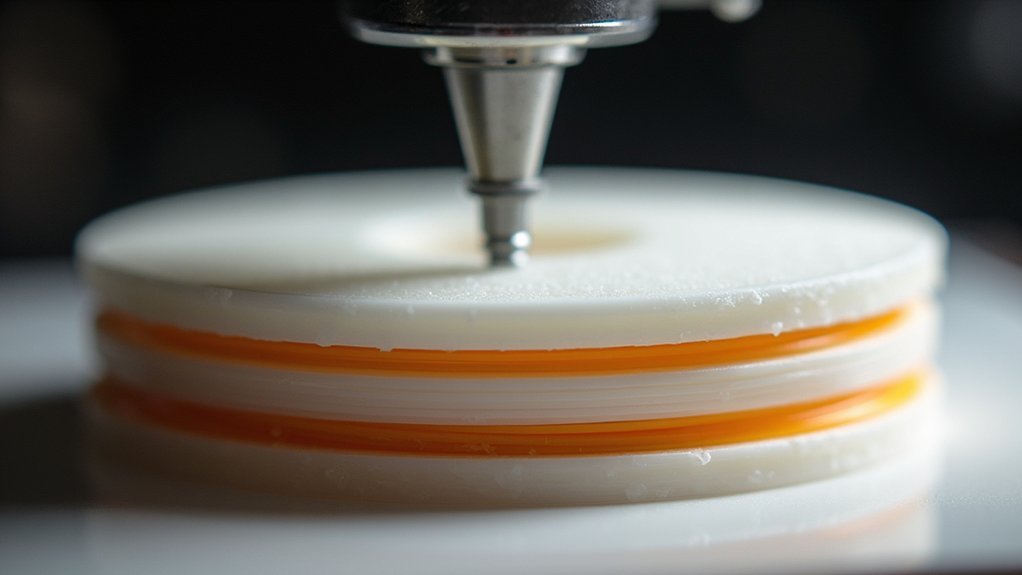
Horizontal Crack Patterns
Three distinct horizontal crack patterns can reveal whether your nozzle height is causing layer separation issues. These patterns appear as visible lines running parallel to the print bed, indicating poor layer adhesion between successive layers.
| Crack Pattern | Nozzle Height Issue |
|---|---|
| Clean, straight lines | Too high – insufficient squish |
| Zigzag separations | Too low – over-compression |
| Intermittent gaps | Inconsistent bed leveling |
| Wide separations | Severely incorrect height |
| Hairline cracks | Minor height deviation |
You’ll notice these horizontal cracks most clearly on vertical surfaces where layer interfaces are exposed. When your nozzle height isn’t properly calibrated, the extruded filament can’t bond effectively with the previous layer, creating these telltale separation patterns that compromise your print’s structural integrity.
Measuring and Adjusting Nozzle Height for Optimal Results

Getting your nozzle height dialed in correctly forms the foundation of successful 3D printing, as this critical setting directly determines whether your first layer will stick properly or separate from the bed.
You’ll need to measure and adjust this distance precisely to achieve ideal results.
Here’s how to properly set your nozzle height:
- Use the paper test – Place a standard piece of paper between the nozzle and bed, adjusting until there’s slight drag when moving the paper.
- Set distance to 0.1-0.2mm – This range guarantees adequate filament squish without blocking flow.
- Calibrate regularly – Check bed leveling frequently as even minor changes affect layer bonding.
- Consider auto-leveling sensors – These tools maintain consistent height measurements across your entire print bed automatically.
First Layer Height Impact on Subsequent Layer Quality
When you establish proper first layer height, you’re creating the foundation that determines how well every subsequent layer bonds and maintains structural integrity.
The height you set here propagates upward through your entire print, directly affecting how each new layer interacts with the one beneath it.
You’ll find that consistent adhesion quality starts with this critical first layer, as any defects or inconsistencies will compound throughout the printing process.
Foundation Layer Stability
Since the foundation layer serves as the cornerstone of your entire print, its stability directly determines whether subsequent layers will bond properly or fail catastrophically.
When you establish a stable foundation layer with proper nozzle height, you’re setting the stage for successful layer adhesion throughout your print. However, incorrect nozzle positioning creates a cascade of problems that can lead to layer separation:
- High nozzle positioning prevents adequate first layer adhesion, creating weak bonding that compromises subsequent layer attachment.
- Low nozzle height causes excessive filament squishing, resulting in uneven surfaces that hinder proper layer fusion.
- Inconsistent foundation stability leads to structural weaknesses that propagate upward through your print.
- Poor initial adhesion creates stress points where layers can separate under thermal expansion and contraction forces.
Your foundation layer’s stability determines your print’s success.
Height Propagation Effects
Foundation layer issues don’t stay contained to the first layer—they ripple upward through your entire print like structural cracks in a building. When you set incorrect first layer height, you’re creating a domino effect that compromises every subsequent layer’s adhesion and structural integrity.
| First Layer Height | Adhesion Quality | Subsequent Layer Effects |
|---|---|---|
| Too High (>0.3mm) | Poor bonding | Gaps propagate upward |
| Ideal (0.1-0.2mm) | Strong adhesion | Stable layer foundation |
| Too Low (<0.1mm) | Over-squished | Warping affects alignment |
| Inconsistent | Variable bonding | Unpredictable delamination |
| Extreme deviation | Print failure | Complete structural collapse |
You’ll notice that improper layer height settings create weaknesses that amplify as your print progresses, ultimately leading to delamination and print failure throughout the entire structure.
Adhesion Quality Consistency
Although first layer height might seem like a single adjustment, it establishes the adhesion consistency that determines whether your entire print succeeds or fails.
When you set your first layer height incorrectly, you’re creating a foundation that’ll compromise every subsequent layer’s ability to bond properly.
Here’s how first layer height impacts your print’s adhesion quality:
- Optimal height ratio – You should set your first layer height at 80% of your nozzle diameter to guarantee proper filament compression against the bed.
- Consistent extrusion – Maintaining uniform height prevents uneven material flow that causes adhesion variations.
- Layer foundation – Each subsequent layer depends on the previous one’s adhesion strength.
- Delamination prevention – Proper initial bonding reduces separation risks throughout your print.
Temperature and Nozzle Height Combined Effects
When nozzle height and temperature work against each other, you’re setting yourself up for layer separation failures that can ruin your entire print.
Poor nozzle height and temperature coordination creates the perfect storm for catastrophic layer separation that destroys your entire print job.
If you’re running low print temperatures while your nozzle height exceeds the recommended 0.2-0.4mm range, you’re severely limiting the thermal interaction needed for proper layer adhesion.
The excessive nozzle height prevents adequate pressure and contact time between layers, while insufficient heat fails to create the molecular bonds required for strong adhesion.
This deadly combination results in visible cracks and structural weakness throughout your print.
You’ll notice that maintaining proper nozzle height becomes even more critical when temperatures drop, as the reduced thermal energy can’t compensate for poor mechanical bonding conditions.
Material-Specific Nozzle Height Requirements
You’ll find that PLA operates within tighter height tolerances than most filaments, requiring precise nozzle positioning between 0.1-0.15mm for ideal first layer adhesion.
ABS presents greater challenges since its temperature dependencies mean you’ll need to adjust nozzle height based on your bed temperature – higher bed temps often require slightly increased nozzle clearance to prevent overheating.
Your success with either material hinges on understanding that PLA forgives minor height variations while ABS demands more careful calibration to prevent warping and separation.
PLA Height Tolerances
Since PLA requires precise nozzle positioning to achieve ideal layer adhesion, you’ll need to maintain a height between 0.1mm to 0.3mm above your print bed.
Getting your nozzle height wrong creates immediate problems that’ll ruin your prints.
Here’s what happens when you don’t maintain proper tolerances:
- Too high positioning prevents adequate filament squishing, causing poor layer bonding and eventual delamination between layers.
- Too low positioning creates excessive pressure that blocks your nozzle or causes uneven extrusion, leading to separation issues.
- Inconsistent calibration means even minor height variations considerably impact adhesion quality throughout your print.
- Regular adjustment becomes essential since small changes dramatically affect your PLA print’s overall structural integrity.
Conduct first layer calibration tests to find your printer’s ideal settings.
ABS Temperature Dependencies
ABS filament demands higher operating temperatures than PLA, which greatly affects how you set your nozzle height.
You’ll need to maintain nozzle temperature between 220-250°C for ideal flow and bonding, making precise height adjustments critical. When your nozzle’s too high, you can’t achieve sufficient extrusion, leading to poor layer adhesion and delamination risks.
You must position your nozzle within 0.1-0.3mm from the bed to guarantee proper first layer squishing. This close proximity becomes even more important with ABS because of its warping tendencies.
If you don’t get adequate bed adhesion initially, subsequent layers won’t bond properly either. The higher nozzle temperature combined with correct height creates the thermal conditions necessary for strong interlayer bonding throughout your print.
Calibration Techniques for Precise Nozzle Positioning
When calibrating your nozzle height, you’ll establish the foundation for successful layer adhesion and prevent costly print failures.
Proper calibration guarantees your first layer bonds effectively to the print bed, eliminating separation risks from poor foundation contact.
Follow these essential calibration techniques:
- Use measuring tools – Employ a piece of paper or feeler gauge to achieve the ideal 0.1mm to 0.2mm gap from your print bed for consistent first layer quality.
- Check regularly – Recalibrate after replacing nozzles or making significant printer adjustments to maintain print consistency.
- Leverage software solutions – Utilize automatic bed leveling features in slicer programs for precise calibration across the entire print surface.
- Monitor gap consistency – Make sure uniform nozzle height prevents extrusion issues that cause delamination throughout your print.
Common Mistakes When Setting Nozzle Height
Despite following calibration procedures, many 3D printer operators make critical errors that compromise nozzle height settings and lead to frustrating layer separation issues.
You’re likely setting your nozzle height too high if you notice gaps between layers. This prevents proper filament squishing, creating weak bonds that separate easily. Conversely, you might be positioning it too low, causing excessive pressure that leads to under-extrusion and inconsistent flow.
Another common mistake is skipping regular calibration checks. You should verify nozzle height before each print, not just during initial setup. Many operators also ignore the 0.1mm to 0.2mm ideal range from the print bed.
Don’t forget to account for bed temperature expansion or warping, which affects your carefully calibrated nozzle height settings throughout the printing process.
Tools and Methods for Accurate Height Adjustment
Several essential tools can transform your nozzle height adjustment from guesswork into precision engineering.
These reliable methods guarantee your first layer achieves maximum adhesion while preventing layer separation.
- Feeler gauge method – Use precision metal strips to set exact clearances between your nozzle and bed, providing consistent measurements across multiple calibration sessions.
- Paper test technique – Slide standard printing paper (0.1mm thick) beneath the nozzle, adjusting until you feel slight resistance when moving the paper back and forth.
- Test print calibration – Print single-layer squares to observe filament flow patterns, adjusting nozzle height based on whether lines appear squished or separated.
- Automatic bed leveling systems – Utilize built-in sensors that maintain consistent nozzle height across your entire print bed, reducing manual calibration requirements.
Troubleshooting Persistent Layer Separation Issues
Even after implementing proper nozzle height adjustment techniques, you might encounter stubborn layer separation that persists despite your calibration efforts.
When this happens, you’ll need to dig deeper into your troubleshooting approach. Start by running multiple calibration prints at different nozzle height settings, testing incremental adjustments of 0.05mm within the 0.1mm to 0.3mm range.
Check for bed warping or inconsistent surface conditions that could affect your carefully calibrated nozzle height.
Examine your filament quality and storage conditions, as moisture-damaged material won’t adhere properly regardless of perfect nozzle height.
Finally, verify that your printer’s mechanical components aren’t introducing variations during printing, as loose belts or worn components can disrupt even properly calibrated nozzle height settings.
Preventive Maintenance for Consistent Nozzle Height
While troubleshooting reactive measures can resolve immediate layer separation problems, establishing a proactive maintenance routine will prevent nozzle height inconsistencies from developing in the first place.
- Calibrate regularly using paper or feeler gauges – Check your nozzle height spacing between the nozzle and print bed consistently to maintain proper first layer adhesion.
- Inspect your Z-axis for wear and misalignment – Examine the Z-axis assembly periodically since misalignment directly affects nozzle height consistency during prints and contributes to layer separation.
- Keep your nozzle clean and debris-free – Remove clogs or buildup that cause uneven extrusion and impact nozzle height performance.
- Implement automatic bed leveling systems – Use ABL technology to maintain accurate nozzle height across your entire print surface, preventing separation issues before they start.
Frequently Asked Questions
How Does Layer Height Affect Layer Adhesion?
You’ll find that thicker layer heights improve adhesion by creating more surface contact between layers, while excessively thin layers reduce material overlap, weakening bonds and increasing your risk of delamination during printing.
What Causes Layers to Separate?
Layers separate when you’ve set incorrect nozzle height, creating poor first layer adhesion. If it’s too high, you’ll get weak bonding; too low causes compression and under-extrusion, weakening layer connections.
Why Are There Gaps in My 3D Print Layers?
Your nozzle’s positioned incorrectly, causing poor filament adhesion between layers. If it’s too high, filament won’t bond properly. Too low creates excessive squishing, making uneven layers that separate easily.
What Is the Best Layer Height for a 0.4 Nozzle?
You’ll get best results with layer heights between 0.1mm and 0.3mm for a 0.4mm nozzle. Start with 0.2mm as it’s ideal for most prints, then adjust based on your specific filament and quality needs.


Leave a Reply