You’ll master multi-color lithophanes by implementing CMYK filament systems with precise color registration and calibrated extruder alignment. Set your first layer height to 0.15mm and standard layers at 0.1mm for exceptional detail capture. Use specialized software supporting CMYK profiles while optimizing purge tower strategies to minimize waste during color shifts. Mount quality transparent paper with spray adhesive and position LED backlighting 5-10cm away for uniform illumination. Advanced techniques below reveal professional-grade results.
Understanding CMYK Filament Systems for Lithophane Creation
While traditional lithophanes rely on single-color transparency variations to create images, CMYK filament systems revolutionize the process by incorporating four distinct colors—cyan, magenta, yellow, and black—that work together to produce vibrant, full-spectrum artwork.
You’ll discover that these four colors blend seamlessly to create an extensive range of hues and intensities, dramatically enhancing your lithophane’s visual impact.
When you’re working with CMYK filament systems, you’re fundamentally mimicking professional printing techniques in your 3D printer. Each color contributes specific characteristics: cyan provides cool blue tones, magenta adds warm reds, yellow brings brightness, and black creates depth and contrast.
CMYK filament systems bring professional printing precision to 3D lithophanes, with each color delivering distinct tonal characteristics for photorealistic results.
This combination allows you to achieve photorealistic results that far exceed traditional single-color limitations, transforming your lithophanes into stunning illuminated displays.
Software Selection and Image Conversion Techniques
Once you’ve mastered the CMYK filament system, you’ll need specialized software to transform your digital images into printable lithophane files.
Your software selection is essential for generating high-quality STL files from images. Consider tools like Make My Lithophane or third-party lithophane makers that support customized 3D prints.
For multi-color lithophanes, verify your chosen software supports CMYK color profiles, which enhance vibrant output in your final prints.
You’ll need to adjust image settings, including contrast and brightness, before conversion to capture intricate details effectively.
Generate tailor-made images that match your printed model’s exact dimensions to maintain alignment and visual integrity.
Utilize advanced software features to manipulate image orientation, scale, and color adjustments, optimizing your multi-color lithophane’s visual impact.
Optimizing Layer Heights and Print Resolution Settings
After converting your images to lithophane files, you’ll need to fine-tune your printer’s layer height and resolution settings to achieve stunning visual results.
Your layer height directly impacts the lithophane’s visual quality and light transmission. Here’s how to maximize these critical settings:
- Set your first layer height to 0.15mm for ideal bed adhesion while maintaining detail reproduction across all filament colors.
- Configure your standard layer height to 0.1mm to capture intricate details and enhance the overall visual impact of your multi-color lithophane.
- Test small sections first before committing to full-scale prints, allowing you to adjust slicing parameters and verify color assignments work correctly.
Maintaining consistent 144mm x 108mm dimensions ensures compatibility with various light sources while your adjusted slicing parameters accommodate different filament colors effectively.
Mastering Multi-Material Printer Calibration
Your perfectly configured layer heights and resolution settings won’t deliver the stunning visual results you expect without precise multi-material printer calibration.
Start by meticulously adjusting filament settings and ensuring extruder alignment accuracy. Monitor temperature settings closely—typically between 190°C to 220°C depending on your materials—to prevent warping and adhesion failures.
Set your first layer height to 0.15mm for ideal adherence and detail capture in intricate lithophane designs.
Regularly inspect and clean nozzles to maintain consistent filament flow, as blockages create uneven color shifts that’ll ruin your lithophane maker projects.
Configure your slicing software properly by enabling multi-material options and fine-tuning retraction distances.
These adjustments directly impact your final output quality, transforming mediocre prints into professional-grade multi-color lithophanes.
Color Registration and Alignment Strategies
While perfect calibration sets the foundation, achieving flawless color registration and alignment determines whether your multi-color lithophane displays crisp, accurate imagery or suffers from distracting color bleeding and misaligned shifts.
Your palette’s color registration settings directly impact print accuracy during color changes. Implement these essential strategies:
- Run test prints with small sections before committing to full lithophanes, verifying colors align correctly and preventing costly misprints.
- Install visual guides on your printer to guarantee proper filament placement, as misalignment creates undesirable results in final images.
- Adjust slicer settings to accommodate filament changeover times, accounting for additional splicing minutes that impact overall print duration.
Regular printer calibration and print head positioning checks maintain consistent color registration throughout your multi-color lithophane process, guaranteeing professional-quality results.
Advanced Slicing Parameters for Multi-Color Prints
Once you’ve mastered color registration, fine-tuning your slicer parameters becomes the critical next step that transforms basic multi-color prints into stunning lithophanes with exceptional detail and color fidelity.
Start by setting your first layer height to 0.15mm for ideal adhesion and detail capture. Configure your bed temperature between 45-55°C for PLA materials to enhance layer bonding and prevent warping.
When configuring advanced slicing parameters for multi-color prints, assign specific colors to filament settings that match your intended design. Your lithophane tool should include a demo 3MF file as reference for correct configurations.
Remember that filament splicing adds approximately five minutes to print time, so factor this into your workflow planning.
Filament Transition and Waste Minimization Methods
You’ll need to master smart filament switching techniques to achieve clean color shifts without compromising your lithophane’s quality.
Proper purge tower optimization becomes critical when you’re working with multiple filaments, as it directly impacts both material waste and print success.
These methods work together to guarantee you’re getting the most value from your filament while producing stunning multi-color results.
Smart Filament Switching Techniques
Advanced multi-color lithophane printing demands precise control over filament shifts to achieve clean color separations without excessive material waste. Smart filament switching techniques revolutionize your multi-color workflow through strategic implementation of advanced systems and improved printer settings.
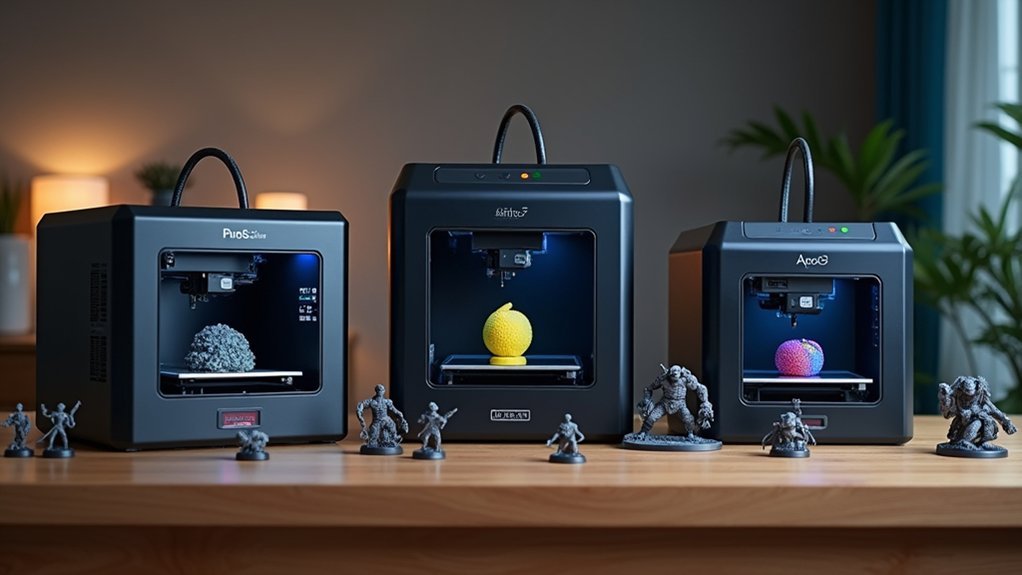
Multi-material systems like Palette 2 Pro enable seamless changes between four filaments, eliminating manual intervention.
Here’s how you’ll maximize efficiency:
- Program splicing settings to use only necessary filament amounts during color changes, dramatically reducing waste material.
- Align your color palette with design requirements for quicker changes and streamlined switching processes.
- Configure precise slicing software settings to dictate ideal pause timing, ensuring clean changes without filament spillage.
Testing and calibrating your filament feed identifies ideal settings that minimize waste while improving overall print quality during lithophane production.
Purge Tower Optimization
While successful filament switching gets you halfway to perfect multi-color lithophanes, fine-tuning your purge tower strategy determines whether you’ll achieve professional results or waste considerable material during color changes.
You’ll want to size your purge towers at approximately 10% of your total print height for maximum efficiency. Consider implementing a dual extrusion setup to purge two filaments simultaneously, reducing changeover times greatly.
Adding a purge block alongside your tower captures excess material more effectively, minimizing waste while maintaining quality. Regular calibration of your printer’s filament flow settings streamlines the entire purge process, ensuring seamless color shifts.
These adjustments reduce material consumption while guaranteeing clean color layers in your lithophanes.
Transparent Paper Application and Assembly Techniques
Once you’ve successfully printed your multi-color lithophane, applying transparent paper becomes the essential next step that transforms your creation into a vibrant light display.
This transparent paper allows colors to shine through brilliantly when illuminated, creating stunning visual effects.
Follow these key assembly techniques:
- Alignment – Carefully position the transparent paper against your lithophane’s back surface, ensuring perfect alignment to avoid visual distortions.
- Adhesion – Use quality adhesives like spray glue or double-sided tape to securely attach the paper while maintaining its light-diffusing properties.
- Testing – Experiment with different light source positions and angles to maximize color vibrancy and visual impact.
Choose high-quality transparent paper that effectively diffuses light while preserving color integrity throughout your lithophane display.
LED Lighting Systems and Backlight Optimization
The right lighting system makes or breaks your multi-color lithophane display. LED lighting systems are your best choice because they’re energy-efficient, distribute light evenly, and last longer than traditional bulbs.
You’ll want to position your LEDs strategically to eliminate shadows and maximize your artwork’s depth and dimension. Consider using adjustable LED backlighting so you can experiment with different brightness levels and color temperatures. This flexibility enhances how your multi-color lithophanes appear.
Adding a light guide plate will diffuse the LED light, creating uniform illumination across your entire lithophane surface. Pay attention to alignment – keep your light source 5 to 10 cm away from your lithophane for ideal lighting effects. This distance guarantees you’ll achieve the best visual impact.
Troubleshooting Common Multi-Color Printing Defects
Even with perfect lighting setup, you’ll encounter printing defects that can ruin your multi-color lithophane’s visual impact.
These issues stem from improper printer configuration and material handling mistakes that create visible artifacts in your finished piece.
Common defects include color bleeding, layer separation, and unexpected filament mixing.
Here’s how to address the most frequent problems:
- Color Misalignment: Verify your CMYK filament placement matches Bambu Studio settings exactly, as incorrect AMS positioning causes dramatic color shifts.
- Clogged Nozzles: Clean print heads regularly to prevent inconsistent extrusion that creates patchy color distribution.
- Poor Layer Adhesion: Adjust temperature settings for each filament type to guarantee proper melting and bonding.
For lithophanes that require complex color changes, conduct small test prints first.
This allows you to fine-tune slicing parameters and identify potential issues before committing to full-scale production.
Post-Processing and Quality Enhancement Methods
After completing your multi-color lithophane print, you’ll need strategic post-processing techniques to maximize light transmission and visual impact. Light sanding removes layer lines and surface imperfections that block light diffusion. Apply gentle circular motions with fine-grit sandpaper, then finish with a clear coat to enhance transparency.
Test smaller sections first before processing your entire lithophane. This lets you evaluate light transmission and adjust techniques accordingly. Your slicing software’s advanced settings—layer height and print speed adjustments—significantly impact final quality requiring minimal post-processing.
| Enhancement Method | Emotional Impact |
|---|---|
| Light Sanding | Creates stunning clarity |
| Clear Coat Application | Delivers breathtaking luminosity |
| High Contrast Imaging | Produces mesmerizing depth |
Experiment with different filament brands during printing. Each type offers unique light diffusion properties, allowing customized finishes that highlight intricate details when illuminated.
Frequently Asked Questions
How to Print Multicolor Lithophane?
You’ll generate an STL file using compatible software, then use a Palette 2 system to splice multiple filaments. Adjust your printer settings for ideal adhesion and guarantee proper filament placement matches your slicer configuration.
Do Lithophanes Need 100% Infill?
You don’t need 100% infill for lithophanes. Use 10-20% infill instead to achieve ideal light diffusion while reducing print time, material costs, and weight without compromising the image quality or structural integrity.
Is Multicolor 3D Printing Worth It?
You’ll find multicolor 3D printing worthwhile if you’re creating artistic pieces, prototypes needing color coding, or personalized gifts. It’s costly and time-consuming, so consider whether your projects truly benefit from multiple colors.
How Long Does It Take to Complete an Advanced 3D Print?
You’ll typically spend 4-10 hours completing advanced 3D prints, depending on complexity and size. Higher resolution settings and intricate details increase duration, while optimized slicing settings and test prints can help reduce overall printing time.

Leave a Reply