
You’ll need to master seven key ironing settings for mirror-like 3D print surfaces: enable ironing in your slicer’s experimental section, set flow rates to 30-35% for PLA/ASA and 25-30% for PETG, configure speeds between 20-40 mm/s at 45-degree angles, use minimum 5 top layers with 30%+ infill, increase nozzle temperature by 5-15°C above standard settings, focus coverage on flat surfaces only, and calibrate your extrusion multiplier between 0.9-1.2. These precise adjustments will reveal professional-quality results.
Enable Ironing Feature in Your Slicer Software
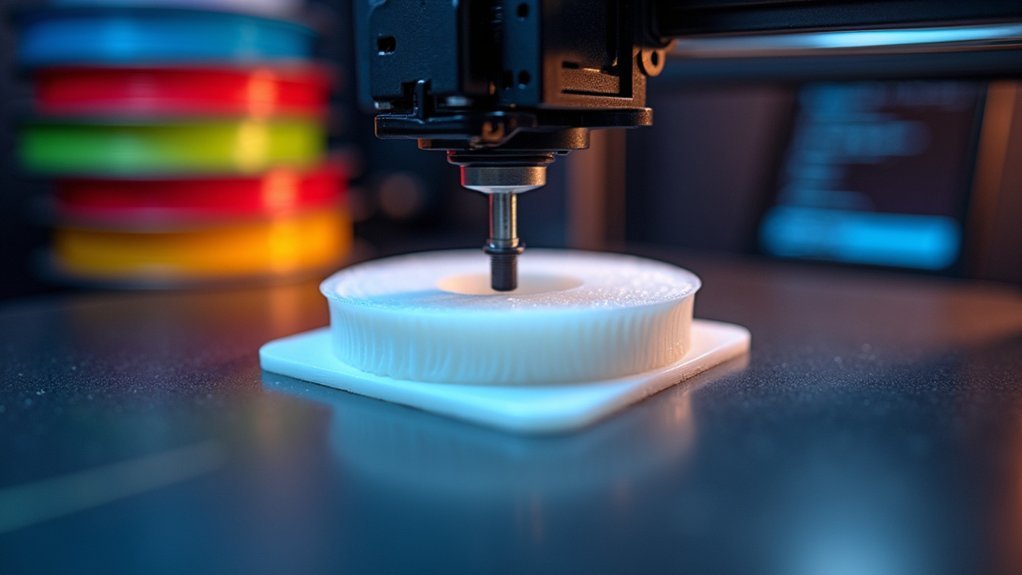
When you’re ready to achieve professional-looking top surfaces on your 3D prints, you’ll need to activate the ironing feature in your slicer software.
To enable ironing in Cura, navigate to the “Preferences” menu and select “Configure Cura.” Switch to “Expert” or “Advanced” mode to access additional settings that aren’t visible in basic mode.
Once you’ve switched modes, locate the ironing setting under the “Experimental” section. Here, you can toggle the feature on and choose between “All top surfaces” or “Topmost surface only” depending on your specific needs.
The “Topmost surface only” option works well for most prints, while “All top surfaces” provides thorough smoothing for complex geometries with multiple horizontal surfaces throughout the model.
Optimize Ironing Flow Rate for Material Type
The ironing flow rate serves as one of the most critical parameters for achieving smooth, professional-looking top surfaces, yet many users overlook its importance in favor of speed and temperature adjustments. Default settings typically range between 10-15%, but you’ll achieve considerably better results by increasing your ironing flow to 30-35%.
| Material | Recommended Flow Rate | Performance Notes |
|---|---|---|
| PLA | 30-35% | Excellent response to higher rates |
| ASA | 30-35% | Handles increased flow very well |
| PETG | 25-30% | More conservative adjustment needed |
Different materials respond variably to flow adjustments. Higher rates help eliminate under-extrusion and dry appearances that plague top layers. You’ll need to calibrate your extrusion multiplier properly, as bed flatness variations affect filament deposition. Experimentation remains key—fine-tuning these settings produces noticeable aesthetic improvements across different prints.
Set Proper Ironing Speed and Pattern Direction

Although ironing flow rate enhancement dramatically improves surface quality, you’ll achieve even better results by fine-tuning your speed settings and pattern direction.
Your ironing speed should stay between 20-40 mm/s, as slower speeds allow better filament flow and superior surface smoothing. Setting speeds too high leads to poor results and compromised surface quality.
For ideal pattern direction, configure your ironing at a 45-degree angle to standard layer lines. This angle enhances the ironing feature’s effectiveness and greatly improves surface finish.
You’ll want to enable Monotonic Ironing Order in Cura, ensuring your nozzle moves consistently in one direction. This prevents visible lines and enhances overall surface quality, creating smoother top layers with professional-grade appearance.
Configure Top Layer Count and Infill Percentage
Beyond enhancing speed and pattern settings, your printer’s structural foundation plays an equally important role in ironing success.
You’ll need at least 5 top layers to create the thickness necessary for effective ironing and smoother surface finishes. This increased top layer count helps fill imperfections that would otherwise show through thinner surfaces.
Your infill percentage should be 30% or higher to provide adequate support beneath those top layers. Lower infill creates gaps that can cause under-extrusion or dry appearances during ironing. The combination prevents sagging and guarantees consistent material flow.
Remember that ideal settings depend on your specific design and aesthetic goals.
Experiment with different top layer and infill percentage combinations to find what works best for each print project.
Adjust Nozzle Temperature During Ironing Process
While your top layer foundation sets the stage for quality ironing, fine-tuning your nozzle temperature becomes the key to achieving that glass-smooth finish you’re after.
Increasing your nozzle temperature by 5°C to 15°C above standard printing settings helps the filament flow better and fill micro-gaps for a perfectly smooth surface. This temperature boost reduces layer lines and enhances finish quality, particularly with PLA and ASA materials.
| Material | Standard Temp | Ironing Temp | Temp Increase |
|---|---|---|---|
| PLA | 210°C | 220°C | +10°C |
| PETG | 240°C | 250°C | +10°C |
| ABS | 250°C | 260°C | +10°C |
| ASA | 260°C | 270°C | +10°C |
| TPU | 220°C | 225°C | +5°C |
Monitor temperatures carefully—excessive heat causes stringing and oozing. Experiment with flow rate adjustments alongside temperature changes to find your best settings.
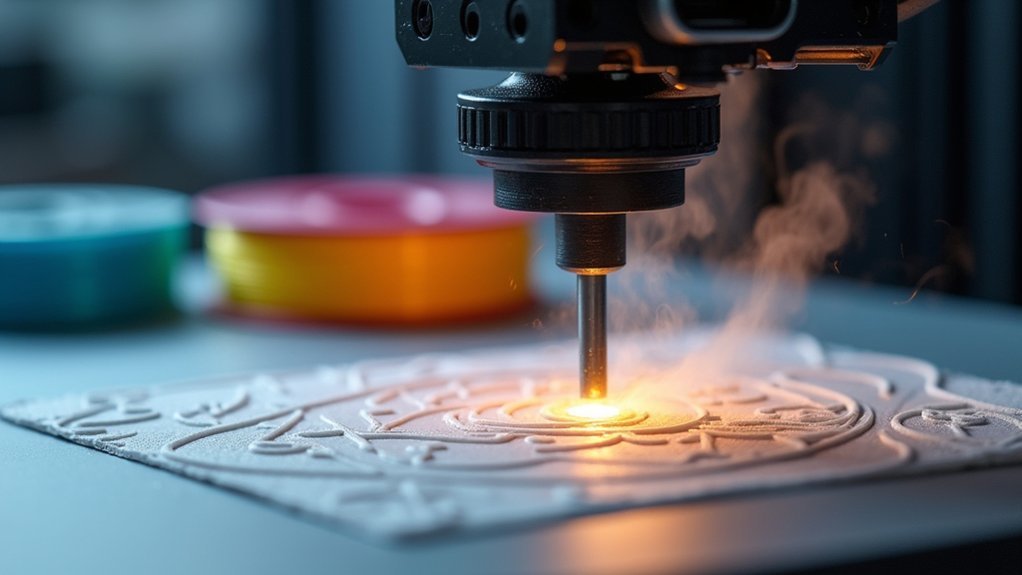
Select Ironing Coverage Area and Surface Types
You’ll need to choose between ironing all top surfaces or just the topmost surface only, depending on your model’s complexity and desired finish quality.
Focus your ironing efforts on flat surfaces like nameplates and logos, as round objects and non-parallel areas won’t benefit from this technique.
You can use modifiers in slicers like PrusaSlicer to apply ironing selectively to specific model sections, giving you precise control over which areas receive the smoothing treatment.
All Vs Topmost Surfaces
When configuring ironing in your slicer, you’ll need to choose between “All top surfaces” and “Topmost surface only” to determine which areas receive the smoothing treatment.
| Setting | Best For |
|---|---|
| All top surfaces | Multi-layer prints requiring consistent finish across multiple levels |
| Topmost surface only | Complex geometries where you only want the final layer smoothed |
The “All top surfaces” option applies ironing to every flat horizontal layer throughout your print, making it ideal when you need uniformity across different height levels. This setting works well for architectural models or functional parts with multiple tiers.
Conversely, “Topmost surface only” restricts ironing to your print’s uppermost layer, reducing print time while focusing on the most visible surface. This ironing settings approach suits decorative items where only the final appearance matters, optimizing the all vs topmost surfaces decision for efficiency.
Flat Surface Requirements
Successful ironing depends on identifying the right surfaces within your print geometry. You’ll achieve the best results when applying ironing to flat, horizontal surfaces like nameplates, logos, and box tops where you need that smooth top finish.
These parallel surfaces provide the perfect foundation for the nozzle to create an even, polished layer.
However, you shouldn’t enable ironing for curved objects or angled surfaces. Round geometries and non-parallel areas won’t benefit from this feature and may actually worsen your print quality.
Focus your ironing settings on genuinely flat areas that’ll showcase that flawless finish.
Before enabling ironing, verify your print bed’s properly calibrated and perfectly level. This foundation’s essential for achieving consistent results across your selected surfaces.
Modifier-Based Selective Ironing
Most 3D printing slicers offer modifier-based selective ironing that lets you target specific areas of your model rather than applying the feature universally.
In PrusaSlicer, you can apply modifiers to define regions for selective ironing, choosing between “All top surfaces” or “Topmost surface only” for precise control. This approach is particularly valuable for complex prints where you want enhanced finishes on logos or detailed areas without affecting the entire print.
You’ll optimize both print time and quality by strategically using modifiers, since ironing can be resource-intensive.
Modifier-based selective ironing allows you to balance aesthetic improvements with operational efficiency. Experimenting with these settings helps you achieve good results by evaluating ironing effectiveness based on your print’s specific geometry and requirements.
Calibrate Extrusion Multiplier for Consistent Results
Because your 3D printer’s extrusion multiplier directly affects how much filament flows during ironing passes, you’ll need to calibrate this setting precisely to achieve smooth, consistent top layers.
Start with the default value of 1.0, but don’t expect perfect results immediately. Most users find their ideal extrusion multiplier between 0.9 and 1.2 depending on filament type and printer characteristics.
Run an extrusion test cube to measure actual versus expected filament output. Over-extrusion creates blobs and stringing that’ll ruin your ironed surface, while under-extrusion leaves gaps and weak layer bonding.
You’ll get best results by recalibrating whenever you switch filament brands or types, ensuring your extrusion multiplier stays dialed in for consistently smooth ironed top layers.
Frequently Asked Questions
How to Get a Better Top Layer 3D Printing?
You’ll improve your top layer by using at least five top layers, setting 30% infill minimum, adjusting flow rate to 30-35%, optimizing nozzle temperature, and enabling monotonic printing order for smoother results.
What Speed Should 3D Printing Top Layer Be?
You should set your top layer speed between 20-40 mm/s for best results. Use 20 mm/s for detailed prints requiring precision, but don’t exceed 40 mm/s or you’ll get poor surface quality.
What Is the Best Pattern for Top Layer 3D Printing?
You’ll get the best results using monotonic or zigzag patterns for top layers. These patterns guarantee consistent filament flow direction, reduce visible layer lines, and provide better gap coverage for smoother surface finishes.
How Do You Iron in 3D Printing Settings?
You’ll access ironing settings in your slicer’s advanced mode, then adjust the flow rate to around 35%, slow down the ironing speed, and guarantee you’re using sufficient top layers for effectiveness.


Leave a Reply