You’ll master miniature hollowing with three proven techniques: use Meshmixer’s Edit > Hollow feature with 2-3mm wall thickness and strategic drain hole placement near the build platform, leverage PreForm’s built-in hollowing tools with 2.1mm walls for standard miniatures or 1.8mm for smaller designs, and manually place multiple drain holes in concealed areas to prevent resin trapping and pressure buildup. Each method requires at least two drainage points for complete resin evacuation and successful prints. These foundational strategies will transform your printing efficiency and quality outcomes.
Using Meshmixer to Hollow Miniatures With Strategic Drain Holes

When you’re ready to hollow your miniatures efficiently, Meshmixer offers a straightforward approach that’ll save material while maintaining structural integrity.
Start by opening your model and using Edit > Hollow to create a resin-saving shell. Choose a wall thickness that balances material reduction with durability.
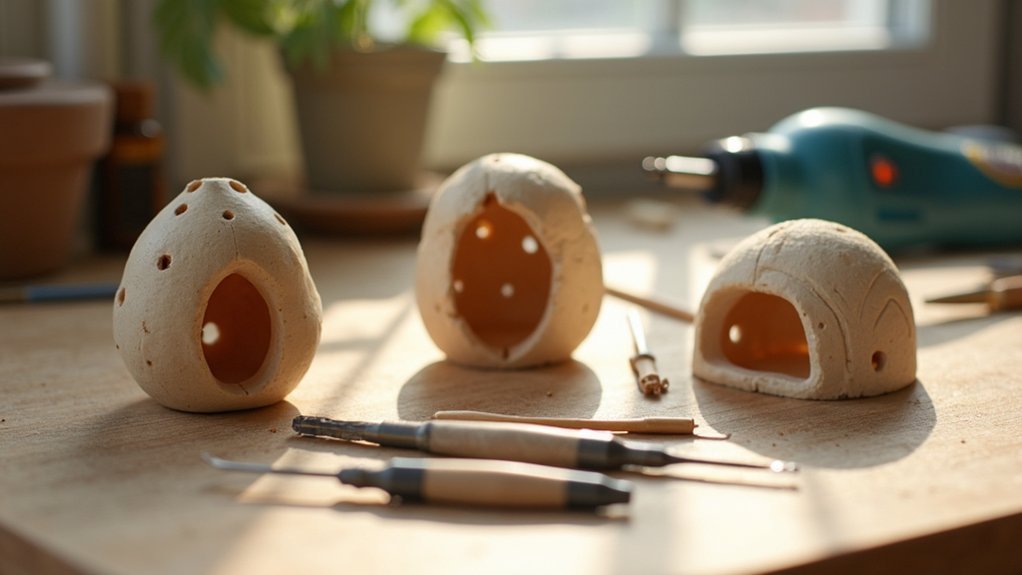
Strategic drain holes are essential for successful printing. Place at least two holes near the build platform to enable effective drainage and proper air flow during the cleaning process. This prevents internal pressure buildup and vacuum formation that causes print failures.
Strategic drain hole placement prevents vacuum formation and internal pressure buildup that leads to print failures during resin printing.
After hollowing, use Edit > Make Solid to preserve mesh quality.
Position drain holes in less visible areas to protect your miniature’s aesthetic design while ensuring they remain functional for removing uncured resin and facilitating thorough cleaning.
PreForm Hollowing Techniques for Optimal Wall Thickness
Precision becomes your greatest asset when using Formlabs’ PreForm software to hollow the model with ideal wall thickness settings.
You’ll find the Hollow option in the left toolbar, which transforms solid STL files into efficient hollow structures that dramatically reduce overall weight and liquid resin consumption.
Set wall thickness at 2.1mm for standard miniatures, though you can reduce it to 1.8mm for smaller designs.
The Hole tool lets you strategically place drain holes—always include at least two for proper resin inside drainage and airflow during the printing process.
Click Hollow Selected to finalize your adjustments while preserving surface detail.
Always inspect the internal structure post-hollowing to verify consistent thickness and appropriately sized drain holes for peak flow.
Manual Hole Placement Methods to Prevent Resin Trapping
Two critical drain holes form the foundation of successful resin removal, but their placement requires strategic thinking to prevent costly trapping issues. You’ll need one hole near the print platform and another positioned higher up inside your model to regulate pressure effectively.
| Location | Purpose | Size |
|---|---|---|
| Platform Area | Minimize suction forces | 2-3mm depth |
| Upper Section | Pressure regulation | 2-3mm depth |
| Hidden Areas | Aesthetic preservation | Variable |
| Base Connection | Primary drainage | 3mm+ depth |
| Secondary Points | Complete evacuation | 2mm depth |
When punching holes in large models, you’re creating drainage pathways that build layer by layer during printing. This approach makes your hollow part less prone to water absorption while ensuring liquid resin won’t get trapped inside. Add a hole strategically in concealed locations to maintain visual appeal.
Frequently Asked Questions
Should I Hollow Miniatures?
You should hollow larger miniatures to save resin and reduce weight, but keep smaller models solid. Medium-sized figures benefit from hollowing without internal supports, while bigger ones need lattice structures.
How to Hollow Out an STL File?
You’ll open your STL file in Meshmixer or PreForm, use the hollowing tool to create a 2.1mm wall thickness, then add drain holes near the build platform for proper resin drainage.
How to Make Your 3D Print Hollow?
You’ll use hollowing software like Meshmixer or PreForm to remove interior material from your STL file. Set wall thickness between 1.8-2.1mm, add two drain holes, and orient properly before printing.
How to Hollow Lychee?
Import your STL file into Lychee, select the “Hollow” feature, set appropriate wall thickness, add strategic drain holes, use mesh repair tools, then visually inspect before exporting your model.


Leave a Reply