You’ll need to heat your hotend to 250-260°C and use specialized tools like fine needles and cleaning filament to remove stubborn glow filament residues. Phosphorescent additives in glow filaments create unique challenges, causing clogs that resist standard cleaning methods. Start by identifying severity through extrusion testing, then disassemble your hotend carefully. For persistent buildup, soak the nozzle in acetone while protecting electronic components. Following proper techniques will guarantee your printer returns to peak performance.
Understanding Glow Filament Properties and Challenges
When you’re working with glow filament, you’ll quickly discover that its phosphorescent additives create unique printing challenges that standard filaments don’t present.
Glow filament’s phosphorescent additives introduce printing complications you won’t encounter with conventional thermoplastic materials.
These thermoplastic blends are notorious for their tendency to soften and fuse unexpectedly, making them prime candidates for extruder blocks. You’ll find that glow filaments behave differently than regular materials, especially regarding temperature sensitivity.
Without a Teflon liner in your printer, heat creep becomes a serious concern. This phenomenon causes filament softening within the extruder, leading to clogs that you’ll need to clean from your hot end regularly.
The varying compositions of different glow filaments create inconsistent extrusion patterns, and you’ll struggle with gumming issues that make cold pulls nearly impossible, requiring thorough maintenance after each print session.
Identifying Glow Filament Clogs in Your Hotend
You’ll need to catch glow filament clogs early before they become major headaches that require hotend disassembly.
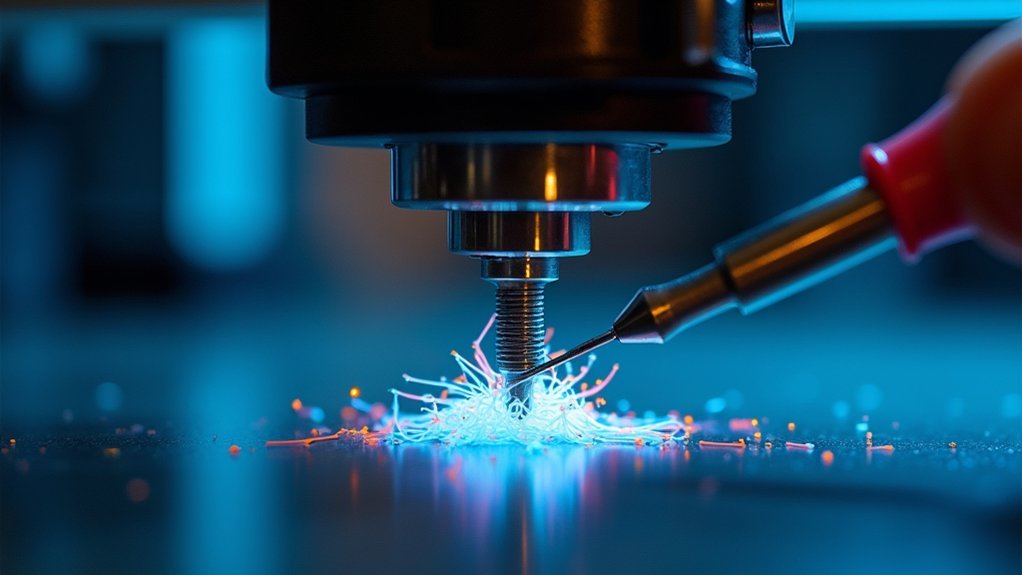
Watch for telltale signs like inconsistent extrusion, clicking sounds from your extruder, or filament buildup around the nozzle tip.
Once you spot these warning signs, you can assess whether you’re dealing with a minor blockage or a severe clog that’s completely stopping material flow.
Early Warning Signs
Several telltale indicators can alert you to developing glow filament clogs before they completely shut down your print job.
Watch for inconsistent extrusion patterns where layers appear thin or missing—this suggests material buildup in your nozzle. You’ll often hear clicking sounds from extruder gears when blockages form, as glow filaments are particularly prone to fusing.
Layer adhesion problems serve as another early warning sign that you should clean a 3D printer hotend soon.
Visual inspection reveals filament buildup around the nozzle tip, a common issue with glow materials’ unique properties.
If you catch these clogs early, you’ll prevent complete blockages that occur when glow filaments soften too far up the extruder, making cleaning much more difficult.
Clog Severity Assessment
How can you determine whether your hotend has a minor inconvenience or a major blockage? A proper clog severity assessment starts with heating your nozzle to the last printing temperature you used for glow filament.
Watch carefully as you observe whether material extrudes cleanly—smooth flow indicates minimal blockage, while no extrusion suggests a complete clog.
Next, try manual feeding. Push filament through by hand; if it flows smoothly, you’re dealing with a minor issue.
Resistance or complete blockage means you’ve got a serious problem requiring more aggressive cleaning methods.
During this clog severity assessment, listen for clicking sounds from your extruder gears and check for visible buildup around the nozzle, as these confirm the blockage’s extent.
Essential Tools for Glow Filament Removal
Five essential tools form the foundation of any effective glow filament removal kit for your 3D printer hotend. These specialized implements help you clean your 3D printer efficiently and restore peak printing performance.
| Tool | Purpose |
|---|---|
| Fine needle/acupuncture needle | Clear nozzle clogs precisely |
| Wire brush | Remove external buildup |
| Specialized cleaning filament | Maintain nozzle internally |
| Pliers/wrench | Replace damaged nozzles |
| Heat gun | Melt hardened obstructions |
You’ll also need paper towels or thin cardboard for wiping excess filament when the nozzle’s heated. Keep small flat blades and cleaning brushes nearby to streamline your maintenance process. Having these essential tools for glow filament removal readily available prevents printing interruptions and maintains your printer’s reliability long-term.
Temperature Settings for Effective Cleaning
With your cleaning tools ready, proper temperature control becomes your next focus for successful glow filament removal. Heat your nozzle to approximately 260°C to effectively clear gunk and residue from the extruder.
Proper temperature control at 260°C is essential for effectively softening and removing stubborn glow filament residue from your nozzle.
This temperature range of 250°C to 260°C guarantees PLA glow filament softens adequately for removal.
For cold pulls, you’ll want to lower your temperature settings to around 115°C. This approach helps extract remaining filament while minimizing hotend damage risks.
Always heat the nozzle to your last printed material’s temperature before attempting clog clearing for best results.
Monitor your temperature settings continuously during cleaning to prevent overheating. Excessive heat can cause severe clogs or damage hotend components, making your cleaning efforts counterproductive.
Step-by-Step Hotend Disassembly Process
Once you’ve established proper temperature settings, disassembling your hotend requires careful attention to safety protocols.
First, power off your printer completely and allow the hotend to cool to room temperature. Never attempt disassembly while components remain hot, as this risks burns and potential damage.
Next, carefully disconnect the electrical connections. Remove the thermistor and heater wires from your hotend, handling these delicate components with extreme care to prevent wire breakage or connector damage.
Here’s your disassembly sequence:
- Remove the nozzle using appropriate wrenches or pliers with controlled force
- Clean thoroughly with fine needles or cleaning filament to eliminate glow residue
- Document placement of components for accurate reassembly
This systematic approach guarantees safe hotend maintenance while preserving component integrity throughout the cleaning process.
Cold Pull Technique for Stubborn Glow Residue
When standard cleaning methods fail to remove persistent glow filament residue, the cold pull technique offers a highly effective solution for clearing your hotend.
Heat your nozzle to approximately 250°C and insert filament with a higher melting point than the glow residue. Allow the temperature to drop to around 115°C, then pull the filament out firmly.
This process works because the cooling filament solidifies and grips debris inside the nozzle, extracting it during removal. You’ll likely need several cold pull attempts to fully dislodge stubborn material.
Monitor your nozzle temperature carefully throughout the process to prevent damage to hotend components or the filament you’re using for cleaning.
Chemical Cleaning Methods for Persistent Buildup
When cold pulls don’t fully remove persistent glow filament buildup, you’ll need chemical cleaning methods to dissolve stubborn residue from your nozzle.
You can use acetone for ABS-based glow filaments or ethyl acetate for more aggressive cleaning, but you must follow proper safety precautions to protect both yourself and your printer components.
These chemical treatments work best when you disassemble the nozzle completely and allow sufficient soaking time for the solvents to break down the accumulated debris.
Acetone Soaking Process
Stubborn filament clogs demand a more aggressive approach than heat cleaning alone can provide. Acetone soaking effectively dissolves hardened glow filament residue, particularly ABS-based materials, though you shouldn’t use it on all nozzle types due to potential surface damage.
Follow this acetone soaking process:
- Disassemble completely – Remove the hotend assembly and disconnect the nozzle from both heat block and thermistor to prevent component damage.
- Submerge and wait – Soak the nozzle in acetone for several hours, allowing the solvent to break down stubborn buildup.
- Clear and rinse – Use a fine needle to remove loosened debris, then rinse thoroughly with warm water.
Ensure the nozzle’s completely dry before reassembling to avoid printing complications from acetone residue.
Ethyl Acetate Treatment
For particularly stubborn clogs that resist acetone treatment, ethyl acetate provides a more powerful dissolving action against hardened glow filament residue.
Remove your hotend from the printer and submerge the nozzle in ethyl acetate for several hours. This solvent effectively breaks down persistent buildup that mechanical cleaning can’t remove.
After soaking, rinse the nozzle thoroughly with warm water. Use a thin wire or needle to clear any remaining debris from the nozzle opening.
Verify the nozzle is completely dry before reassembling with your hotend to prevent moisture-related printing issues.
Handle ethyl acetate with caution since it’s a volatile organic compound. Work in a well-ventilated area and wear protective gear including gloves and goggles for safety.
Chemical Safety Precautions
Chemical solvents like acetone and ethyl acetate require strict safety protocols to protect your health and equipment.
These chemical safety precautions aren’t optional—they’re essential for preventing injury and equipment damage during the cleaning process.
Essential Safety Steps:
- Work in well-ventilated areas to minimize inhalation of harmful fumes that can cause respiratory irritation and other health issues.
- Wear protective equipment including chemical-resistant gloves and safety goggles to prevent skin contact and eye irritation from splashes.
- Remove all electronic components before chemical exposure to prevent irreversible damage to your hotend’s sensitive parts.
Safely Cleaning Thermistor and Heater Components
When cleaning around your 3D printer’s thermistor and heater components, you’ll need to exercise extreme caution since these parts are both delicate and potentially dangerous.
Handle thermistor wires carefully as they’re fragile and easily damaged during cleaning. Never use fingernails to scrape filament from these sensitive components.
Use small tools to gently press filament against the heat block, remembering that wires may be live during operation. Monitor the insulation around thermistor wires closely, as heat exposure makes it brittle over time, creating safety risks.
If you must disassemble components for thorough cleaning, proceed cautiously to avoid damaging the thermistor or heater. Always document your disassembly process for future reference, ensuring you can properly reassemble everything afterward.
Preventing Future Glow Filament Contamination
While proper cleaning techniques can restore your hotend’s performance, establishing preventive measures will save you from dealing with stubborn glow filament contamination in the future.
Essential Prevention Steps:
- Store glow filament properly – Keep it in airtight containers with desiccant packets to prevent moisture absorption that leads to clogs and filament stuck situations.
- Follow manufacturer temperature guidelines – Adjust printing temperatures based on specifications to minimize softening and reduce heat creep risks.
- Implement regular maintenance – Flush your hotend with cleaning filament after each glow print session and perform cold pulls to remove residual buildup.
Monitor your PTFE tube regularly for wear, as damage can worsen contamination issues.
You’ll also want to establish a dedicated cleaning routine that includes chemical soaking when necessary to maintain peak performance.
Post-Cleaning Hotend Reassembly and Testing
After thoroughly cleaning your hotend, you’ll need to carefully reassemble all components and verify everything’s working properly before returning to normal printing.
Start by securing the thermistor and heater cartridge, then conduct a visual inspection of the nozzle for any remaining debris before reconnecting the PTFE tube.
Once you’ve completed the reassembly, you’ll want to run specific tests to confirm your hotend’s performing efficiently and ready for your next project.
Proper Component Assembly
Reassemble your hotend components with precision to guarantee safe and reliable printing performance.
After thoroughly cleaning glow filament residue, you must carefully restore each component to its proper position and specification.
Follow these critical assembly steps:
- Secure your printer nozzle using a torque wrench set to 1.5-2 Nm specifications to prevent leaks and guarantee ideal heat transfer throughout your hotend assembly.
- Reconnect thermistor and heater wires without pinching or exposing any connections, maintaining the electrical integrity essential for safe hotend operation.
- Verify all components including the thermistor and heater cartridge are firmly seated to prevent thermal or electrical malfunctions during subsequent printing operations.
Proper reassembly prevents costly repairs and guarantees your printer operates efficiently after glow filament cleaning procedures.
Initial Test Prints
Your cleaned and reassembled hotend requires systematic testing to verify proper functionality before resuming regular printing operations.
Start initial test prints at lower temperature settings to confirm your nozzle delivers consistent filament flow while maintaining proper layer adhesion. Use slower print speeds to prevent heat creep, which commonly affects glow filaments that soften easily within the hotend assembly.
Monitor your extruder carefully during these tests, listening for clicking sounds or observing inconsistent extrusion that indicates remaining blockages.
Keep retraction speeds at 18 mm/s or lower to prevent new clogs from forming. Before switching back to glow filament, flush your system with regular filament to guarantee complete cleanliness.
This systematic approach prevents recurring issues and verifies your cleaning efforts were successful.
Maintenance Schedule for Glow Filament Users
While glow filament creates stunning visual effects, it demands a rigorous maintenance routine to keep your 3D printer running smoothly.
You’ll need to establish a consistent maintenance schedule that addresses glow filament’s tendency to cause clogs and material buildup.
Your extensive maintenance schedule should include:
- After every print – Perform thorough hotend cleaning to prevent filament fusion to the heatsink, and flush filament at high temperatures before unloading.
- Every few prints – Check your nozzle and PTFE tube for wear and tear, as glow filaments frequently cause extruder blocks.
- Weekly – Monitor the heatsink area for heat creep signs, clogs, or material buildup.
Document your cleaning activities and print quality to identify patterns and optimize your maintenance routine for consistent performance.
Frequently Asked Questions
How Do You Clean Filaments Out of Hotend?
You’ll heat your nozzle to about 260°C to soften material. Use wire to poke through while pushing filament. Perform cold pulls and flush at high temperatures to remove debris effectively.
How to Get PLA off Hotend?
Heat your hotend to 215°C to soften the PLA. Wipe excess filament with paper towels while hot. Use the cold pull technique or gently poke through with a fine needle.
How Do You Clean a 3D Printer Heater Block?
Heat your heater block to 215°C to soften residual filament. Carefully wipe away buildup with paper towels, then gently scrape stubborn spots using shaped cardboard or a small blade.
How to Clean PLA off Nozzle?
Heat your nozzle to 215°C to soften the PLA. While it’s hot, carefully wipe off excess filament using paper towels. For stubborn buildup, gently scrape with thin cardboard shaped into a V.


Leave a Reply