
To upgrade your extruder for better feeding, start by adjusting tension to create slight gear imprints without crushing filament. Consider upgrading to a dual drive system for enhanced grip consistency, especially with flexible materials. Install a high-quality all-metal hotend to eliminate heat creep and handle advanced filaments above 250°C. After installation, calibrate E-steps starting at 415 baseline and fine-tune flow rates in your slicer. These modifications will markedly improve your printer’s performance and reliability.
Understanding Extruder Tension and Its Impact on Print Quality
When you’re troubleshooting print quality issues, extruder tension often emerges as the hidden culprit behind inconsistent results. Proper extruder tension directly impacts filament feeding and overall print quality.
Extruder tension acts as the silent saboteur of print quality, hiding behind layers of frustrating inconsistencies.
You’ll want to achieve the sweet spot where your extruder creates slight gear imprints without crushing the filament. Insufficient tension causes under-extrusion and inconsistent flow, while excessive pressure leads to grinding and filament deformation.
Dual drive systems offer superior performance by distributing force more evenly, reducing stripping risks compared to single gear setups.
Test your tension by observing gear marks during extrusion. You should see light indentations that maintain filament integrity.
Regular adjustments become essential when switching between rigid and flexible materials to maintain ideal flow consistency throughout your printing process.
Identifying Common Extruder Failure Modes and Their Symptoms
You’ll encounter several telltale signs when your extruder starts failing, with grinding and skipping being the most common issues that’ll affect your print quality.
Listen for clicking sounds from your stepper motor, as this indicates the motor can’t overcome resistance and is losing steps during operation.
These symptoms often stem from improper tension settings that prevent your extruder from feeding filament consistently through the hotend.
Grinding and Skipping Issues
Although your extruder may appear to function normally, grinding and skipping issues can silently sabotage your print quality before you notice the damage. Grinding occurs when your extruder gears can’t properly grip the filament, creating visible grooves and causing inconsistent feeding. Skipping happens when your motor lacks sufficient power, resulting in under-extrusion and layer gaps.
| Issue | Cause | Solution |
|---|---|---|
| Grinding | Insufficient tension | Increase tension gradually |
| Crushed filament | Excessive tension | Reduce tension settings |
| Under-extrusion | Wrong tension for material | Adjust based on filament type |
You’ll need to balance tension carefully—flexible filaments require lower settings to prevent grinding, while rigid materials need higher tension for effective feeding. Regular inspection prevents these problems from compromising your prints.
Clicking Motor Symptoms
Nothing reveals extruder problems faster than the distinctive clicking sound from your stepper motor.
These clicking noises signal insufficient filament feeding, indicating your motor can’t grip the filament properly. When this happens, you’ll experience inconsistent extrusion that ruins print quality.
The clicking typically results from grinding between your drive gear and filament. Your stepper motor loses its grip, creating visible grooves on the filament surface while producing that telltale sound.
This grinding compounds the problem, making future feeding even more difficult.
Check your extruder assembly for proper filament path alignment and guarantee adequate motor power.
These clicking symptoms often indicate tension issues, clogs, or misalignment within your feeding mechanism. Address these problems immediately to prevent further damage and restore reliable operation.
Tension-Related Feeding Problems
When your extruder’s tension settings drift from their ideal range, feeding problems become inevitable and predictable. Insufficient tension causes grinding as drive gears lose their grip on filament, creating surface grooves and inconsistent flow.
Excessive tension crushes filament, increasing friction and causing under-extrusion through motor energy loss.
You’ll recognize grinding when gears can’t properly engage material, while skipping indicates insufficient motor power. Different materials demand specific pretension adjustments—flexible materials need lower settings to prevent grinding, whereas rigid filaments require higher tension for consistent extrusion.
Test your settings by examining gear imprints left on filament. Proper imprints should be visible but not destructive.
Regular observation and adjustment of these marks helps you identify ideal tension for various materials, preventing feeding issues before they compromise your prints.
Choosing Between Direct Drive and Bowden Extruder Systems
Why does the choice between direct drive and Bowden extruder systems matter so much for your 3D printing success? Your extruder system directly impacts filament feeding reliability, extrusion accuracy, and overall print quality.
Key considerations when choosing your extruder system:
- Material compatibility – Direct drive excels with flexible filaments due to reduced feeding distance, while Bowden extruder systems work well with rigid materials and offer faster print head movement.
- Precision requirements – Direct drive provides superior extrusion accuracy with minimal lag, whereas Bowden systems may introduce delays affecting complex model details.
- Upgrade potential – Consider a dual drive extruder upgrade for either system to enhance grip consistency and minimize grinding or under-extrusion issues regardless of your current setup.
Installing a High-Quality All-Metal Hotend for Better Temperature Control
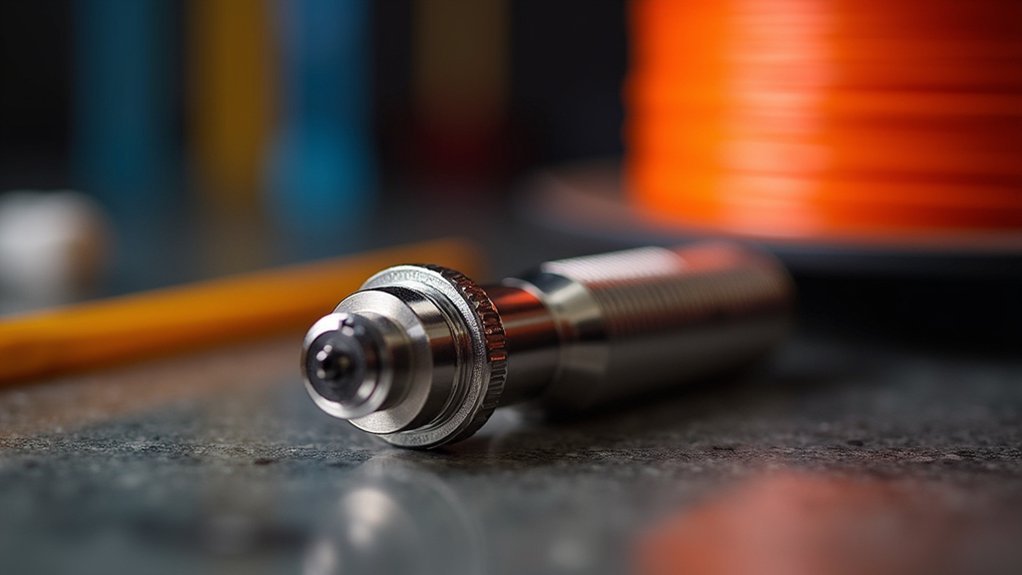
Although your current hotend might handle basic printing materials adequately, installing a high-quality all-metal hotend transforms your printer’s capabilities by eliminating temperature limitations that restrict material choices.
You’ll access temperatures above 250°C without melting PTFE liners, enabling advanced filaments like PEEK and PEI.
The all-metal hotend’s superior thermal conductivity delivers precise temperature control and consistent extrusion throughout your prints.
Superior thermal conductivity in all-metal hotends ensures precise temperature control and consistent material extrusion for reliable printing performance.
Without PTFE components, you’ll eliminate heat creep issues that cause clogs during extended jobs or high-temperature printing.
The larger melt zone accommodates diverse materials, including flexible filaments.
However, you’ll need to adjust extruder tension and reconfigure firmware settings like E-Step values to optimize performance.
These adjustments guarantee reliable feeding and maximize your upgraded hotend’s potential.
Proper Extruder Disassembly and Preparation Steps
Before installing your new all-metal hotend, you’ll need to systematically disassemble your current extruder setup to avoid damaging delicate components.
Start by unloading filament and powering off your printer to prevent thermal damage during the upgrade process.
Essential Disassembly Steps:
- Remove extruder housing – Use a 2.5mm hex wrench to carefully remove hex screws from both sides, then unscrew the two additional screws beneath the motors on the backside.
- Detach cable connections – Remove cable chain screws, then take off fixing screws and cover from the extruder board to access internal components.
- Extract original extruder – Pull the extruder straight up for detachment, noting all connections for later reconnection.
Mark the right extruder motor for dual extrusion models to simplify reinstallation.
Configuring Optimal Tension Settings for Different Filament Types

With your extruder successfully disassembled, you’ll need to configure proper tension settings that match your specific filament types to achieve consistent, high-quality prints.
For rigid materials like PLA, set your extruder tension around 14mm to create slight indentation without filament crushing. When switching to flexible filaments such as TPU, you’ll need looser settings to prevent grinding and under-extrusion.
Dual drive systems typically handle higher tension well with rigid materials but require reduced pressure for softer ones.
Conduct extrusion tests to find your best settings. Examine gear imprints on the filament—clear marks indicate proper tension while excessive deformation means you’ve overtightened.
Too little tension causes grinding, while too much wastes motor energy and damages filament.
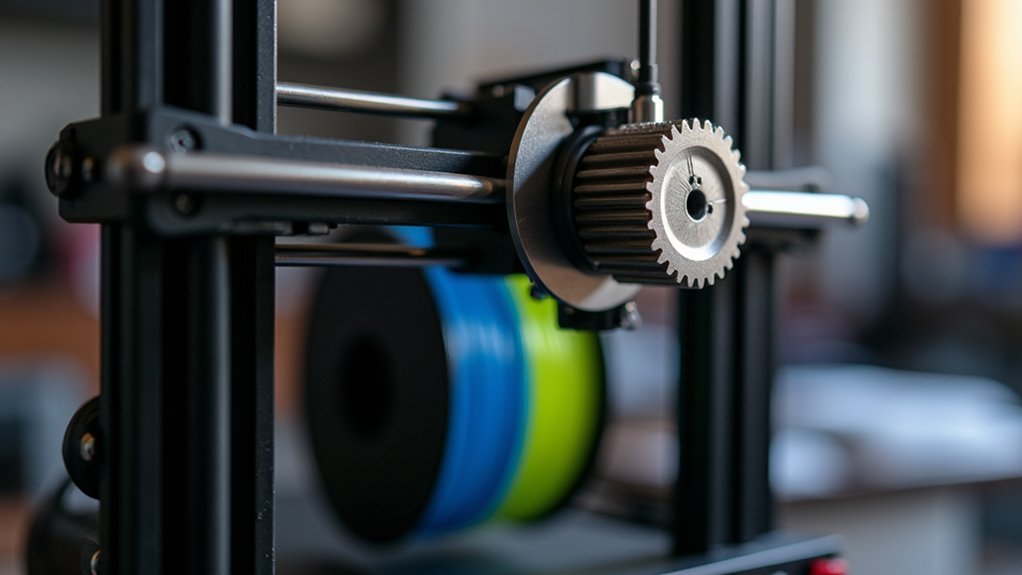
Upgrading to Dual Drive Gear Systems for Enhanced Grip
When you’re ready to take your extruder’s performance to the next level, upgrading to a dual drive gear system provides superior filament grip through two synchronized driven gears that work together to maintain consistent feeding pressure.
This enhanced grip considerably reduces filament stripping while delivering superior filament control compared to single gear configurations.
Key advantages of dual drive systems:
- Improved flexible materials handling – Reduces grinding and prevents under-extrusion when printing with TPU and other elastomers
- Enhanced extrusion consistency – Maintains steady feeding force throughout complex multi-part prints for better print quality
- Precise tension settings control – Allows ideal pressure adjustment that creates slight filament indentation without crushing
You’ll need to recalibrate your tension settings after installation, using lower pressure for flexible materials to prevent deformation while maintaining reliable feeding performance.
Calibrating E-Steps and Flow Rate Settings After Installation
After installing your new extruder, you’ll need to configure the E-Step value to guarantee your printer feeds filament accurately.
Start by setting the E-Steps to the typical baseline of 415, then perform a calibration test by measuring and marking 100mm of filament before commanding an extrusion.
Once you’ve dialed in your E-Steps, you can fine-tune your print quality through flow rate testing in your slicer software.
E-Step Value Configuration
Installing a new extruder is only half the battle—you’ll need to calibrate your E-Step value to guarantee accurate filament feeding. The default E-Step value is typically set to 415, but this won’t always match your specific setup and can lead to under-extrusion problems.
Here’s how to calibrate E-Steps effectively:
- Measure and mark exactly 100mm of filament above your extruder entrance point.
- Command your printer to extrude 100mm through your printer’s interface or software.
- Measure the actual amount extruded and calculate the new E-Step value using the formula: (Current E-Steps × Commanded Distance) ÷ Actual Distance.
Once you’ve configured your E-Step value, fine-tune your flow rate settings and initial layer flow percentage in your slicer to optimize print quality and prevent future extrusion issues.
Flow Rate Testing
With your E-Steps properly calibrated, you’ll want to verify your extruder’s performance through systematic flow rate testing. Conduct this test by commanding your extruder to push a specific length of filament, then measure the actual amount extruded. Compare these values to determine your extrusion consistency and accuracy.
| Test Parameter | Target Value | Actual Result |
|---|---|---|
| Commanded Length | 100mm | 98mm |
| Flow Rate Percentage | 100% | 102% |
| E-Step Value | 415 | 415 |
Next, adjust your flow rate percentage in Cura based on these results. Start around 100% and fine-tune according to your measurements. Regular calibration prints help verify ideal feeding performance across different filament types. Document your settings to maintain consistent results for future projects.
Troubleshooting Clicking Noises and Feeding Interruptions
Why does your extruder produce that annoying clicking sound during prints?
These clicking noises typically signal feeding interruptions caused by insufficient extruder tension, allowing filament to slip or grind against the drive wheel.
Here’s how to eliminate these issues:
- Adjust extruder tension to ideal levels around 14mm from handbook specifications – too loose causes slipping, too tight creates excessive pressure.
- Perform cold pulls to clear partial nozzle clogs that create resistance and monitor nozzle temperature carefully (215-220°C for PLA).
- Clean your drive wheel regularly and check your filament spool for tangles that restrict smooth feeding.
Testing and Fine-Tuning Your Upgraded Extruder Performance
Once you’ve completed your extruder upgrade, you’ll need to verify it’s performing efficiently through systematic testing and calibration. Conduct extrusion tests by measuring the amount of filament extruded over a set period to guarantee consistent feeding. Start by adjusting your E-Step value to 415, then fine-tune based on test results.
| Filament Types | Recommended Tension Settings |
|---|---|
| PLA | Medium tension |
| PETG | Medium-low tension |
| TPU | Low tension |
| ABS | Medium-high tension |
| Wood/Carbon | Medium tension |
Monitor extruder performance during prints by listening for grinding or clicking sounds. Optimize your flow rate in slicer software like Cura, adjusting initial layer flow percentage for proper adhesion. Different filament types require specific tension settings—softer materials need lower tension to prevent grinding.
Frequently Asked Questions
What Is the Feed Rate of an Extruder?
You’ll find the feed rate measures how fast your extruder pushes filament through the hotend, typically in millimeters per minute. It directly affects your print’s extrusion volume and overall quality.
What Are the Best Extruder Settings?
You’ll want to set your E-Step value to 415 for accurate filament feeding. Adjust initial layer flow in Cura, dial in proper Z offset, and fine-tune settings during prints using the TUNE menu.
How Far Should My Extruder Be From the Bed?
Your extruder nozzle should be 0.1mm to 0.3mm from the bed. This Z offset guarantees proper first-layer adhesion and filament flow. You’ll need to fine-tune based on your filament’s performance.
Why Is My Extruder Not Extruding Enough?
Your extruder’s likely under-extruding due to insufficient tension, clogged nozzle, or wrong temperature settings. Check your tension adjustment, clean drive gears, and try increasing temperature to 220°C for better flow.


Leave a Reply