
You’ll need to shut off your 3D printer completely before starting any hobbed gear maintenance. Remove tension screws carefully while holding them firmly due to spring loading, then use a razor blade or wire brush to extract filament debris from between gear teeth. Rotate the feeder gear manually for complete access and inspect for wear or damage. After cleaning, apply appropriate lubricant, reassemble components with correct tension, and establish regular cleaning schedules. Following these thorough maintenance steps will guarantee peak extrusion performance and prevent costly printing failures.
Turn Off Equipment and Remove Tension Components
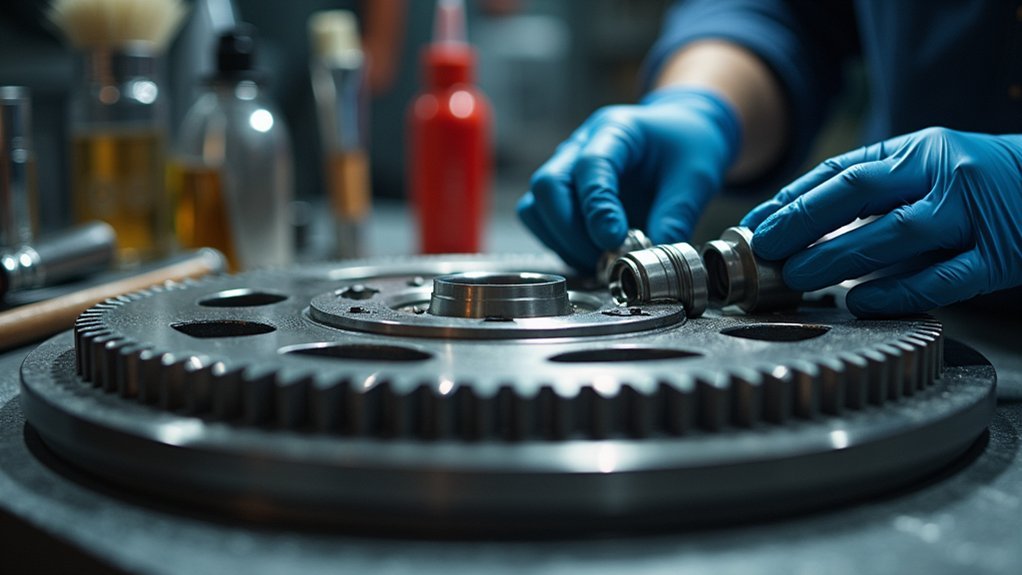
Before you begin any hobbed gear maintenance, shut off your machine completely to prevent potential injuries from moving parts.
Once you’ve confirmed the equipment is off, locate the filament thumb latch and identify the tension screws that secure it.
Hold these screws firmly as you unscrew them since they’re under spring load and could pop out unexpectedly.
After removing the tension screws completely, verify that the thumb latch can lay down freely without resistance. This positioning provides clear access to the gear components underneath.
Before proceeding further, gather your cleaning tools including a razor blade or wire brush. Having everything ready guarantees you can efficiently clean the gear teeth and remove any accumulated debris that affects performance.
Clear Filament Debris From Gear Teeth
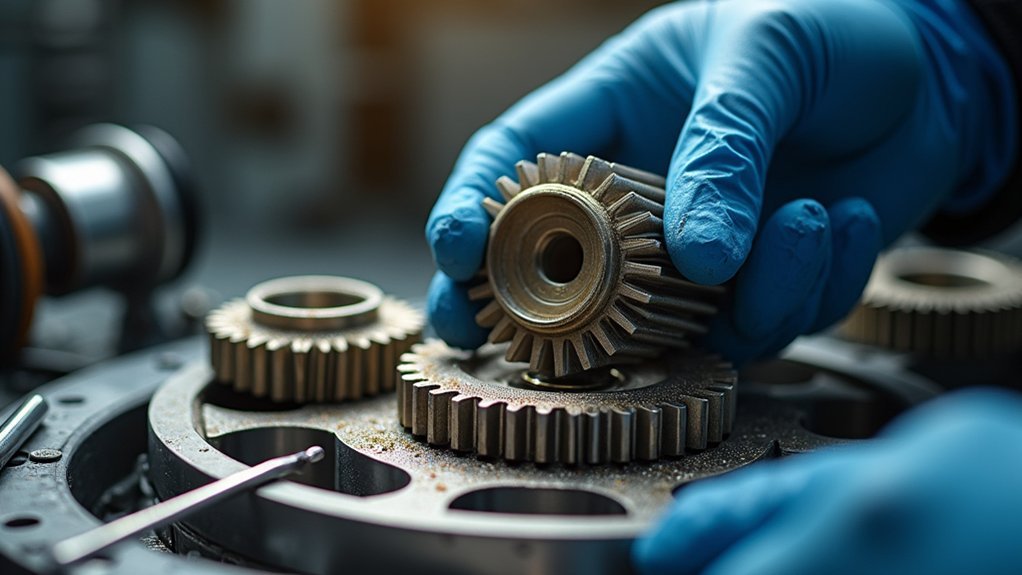
With the tension components safely removed, you’ll now focus on extracting filament debris that’s lodged between the gear teeth.
Use a razor blade or wire brush to carefully remove any filament remnants, guaranteeing you don’t damage the gear during the cleaning process. Manually rotate the large feeder gear while cleaning to access all areas effectively and confirm thorough debris removal.
Regularly inspect the gear teeth for stuck filament, as accumulation can hinder your feeder’s performance and lead to potential clogs.
After cleaning, verify that all filament remnants are completely removed by checking the teeth after each rotation.
These maintenance tips are essential for peak extrusion, enhancing your machine’s overall performance and longevity.
Rotate the Feeder Gear for Complete Access
Proper rotation technique guarantees you’ll access every section of the feeder gear during cleaning. Turn the gear manually in small increments to inspect each tooth thoroughly. This methodical approach prevents tool wear and extends hob maintenance intervals considerably.
| Rotation Step | Action Required | Debris Check |
|---|---|---|
| Quarter turn | Clean visible teeth | Inspect grooves |
| Half turn | Clear remaining debris | Verify removal |
| Three-quarters | Deep clean hard spots | Check alignment |
| Full rotation | Final inspection | Confirm cleanliness |
| Reset position | Return to start | Document condition |
Consistent rotation during cleaning maintains ideal extrusion performance and prevents future clogs. Quality gear manufacturing depends on regular maintenance, so rotate until you’ve eliminated all filament remnants. This thorough approach guarantees your equipment operates efficiently and reduces unexpected downtime from debris accumulation.
Use Proper Cleaning Tools and Techniques
You’ll need specific tools to effectively remove filament debris without damaging your hobbed gear’s delicate teeth.
A razor blade or wire brush designed for gear cleaning works best for scraping away stuck material from between the teeth.
Your cleaning technique should focus on thorough debris removal while protecting the gear’s precision-machined surfaces.
Essential Cleaning Tool Selection
Something as simple as choosing the right cleaning tools can dramatically impact your hobbed gear’s performance and longevity. You’ll need specific tools designed to tackle different types of debris without damaging delicate gear teeth.
| Tool Type | Primary Use | Best For |
|---|---|---|
| Razor Blade | Scraping tough debris | Hardened filament buildup |
| Wire Brush | Aggressive cleaning | Stubborn residue removal |
| Soft Brush | Delicate areas | Regular maintenance cleaning |
| Fine Scraper | Precision work | Tight spaces between teeth |
Keep your cleaning tools in prime condition through proper maintenance. Sharp blades and debris-free brushes guarantee maximum effectiveness. When cleaning, manually rotate the gear to access all surfaces thoroughly. This systematic approach prevents missing critical areas where debris accumulates, maintaining consistent extrusion performance.
Debris Removal Techniques
Effective debris removal starts with understanding where filament buildup occurs most frequently on your hobbed gear. The gear teeth collect the most debris and require focused attention during your cleaning process.
Use a razor blade or wire brush to carefully scrape away filament residue from each tooth, ensuring you don’t damage the gear’s surface. Manually rotate the feeder gear while cleaning to access all areas thoroughly. This rotation allows you to systematically work around the entire circumference, removing stuck filament after each turn.
Pay special attention to the grooves between teeth where debris often accumulates. After completing the debris removal, verify that no residue remains on any part of the gear.
Repeat this cleaning process regularly to maintain peak performance.
Gear Teeth Cleaning
The right cleaning tools make all the difference when maintaining your hobbed gear’s teeth. Use a razor blade or wire brush to effectively remove filament debris from the gear teeth, ensuring no stuck material remains.
Focus your cleaning efforts specifically on these critical areas, as they’re essential for accurate gear operation and performance. Manually rotate the large gear while cleaning to access all areas, ensuring thorough debris removal from every part.
Be cautious not to damage the gear during maintenance – excessive force or improper tools can cause wear and affect gear quality. Repeat the cleaning process as necessary until the gear teeth are completely free of debris, promoting better efficiency and longevity of your equipment.
Inspect for Wear and Damage During Cleaning
While cleaning provides an ideal opportunity to examine your hobs closely, you’ll want to systematically inspect each tool for signs of wear and damage that could jeopardize your gear production quality.
During tool inspection, look for chipped or broken teeth that can cause tool breakage and production shutdowns. Check for excessive hob wear on cutting surfaces, as this compromises gear accuracy and surface finish.
Measure critical dimensions like spacing and rake angles to guarantee your gear hobs remain within specified tolerances. Document each hob’s condition before and after cleaning to track wear patterns effectively.
This documentation helps you make informed decisions about maintenance schedules and replacement timing, ultimately extending tool life and maintaining consistent production quality.
Apply Appropriate Lubrication After Cleaning
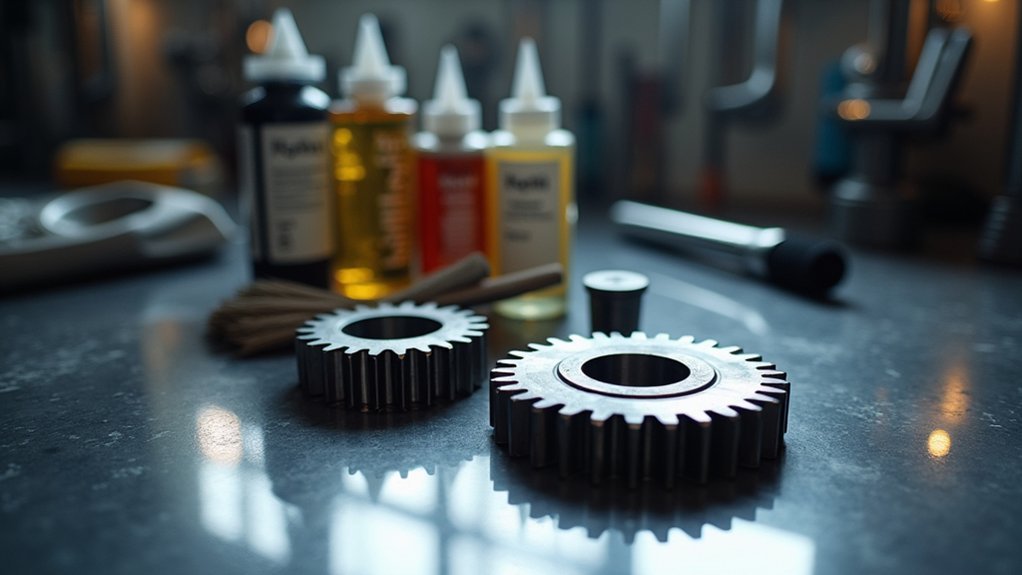
After completing your thorough cleaning and inspection process, you’ll need to apply proper lubrication to protect your hobs and guarantee peak cutting performance.
Selecting the right lubricant is essential for preventing wear and ensuring ideal gear performance throughout extended operations.
Choose high-quality lubricants that match your manufacturer’s specifications and remain compatible with your gear materials. Apply the lubricant evenly across all surfaces to minimize friction and prevent overheating during cutting cycles.
- Use manufacturer-recommended lubricants for material compatibility
- Apply lubricant evenly across all gear surfaces
- Check lubricant levels regularly during operation
- Establish lubrication schedules based on usage patterns
- Monitor for signs of insufficient lubrication like increased heat
Regular lubrication maintenance prevents premature wear and extends your hobbed gear’s operational lifespan considerably.
Reassemble Components With Correct Tension
Once you’ve completed the lubrication process, you’ll need to reassemble your hobbed gear components with precise tension settings to confirm peak performance. Start by flipping the filament thumb latch back up to confirm proper reassembly positioning.
| Component | Action Required | Verification Step |
|---|---|---|
| Tension Screws | Replace into extruder assembly | Check correct positioning |
| Thumb Latch | Flip back up after cleaning | Test smooth movement |
| Overall Assembly | Tighten screws securely | Confirm no misalignment |
Replace the tension screws into the extruder assembly, positioning them correctly to maintain gear performance. Refer to the Filament Latch Adjustment guide for correct tension settings. Tighten screws securely to prevent operational problems. Finally, verify the thumb latch moves smoothly, confirming appropriate tension and proper functionality.
Verify Smooth Operation After Maintenance
After completing your hobbed gear maintenance, you’ll need to verify everything operates smoothly through systematic testing.
Start by manually rotating the gear to test its movement, then check that all components align accurately within their housing.
Monitor key performance parameters like filament grip strength and feeding consistency to guarantee your maintenance work has restored peak functionality.
Test Gear Rotation
When you’ve finished reassembling your hobbed gear, you’ll need to confirm it’s operating correctly by testing its rotation. Manually rotate the gear to guarantee it moves smoothly without resistance or sticking, which confirms your maintenance was successful and meets gear specifications.
Test your hobbed gear thoroughly using these steps:
- Rotate the gear in both directions to verify complete functionality
- Listen carefully for unusual sounds that may indicate misalignment
- Check for any resistance or sticking during rotation
- Confirm the filament thumb latch tension is properly adjusted
- Document your test results for future maintenance tracking
Pay attention to any grinding or clicking sounds, as these signal potential issues affecting tool life.
Proper rotation testing guarantees your hobbed gear will perform reliably and extends its operational lifespan.
Check Alignment Accuracy
Precision alignment verification represents the critical final step in your hobbed gear maintenance process. You’ll need to check hob and workpiece alignment accuracy to prevent inaccurate gear profiles. Use alignment tools like dial indicators or laser alignment systems to assess your machine setup post-maintenance.
| Alignment Check | Tool Required |
|---|---|
| Radial alignment | Dial indicator |
| Angular positioning | Laser system |
| Center distance | Precision gauge |
Proper alignment reduces tool wear and extends machine lifespan, boosting production efficiency. You’ll prevent abnormal vibrations and operational disruptions by catching misalignment early. Document your alignment checks and adjustments to track performance trends and identify recurring issues. This systematic approach guarantees ideal gear quality while maximizing your equipment’s operational reliability.
Monitor Performance Parameters
Once maintenance procedures conclude, you’ll need to systematically monitor key operational parameters to ascertain your hobbed gear machine functions effectively.
Focus on cutting speed, feed rate, and power consumption to verify everything operates within specifications. Listen for unusual vibrations or noises that signal potential problems requiring immediate attention.
Implement quality control checks on your gear output to guarantee products meet tolerance and surface finish requirements. Track performance data consistently to identify trends and prevent future issues.
Essential monitoring activities include:
- Verify cutting speed remains consistent throughout operation cycles
- Check feed rate accuracy against programmed values
- Monitor power consumption for unexpected fluctuations
- Inspect bearing operation and lubrication system effectiveness
- Document performance data for trend analysis and predictive maintenance
Establish Regular Cleaning Schedules
Three key factors determine an effective cleaning schedule for your hobbed gears: machining volume, operating conditions, and material type.
You should perform regular cleaning after a set number of machining cycles or at least once per shift to maintain peak performance and prevent debris accumulation that reduces efficiency.
Your cleaning schedule must include visual inspections to catch wear or damage early, preventing costly downtime.
Regular visual inspections during cleaning catch gear wear and damage early, preventing unexpected equipment failures and costly production downtime.
Use appropriate cleaning tools like wire brushes or razor blades to remove stuck filament without damaging gear teeth. Document every cleaning activity to track maintenance patterns and improve consistency.
This systematic approach prevents clogs, extends tool life, and maintains machining precision.
Consistent scheduling based on actual usage patterns delivers better results than arbitrary timing.
Monitor Performance and Extrusion Quality
You’ll need to track your extrusion consistency by monitoring filament flow patterns and layer quality throughout your printing process.
Measure your gear tolerances regularly to verify the hobbed gear maintains proper grip on the filament without causing deformation or slippage.
Detect performance issues early by watching for signs like inconsistent flow rates, poor layer adhesion, or unexpected filament grinding that indicate your gear needs immediate attention.
Track Extrusion Consistency
While maintaining your hobbed gear system requires attention to multiple components, tracking extrusion consistency serves as one of the most reliable indicators of overall machine health.
You’ll need to establish systematic monitoring protocols that document performance variations throughout production runs. Your hobbing machine’s cutting tool performance directly correlates with extrusion uniformity, making consistent tracking essential.
Focus on these key monitoring practices:
- Check filament diameter against specifications during each production cycle
- Document extrusion rates and flow patterns systematically
- Use calibration tools to measure extruded part quality regularly
- Create operator feedback loops for reporting irregularities immediately
- Assess hob material condition frequently, as wear considerably impacts consistency
When you notice deviations from established baselines, you can address potential issues before they escalate into costly repairs or production delays.
Measure Gear Tolerances
Precision tolerance measurements form the backbone of effective gear monitoring, building directly on the consistency tracking you’ve already established. When you measure gear tolerances using high precision tools like calipers and micrometers, you’re ensuring peak performance and surface finish quality. Focus on checking gear tooth spacing and lead deviations, as these indicate wear or misalignment issues affecting extrusion.
| Measurement Type | Frequency | Tools Required | Critical Tolerance | Documentation |
|---|---|---|---|---|
| Tooth Spacing | Weekly | Micrometers | ±0.001″ | Digital logs |
| Lead Accuracy | Bi-weekly | Calipers | ±0.0005″ | Trend charts |
| Surface Finish | Monthly | Profilometer | 32 Ra max | Quality reports |
| Overall Diameter | Weekly | Precision gauges | ±0.002″ | Maintenance records |
| Pitch Variation | Daily | CMM equipment | ±0.0003″ | Performance data |
Document measurements consistently to track trends and calibrate machines accordingly.
Detect Performance Issues
Since tolerance measurements establish your baseline standards, detecting performance issues requires continuous monitoring of both gear operation and extrusion quality indicators.
You’ll need to watch for consistent filament flow patterns and identify irregularities that signal blockages or gear wear. Temperature fluctuations and improper cutting speeds can reduce heat dissipation, affecting your tool selection and overall performance.
Monitor these key performance indicators:
- Visual debris buildup on gear teeth affecting feeding performance
- Temperature and feed rate deviations from standard parameters
- Vibrations or unusual noises during operation indicating mechanical issues
- Filament flow inconsistencies suggesting blockages or wear
- Dimensional variations in finished gears exceeding specified tolerances
Conduct routine checks during operation and perform periodic evaluations measuring finished dimensions against specifications to address deviations promptly.
Frequently Asked Questions
What Type of Lubricant Works Best for Different Hobbed Gear Materials?
You’ll want synthetic oils for steel hobbed gears, while mineral oils work well for cast iron. Use specialty lubricants for bronze gears, and you should avoid petroleum-based products on plastic gear materials.
How Do Environmental Factors Like Humidity Affect Hobbed Gear Performance?
Humidity directly impacts your hobbed gear’s performance by causing corrosion, affecting lubrication viscosity, and promoting wear. You’ll notice increased friction, reduced efficiency, and accelerated deterioration in high-moisture environments without proper protection.
Can Worn Hobbed Gears Be Restored or Do They Require Complete Replacement?
You can’t restore worn hobbed gears effectively. Once the teeth’s precise geometry degrades, you’ll lose critical tolerances and accuracy. Complete replacement’s necessary to maintain proper meshing, load distribution, and performance in your gear system.
What Are the Signs That Indicate Hobbed Gear Teeth Need Professional Repair?
You’ll notice excessive wear patterns, chipped or broken teeth, unusual noise during operation, vibration increases, reduced gear efficiency, visible cracks, or irregular tooth profiles that can’t be corrected through standard cleaning procedures.
How Does Gear Storage Temperature Impact Long-Term Durability and Functionality?
You’ll find extreme temperatures cause metal expansion and contraction, leading to stress fractures and dimensional changes. Store your gears in climate-controlled environments between 60-80°F to prevent premature wear and maintain precision tolerances.


Leave a Reply