Your extruder clicks when the motor can’t push filament through at the required rate, creating excessive back pressure. Common causes include incorrect nozzle temperatures below your filament’s ideal range, clogged nozzles from burnt residue, worn extruder gears losing grip, contaminated or moisture-damaged filament, damaged PTFE tubes restricting flow, and improper tension settings. Print speeds exceeding your hot end’s melting capacity also trigger clicking as the system struggles to keep up. Understanding these specific issues will help you pinpoint and resolve the underlying problem.
Insufficient Filament Flow Due to Temperature Settings
When your extruder starts clicking during a print, insufficient filament flow often stems from incorrect temperature settings that prevent proper material extrusion.
If you set your nozzle temperature below the ideal range for your filament—like running PLA below 190°C—the material won’t melt properly, creating clogs that trigger clicking sounds.
You’ll need to experiment with temperature increases of 5°-10°C to improve flow.
Heat creep issues can worsen this problem when your hotend doesn’t maintain consistent temperatures, causing premature filament solidification.
For accurate readings, use thermocouples to verify your nozzle reaches necessary heat levels.
Proper temperature control guarantees smooth extrusion and eliminates those frustrating clicking noises from your extruder.
Clogged Nozzle and Hot End Blockages
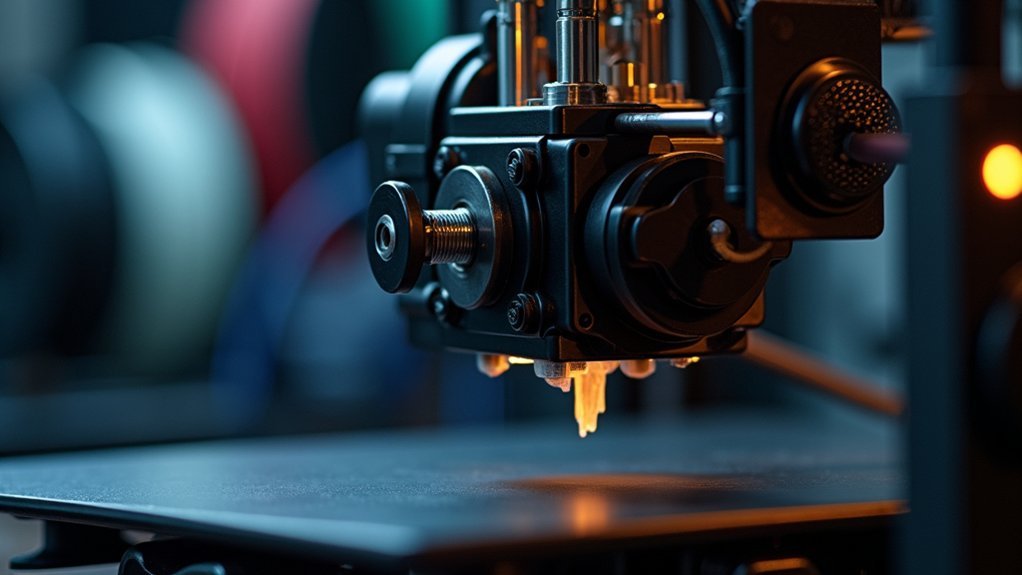
A blocked pathway in your nozzle creates one of the most common causes of extruder clicking, as restricted filament flow forces your extruder motor to skip steps when it can’t push material through the obstruction. Burnt filament residue and debris accumulate in your hot end, impeding the melting process and creating those telltale clicking sounds during printing.
| Prevention Method | Purpose |
|---|---|
| Cold pulls | Remove stubborn blockages |
| Cleaning filaments | Clear residue buildup |
| PTFE tube alignment | Guarantee smooth filament path |
| Correct nozzle size | Maintain proper flow rates |
Regular maintenance prevents your clogged nozzle from disrupting prints. You’ll need to inspect your PTFE tube alignment and maintain ideal temperature settings to avoid jams that restrict filament passage.
Bowden Tube Interference and Pathway Restrictions
While your nozzle might be clear, bowden tube restrictions can still trigger extruder clicking by creating back pressure that forces your stepper motor to skip steps.
If your Bowden tube’s inner diameter is too tight, it’ll create resistance that impedes filament flow. Even minor bends, kinks, or obstructions in the tube can restrict the filament’s pathway, causing jams and clicking noises.
You’ll need to guarantee a smooth, unobstructed path through your Bowden tube since even small restrictions increase back pressure considerably.
Regularly inspect your PTFE tube for wear or damage, as compromised tubing won’t guide filament efficiently.
You might need to adjust the tube’s length and positioning to optimize filament feed and eliminate clicking issues.
Loose Hot End and Tube Assembly Connections
When your hot end and Bowden tube connections aren’t properly tightened, you’ll create gaps that allow molten filament to swell and jam your extruder.
This swelling causes the telltale clicking sound as your extruder skips steps trying to push the bulged filament through the pathway.
You’ll need to disassemble and rebuild these connections to eliminate any gaps between the tube and heat break components.
Gap-Induced Filament Swelling
Though your extruder motor might sound healthy, gaps between the Bowden tube and hot end create hidden problems that’ll manifest as persistent clicking. When molten filament encounters these gaps, it expands and swells, creating resistance that forces your extruder to work harder.
This thermal swelling produces the characteristic clicking sound as your motor skips steps trying to push material through the obstruction. You’ll notice bulbous shapes forming on filament ends after failed prints—clear evidence of gap-induced swelling.
The loose connection between your hot end and Bowden tube allows improper filament guidance, causing binding that restricts flow. Inspect your hot end coupling for play or movement.
Ensuring a snug fit between the tube and heat break prevents these extrusion problems and eliminates the frustrating clicking.
Rebuilding Tight Connections
Rebuilding your hot end assembly addresses these gap-induced problems at their source by establishing proper connections throughout the filament path. When you disassemble and carefully rebuild your hot end, you’ll eliminate loose connections that cause filament jams and extruder clicking.
Pay special attention to securing the Bowden tube tightly against the heat break and nozzle, ensuring no gaps exist where molten filament can swell and create clogs.
During reassembly, inspect your PTFE tube for any deformation or tight inner diameters that restrict smooth filament movement. Replace damaged components as needed.
Proper alignment prevents play between parts that disrupts feeding. This systematic approach considerably improves extrusion reliability and eliminates the clicking sounds that plague poorly assembled hot end systems.
Extruder Gear Wear and Tension Problems

While your extruder motor spins and clicks repeatedly, worn gears often can’t maintain their grip on the filament, causing this frustrating slipping action.
Extruder clicking frequently stems from gear deterioration that prevents proper filament engagement. You’ll need to inspect your extruder gears regularly for visible wear patterns, teeth damage, or accumulated debris that reduces gripping effectiveness.
Regular gear inspection reveals wear patterns and debris buildup that compromise filament grip and cause persistent extruder clicking.
Tension problems also contribute considerably to clicking issues. If you’ve set insufficient tension, the gear won’t adequately engage the filament, creating inconsistent feeding and clicking sounds.
However, you can’t over-tighten the extruder clamp either, as excessive pressure causes filament jams and forces the motor to struggle. Instead, adjust your tension lever gradually until you achieve ideal grip without creating binding issues that trigger clicking noises.
Incorrect Nozzle Distance From Print Bed
You’ll often find that incorrect nozzle distance from your print bed creates the perfect conditions for extruder clicking.
When your nozzle’s too close, it creates excessive back-pressure that forces your extruder to skip and click as it struggles to push filament through the restricted gap.
Conversely, if you’ve set the nozzle too high, poor first layer adhesion and inconsistent extrusion will trigger clicking as your extruder compensates for the inadequate flow.
Nozzle Height Adjustment
When your nozzle sits too close to the print bed, it creates excessive resistance that prevents filament from extruding properly, causing your extruder to skip steps and produce those telltale clicking sounds.
Adjusting your nozzle height is essential for eliminating this problem and achieving smooth first layers.
You’ll want to maintain a distance of approximately 0.1mm to 0.2mm between your nozzle and print bed for ideal extrusion. If you’re experiencing clicking, raise your nozzle slightly and observe the first layer quality. Look for thin or unevenly distributed filament, which indicates the nozzle’s still too low.
Regular nozzle height checks and adjustments prevent extrusion problems before they start. This simple maintenance step enhances your overall print quality while reducing those frustrating clicking sounds.
First Layer Symptoms
Since your first layer reveals the most obvious signs of incorrect nozzle distance, you’ll need to examine it closely for telltale symptoms that indicate extruder clicking problems.
When your nozzle height is set too low, you’ll notice thin, translucent first layers with visible gaps between extrusion lines. These symptoms occur because the nozzle crushes filament against the bed, restricting proper flow and causing your extruder gears to slip and click audibly.
You’ll also see inconsistent line thickness where some areas appear over-squeezed while others show insufficient material deposition. The filament gets pinched between the nozzle and bed surface, creating back-pressure that forces your extruder to work harder.
Print Speed and Extrusion Rate Mismatches
Although your 3D printer’s extruder motor is powerful, it’ll start clicking when you’re trying to push filament through the nozzle faster than the material can melt and flow.
This mismatch between print speed and extrusion rate causes the extruder to skip steps, creating that distinctive clicking sound you’re hearing.
When your print speed exceeds what your material can handle, you’ll experience under-extrusion and poor print quality.
To fix this, start with speeds between 30-60 mm/s and adjust based on your filament’s specifications.
Watch your first layer carefully and make real-time adjustments to find the sweet spot where your filament flows consistently without clicking.
This balance guarantees smooth operation and better prints.
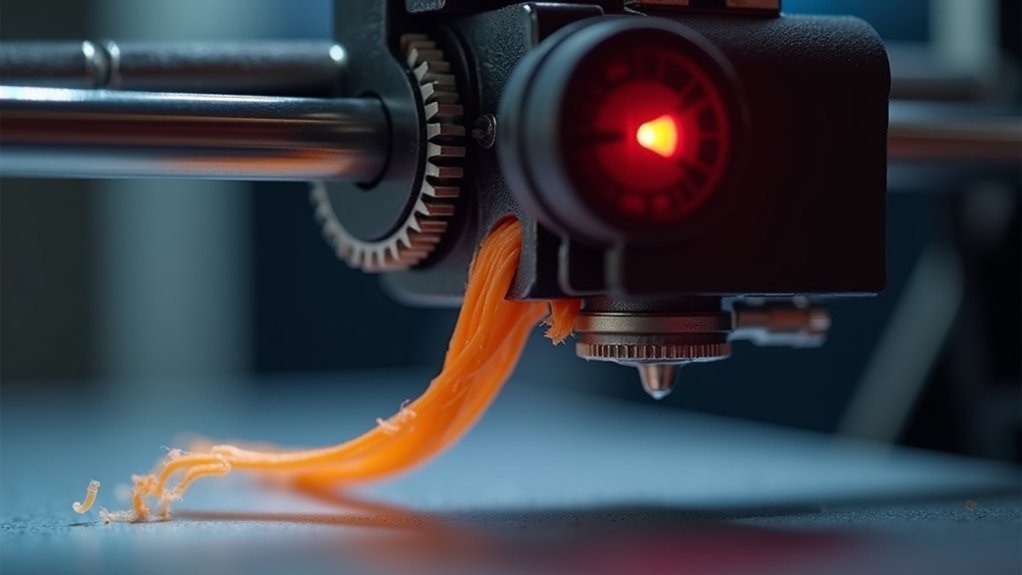
Filament Quality and Moisture Issues
Your filament’s quality directly impacts whether you’ll experience extruder clicking issues.
When filament absorbs moisture from the air, it swells and creates diameter inconsistencies that disrupt your extruder’s feeding mechanism.
You’ll need to maintain proper storage conditions and use high-quality materials to prevent these moisture-related problems from causing your extruder to click and struggle.
Moisture Absorption Effects
When moisture seeps into your 3D printing filament, it transforms from a reliable material into a source of frustration that’ll cause your extruder to click repeatedly.
Moisture absorption creates a cascade of printing problems that’ll disrupt your entire workflow.
Here’s what happens when your filament absorbs moisture:
- Steam forms when heated filament reaches the hot end, creating bubbles that block material flow
- Increased brittleness makes filament prone to breaking and jamming in the extruder
- Nozzle clogs become more frequent as inconsistent material flow disrupts extrusion
- Certain materials like nylon and PETG are especially vulnerable to atmospheric moisture
- Print quality deteriorates considerably, leading to failed prints and wasted time
Regular filament drying and proper storage in airtight containers with desiccants prevents these moisture-related issues.
Filament Diameter Consistency
Beyond moisture problems, inconsistent filament diameter creates another major source of extruder clicking that’ll derail your prints.
When your filament varies from the standard 1.75mm or 2.85mm specification, it disrupts the delicate balance your extruder needs for smooth operation. Thicker sections force your extruder to work harder, causing it to skip steps and produce those telltale clicking sounds.
You’ll want to invest in high-quality filament manufactured with tight diameter tolerances.
Cheap filament often varies notably, creating feeding issues that interrupt material flow through your nozzle.
Don’t forget to regularly measure your filament with calipers before printing. This simple check helps you catch diameter inconsistencies early and avoid frustrating mid-print failures that waste time and material.
Storage Condition Requirements
Since proper filament storage directly affects your extruder’s performance, you’ll need to maintain ideal environmental conditions to prevent moisture-related clicking issues.
Poor storage leads to moisture absorption, which causes filament swelling, inconsistent extrusion, and the telltale clicking sound from your extruder struggling to push degraded material through the hotend.
Follow these essential storage requirements:
- Store filament in airtight containers with desiccant packets in cool, dry locations
- Use high-quality filament with tighter diameter tolerances for consistent feeding
- Consume opened filament within a few months to prevent degradation
- Inspect filament regularly for bubbles, rough texture, or other moisture damage signs
- Dry compromised filament using a dedicated dryer or food dehydrator before printing
Mechanical Extruder Component Failures
Although your 3D printer’s software settings might be perfect, mechanical failures within the extruder assembly can still cause that frustrating clicking sound. Worn or damaged gears create slipping issues, preventing proper filament feeding through the system.
When you don’t maintain sufficient tension on your extruder, gear play develops, causing misalignment and producing that telltale clicking noise during operation.
Check your PTFE tube for damage or improper sizing, as restrictions hinder filament flow and force the motor to struggle. Loose hot end connections create gaps where molten filament swells and jams.
You’ll prevent most clicking issues by regularly inspecting mechanical components, ensuring screws stay tight, and maintaining proper gear alignment throughout your printer’s assembly.
PTFE Tube Damage and Deformation
When your PTFE tube suffers damage or deformation, it creates one of the most common yet overlooked causes of extruder clicking. Heat damage can warp your PTFE tube’s structure, creating restrictions that jam filament flow. A tight inner diameter increases friction, forcing your extruder to work harder and produce those telltale clicking sounds.
A damaged PTFE tube restricts filament flow, forcing your extruder to work harder and creating those frustrating clicking sounds.
Watch for these critical warning signs:
- Visible kinks or bends in the PTFE tube
- Heat-damaged sections with darkened or melted areas
- Abrasions or cuts along the tube’s surface
- Gaps at connection points between fittings
- Inconsistent inner diameter measurements
You’ll need to replace your damaged PTFE tube with one matching proper specifications.
Ascertain secure installation without gaps at connections to maintain a clear filament pathway and eliminate clicking issues.
Firmware Calibration and Stepper Motor Settings
While hardware issues often grab attention first, incorrect firmware calibration and stepper motor settings frequently cause extruder clicking that’s entirely software-related. Your printer’s firmware calibration directly controls how much filament gets extruded, and improper settings create feeding problems that manifest as clicking sounds.
| Setting Type | Issue | Solution |
|---|---|---|
| Steps/mm | Under/over-extrusion | Measure actual vs. commanded extrusion |
| Motor Current | Insufficient torque | Match specifications to motor requirements |
| Advanced Features | Sudden extrusion changes | Enable linear/pressure advance |
| Firmware Version | Compatibility problems | Update to latest stable release |
You’ll need to test your extruder’s steps/mm by manually extruding known lengths and measuring actual output. If you’re experiencing sudden clicking during complex prints, implementing pressure advance features can compensate for rapid extrusion demand changes.
Frequently Asked Questions
Why Does My Printer Make a Clicking Noise When Printing?
Your printer’s clicking noise means your extruder motor’s skipping steps. You’ve likely got a filament jam, wrong temperature settings, worn gears, calibration issues, or you’re using poor-quality filament that’s causing feeding problems.
Why Is My Ender 3 Extruder Clicking Mid Print?
Your Ender 3’s clicking mid-print typically means the filament’s jammed or your nozzle temperature’s too low. Check for clogs, increase temperature, reduce print speed, or clean your extruder gears to fix it.
Why Is My 3D Printer Making a Ticking Sound?
Your 3D printer’s ticking sound indicates extruder clicking, where the motor skips steps because filament isn’t feeding properly. Check for nozzle jams, adjust temperature settings, or loosen over-tightened extruder clamps.
How to Tell if an Extruder Motor Is Bad?
You’ll notice unusual clicking or grinding sounds if your extruder motor’s failing. Check for overheating, inconsistent extrusion, physical damage like burnt wires, and test voltage output with a multimeter.


Leave a Reply