
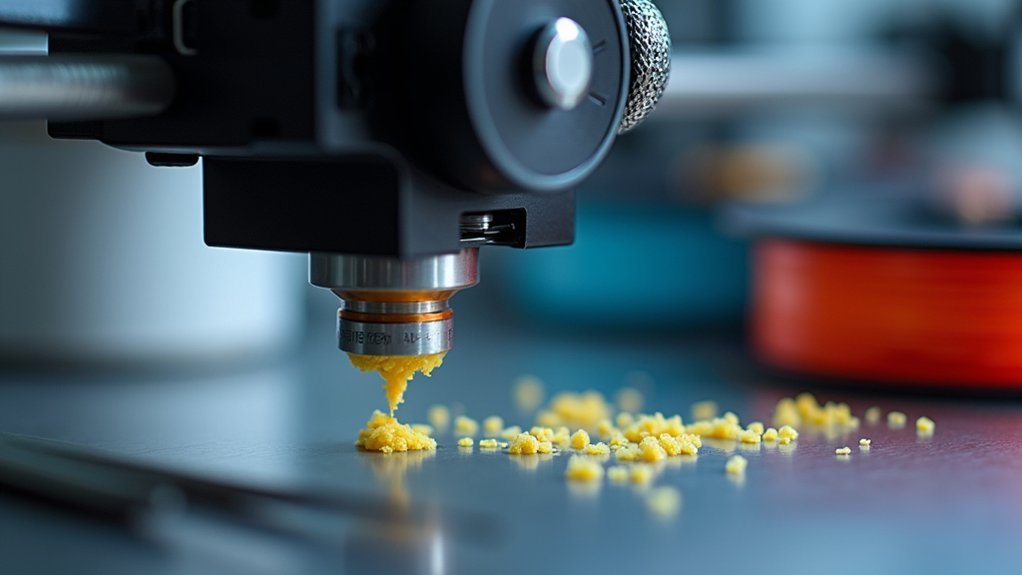
To clean your 3D printer extruder using the cold pull method, heat your nozzle to 230-250°C and insert light-colored PETG filament. Allow the filament to flow through completely, then cool the nozzle to 80-110°C. Once cooled, grasp the filament firmly and pull it out in one smooth motion. You’ll extract debris stuck inside the nozzle that’s visible on the filament tip. This technique helps you master advanced troubleshooting strategies for consistent printing performance.
Identifying Signs of a Clogged 3D Printer Nozzle
When does a simple 3D printing session turn into a frustrating troubleshooting nightmare? Usually when you’ve got a clogged nozzle wreaking havoc on your prints.
You’ll spot the telltale signs quickly: inconsistent extrusion creating weak, stringy lines, visible holes or gaps in your printed layers, and unusual resistance when pushing filament through the hotend.
A partially clogged nozzle is particularly sneaky—it still extrudes material but creates irregular flow patterns that ruin print quality.
Complete blockages are more obvious since they’ll stop filament extrusion entirely, halting your print job immediately.
Don’t wait for problems to escalate. Monitor your prints closely and watch for these warning signs.
Early detection prevents serious damage to your nozzle and saves you time, filament, and frustration down the road.
Understanding Complete Vs Partial Nozzle Blockages
Recognizing these warning signs is just the first step—you’ll need to determine whether you’re dealing with a complete or partial blockage to choose the right cleaning approach.
Complete clogs stop all filament flow, making printing impossible, while partial clogs allow limited extrusion with compromised quality. Here’s how to distinguish between them:
- Monitor extrusion flow – Complete blockages show zero filament output, partial ones produce inconsistent flow.
- Check print quality – Partial clogs create small imperfections and irregular lines in layers.
- Observe filament movement – Complete clogs prevent any plastic from emerging from the nozzle.
- Assess consistency – Partial blockages cause intermittent printing issues rather than total failure.
Understanding these differences helps you choose whether a Cold Pull or more aggressive cleaning method is needed for ideal results.
Common Causes of Extruder Nozzle Clogs
Once you’ve identified the type of blockage, understanding what causes these clogs will help you prevent future issues and maintain smoother printing operations.
Residue accumulation from repeated use creates blockages, particularly in smaller nozzle sizes that trap particles more easily. Operating outside recommended temperature ranges degrades your filament, forming partial clogs that disrupt material flow through the heat break.
Prolonged heating without extrusion breaks down filament structure, creating stubborn blockages. Switching between different materials without proper cleaning leads to contamination as leftover materials solidify inside your nozzle.
You’ll also encounter clogs when filament sits too long in heated extruders or when dust and debris enter your system. Regular maintenance prevents most issues before they develop into complete blockages.
Essential Materials and Tools for Cold Pull Cleaning
Gathering the right materials sets you up for successful cold pull cleaning and prevents potential complications during the process.
You’ll need specific tools to perform this maintenance technique safely and effectively.
Here’s what you’ll need for cold pull cleaning:
- High-quality filament – Use light-colored or transparent PETG for better visibility of debris during extraction.
- Heat-resistant tool – Pliers or tweezers to safely grip and pull the filament without injury.
- Thermometer – Monitor nozzle temperature accurately during the cooling phase (or use your printer’s display).
- Clean workspace supplies – Paper towels to catch residue and maintain tidiness.
Optional materials include a needle or small wire brush for removing stubborn clogs.
Having these tools ready guarantees you can complete the cold pull efficiently.
Preparing Your 3D Printer for the Cold Pull Process
Before you begin the cold pull cleaning process, you’ll need to power on your 3D printer and heat the nozzle to the appropriate temperature for your filament type—typically 230-250°C for PLA or ABS.
Remove any currently loaded filament from the extruder to clear the path and prevent contamination with residual materials.
Select a light-colored filament like transparent PETG for the cold pull, as it’s highly effective for this cleaning method and makes it easy to inspect any debris you extract from the nozzle.
Power and Heat Setup
When you’re ready to begin the cold pull process, start by powering on your 3D printer and connecting it to your monitoring software so you can track the nozzle temperature throughout the procedure.
This power and heat setup phase guarantees you’ll maintain complete control over the hot end temperature.
Follow these essential steps for proper heat setup:
- Verify hot end assembly – Confirm all components are properly secured and functioning before heating.
- Remove existing filament – Clear the extruder completely to prevent contamination during cleaning.
- Heat beyond normal temperature – Set your hot end 10-20°C above the filament’s standard extrusion temperature.
- Prepare workspace – Organize tools and cleaning filament within easy reach.
This systematic approach assures ideal conditions for effective extruder cleaning.
Filament Selection and Removal
With your printer heated and ready, you’ll need to choose the right filament for an effective cold pull. Select a light-colored, preferably transparent PETG filament since it provides better visibility of any debris you’ll extract from the nozzle. Remove any currently loaded filament first to prevent interference.
Heat your nozzles using temperatures higher than normal—around 240-260°C for PETG. Insert the selected filament into the hot nozzle, allowing it to melt completely and fill the interior. This preparation guarantees maximum cleaning performance over a long time of regular maintenance.
| Filament Type | Temperature Range | Shore Hardness | Visibility | Cleaning Effectiveness |
|---|---|---|---|---|
| PETG | 240-260°C | Medium | Excellent | High |
| PLA | 200-220°C | Low | Good | Medium |
| ABS | 250-270°C | Medium-High | Fair | Medium |
| Nylon | 260-280°C | High | Poor | High |
| TPU | 220-240°C | Very Low | Good | Low |
Step-by-Step Cold Pull Technique Execution
Now you’ll execute the cold pull technique through three critical phases that guarantee effective nozzle cleaning.
You’ll start by preparing your nozzle and filament at the correct temperatures.
Then carefully control the cooling sequence to create ideal extraction conditions.
Finally, you’ll extract the filament and inspect the results to determine if additional cleaning cycles are necessary.
Prepare Nozzle and Filament
The cold pull technique requires precise temperature control and timing to effectively extract debris from your extruder nozzle.
You’ll need to prepare both your nozzle and filament properly before executing this cleaning method.
Start by powering on your 3D printer and follow these preparation steps:
- Heat the nozzle to 240°C, which is higher than PETG’s recommended printing temperature.
- Remove any existing filament from the extruder completely.
- Insert clean, transparent PETG filament into the heated nozzle for better debris visibility.
- Allow the filament to melt and completely fill the nozzle chamber.
This preparation guarantees you’re working with ideal conditions for the cold pull.
The transparent PETG makes it easier to identify extracted contaminants during the process.
Execute Temperature Control Sequence
Once you’ve prepared your nozzle and filament, begin lowering the temperature to 90°C while keeping the PETG filament inserted.
Monitor the temperature display carefully as it drops from the initial heating temperature. When the nozzle reaches 90°C, wait approximately 30 seconds to guarantee the filament has solidified properly but remains pliable enough for extraction.
Apply steady, firm tension on the filament and pull it out in one smooth motion. Don’t jerk or use excessive force, as this can damage the extruder mechanism.
If the filament breaks during extraction, reheat the nozzle to 220°C and repeat the cooling sequence. The temperature control timing is essential for successful debris removal.
Extract and Inspect Results
When you’re ready to extract the filament, grasp it firmly near the extruder entrance and apply steady upward pressure in one smooth, continuous motion.
Don’t jerk or pull too quickly, as this can break the filament and leave debris inside the nozzle.
Once you’ve successfully extracted the filament, examine it carefully to assess your cold pull’s effectiveness:
- Check the tip shape – Look for a clean, cone-shaped end that mirrors your nozzle’s interior
- Inspect for debris – Identify any burnt material, dust, or foreign particles attached to the filament
- Examine color consistency – Note any discoloration that indicates contamination from previous materials
- Evaluate cleanliness – Determine if residue remains, requiring additional cold pull cycles
Optimal Temperature Settings for Effective Cleaning
Finding the right temperature balance is critical for successful extruder cleaning, as too hot will cause the filament to flow out completely while too cold won’t allow proper softening.
Start by heating your nozzle slightly above your filament’s recommended extrusion temperature—for PETG, begin around 230ºC to guarantee proper nozzle filling.
Then gradually cool to the ideal cold pull range of 80-110ºC, where the filament softens without liquefying.
Monitor the cooling process closely and make slight adjustments as needed. If your initial pull doesn’t yield clean results, adjust the temperature accordingly.
This balance between adequate softening and maintaining structural integrity is essential for effectively removing clogs and debris from your extruder.
Proper Filament Extraction Methods
After reaching the ideal temperature range, you’ll need to execute the actual filament extraction with precise timing and technique. The success of your cold pull depends on proper execution during this critical phase.
Follow these essential steps for effective extraction:
- Loosen the extruder tensioner to reduce resistance and allow smooth filament removal.
- Apply firm, steady pressure when pulling to dislodge clogs without breaking the filament.
- Examine the extracted filament for residue or burnt pieces that indicate clog severity.
- Use light-colored filament like transparent PETG for better visibility of debris.
You’ll likely need multiple extraction attempts to achieve complete cleaning.
Don’t expect perfect results on your first pull—persistence guarantees thorough nozzle cleaning and peak printer performance.
Evaluating Cleaning Success and Nozzle Performance
Once you’ve completed the cold pull process, determining whether your cleaning efforts succeeded requires careful examination of both the extracted filament and your printer’s subsequent performance. First, inspect the extracted filament for debris or burnt pieces clinging to its tip. Clean filament indicates successful removal of clogs and contaminants.
| Evaluation Method | Good Result | Poor Result |
|---|---|---|
| Filament Inspection | Clean tip, no debris | Dark residue, burnt pieces |
| Test Extrusion | Smooth, consistent flow | Irregular or blocked output |
| Print Quality | Improved layers, better adhesion | Continued issues persist |
| Documentation | Successful cleaning recorded | Multiple failed attempts noted |
Next, test extrude clean filament to verify smooth, consistent flow. Compare your next print’s quality to previous results, noting improvements in layer adhesion and surface finish.
Troubleshooting Failed Cold Pull Attempts
When your cold pull attempt doesn’t produce the expected results, don’t abandon the process entirely—instead, systematically identify what went wrong.
Several factors can cause cold pull failures, but you can address each systematically:
Cold pull problems have solutions—tackle each potential cause one by one until you achieve successful nozzle cleaning.
- Check nozzle temperature – Verify your hotend temperature matches your filament’s requirements, as incorrect temperatures prevent proper melting during extraction.
- Switch filament types – Try transparent PETG, which performs better during cold pulls compared to other materials.
- Inspect filament quality – Replace low-quality or brittle filament that breaks during extraction, preventing complete cleaning.
- Document your attempts – Record temperatures, filament types, and results to identify patterns for future troubleshooting.
If debris remains visible, repeat the process while gradually adjusting cooling temperatures until you find the best range for effective extraction.
Frequently Asked Questions
How to Cold Pull an Extruder?
You’ll heat your nozzle to 230°C, insert filament until it melts completely, cool to 80-110°C, then pull the filament out slowly while loosening extruder tension to remove debris.
How to Clean a 3D Printer Extruder?
You can clean your 3D printer extruder using several methods including cold pulls, disassembly for manual cleaning, acetone soaks, or specialized cleaning filaments that’ll remove clogs and debris effectively.
What Is the Best Filament for a Cold Pull?
You’ll get best results using transparent PETG for cold pulls since it effectively clears clogs. Nylon’s also excellent due to its higher melting point. Avoid PLA – it’s less effective at removing debris.
Should I Remove 3d Printer Nozzle Hot or Cold?
You should remove your 3D printer nozzle when it’s hot. The heat prevents filament from solidifying in the threads, making removal easier and reducing the risk of damaging your hotend or nozzle.


Leave a Reply