You’re looking to boost your 3D printer’s control panel with a modern touchscreen, but the market’s flooded with options that differ in size, power draw, and firmware compatibility. From 5‑inch HD kits that snap onto an Ender 3 to 7‑inch capacitive screens that demand a dedicated board, each upgrade brings its own trade‑offs in mounting, wiring, and software integration. The right choice can cut print‑setup time and improve reliability, yet picking it isn’t as simple as matching dimensions. Let’s explore the seven top contenders and the key factors that will determine which one fits your printer best.
| BIGTREETECH Panda Touch Upgrade Kit for Multi‑Printer Management | 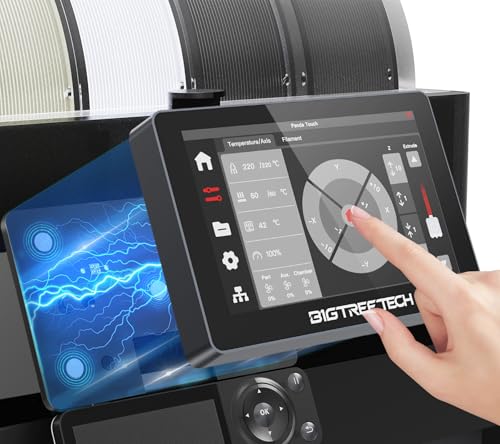 | Multi‑Printer Master | Screen Size: 5 inches | Touch Type: Capacitive (plug‑and‑play) | Resolution: 800 × 480 (5‑inch) | CHECK ON AMAZON | Read Our Analysis |
| BIGTREETECH SKR Mini E3 V3.0 Board + TFT35 Touch Display | 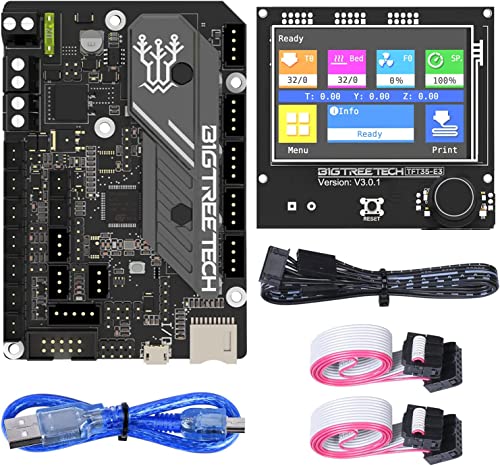 | Silent Upgrade | Screen Size: 3.5 inches (TFT35) | Touch Type: Capacitive (TFT35) | Resolution: 480 × 320 (TFT35) | CHECK ON AMAZON | Read Our Analysis |
| Creality Original Upgrade Ender 3 V2 Intelligent HD Screen Kit |  | HD Upgrade | Screen Size: 4.3 inches (HD screen) | Touch Type: Capacitive (HD) | Resolution: 240 × 240 (HD) | CHECK ON AMAZON | Read Our Analysis |
| Creality 5″ HD Touch Screen for Ender & FDM Printers |  | Fun Interface | Screen Size: 5 inches | Touch Type: Capacitive (HD) | Resolution: 854 × 480 (HD) | CHECK ON AMAZON | Read Our Analysis |
| BIGTREETECH PI TFT70 7″ Capacitive Touch Screen |  | Raspberry Pi Pro | Screen Size: 7 inches | Touch Type: Capacitive (5‑point) | Resolution: 800 × 480 | CHECK ON AMAZON | Read Our Analysis |
| Makerbase Mks Robin Nano 3.1 3D Printer Motherboard |  | All‑In‑One Board | Screen Size: 3.5 inches (LCD) | Touch Type: Capacitive (3D Touch) | Resolution: 240 × 240 (LCD) | CHECK ON AMAZON | Read Our Analysis |
| Ender 3 LCD Display Screen with Knobs and Ribbon Cable |  | Simple Replacement | Screen Size: 3.5 inches (LCD) | Touch Type: Capacitive (LCD with knobs) | Resolution: 240 × 240 (LCD) | CHECK ON AMAZON | Read Our Analysis |
More Details on Our Top Picks
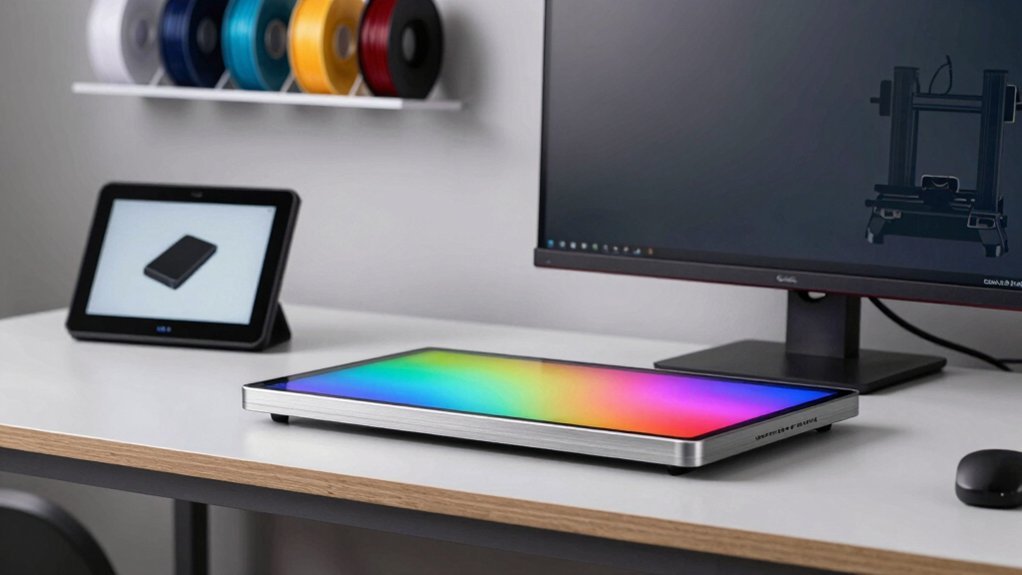
BIGTREETECH Panda Touch Upgrade Kit for Multi‑Printer Management
Looking to streamline several Bambu‑Lab machines from a single console? The BIGTREETECH Panda Touch Upgrade Kit gives you a 5‑inch plug‑and‑play touchscreen that mirrors the X1C UI, fitting P1P, P1S, X1C, X1E, A1 and A1 Mini. Install in two steps—base then wiring—and choose between battery power or a magnetic charging dock. From the Touch you control prints, tweak parameters, toggle LEDs, and manage Wi‑Fi across up to ten printers, each with four AMS units and sixteen filament slots. Adjust temperatures, switch colors, and monitor status centrally. Firmware updates may affect functionality, so stay alert; warranty excludes loss caused by such changes.
- Screen Size:5 inches
- Touch Type:Capacitive (plug‑and‑play)
- Resolution:800 × 480 (5‑inch)
- Power Source:Internal battery / magnetic dock
- Firmware Compatibility:Bambu‑Lab firmware (specific versions)
- Multi‑Printer / Management Capability:Centralized control of up to 10 printers & AMS units
- Additional Feature:Dual power modes
- Additional Feature:Built‑in lithium battery
- Additional Feature:AMS management for 10 printers
BIGTREETECH SKR Mini E3 V3.0 Board + TFT35 Touch Display
If you want a plug‑and‑play upgrade that instantly silences your Ender‑series printer while adding a responsive 3.5‑inch touchscreen, the BIGTREETECH SKR Mini E3 V3.0 board paired with the TFT35 E3 V3.0.1 display is the clear choice. You’ll benefit from a 32‑bit silent MCU, TMC2209 UART drivers, and dual‑Z support for rail or belt upgrades. The board handles filament runout, UPS shutdown, power‑off resume, and sensorless homing, while the TFT35 offers Marlin LCD emulation, touch control, and a selector wheel for mode switching. Upgraded heatsink and three PWM fans keep temperatures low, and the design fits Ender 3, 3 Pro, 5, and V2 models without wiring changes.
- Screen Size:3.5 inches (TFT35)
- Touch Type:Capacitive (TFT35)
- Resolution:480 × 320 (TFT35)
- Power Source:Board power (5 V/12 V)
- Firmware Compatibility:Marlin / Klipper (Ender series)
- Multi‑Printer / Management Capability:Single‑printer control (Ender series)
- Additional Feature:3 PWM‑controlled fans
- Additional Feature:Sensorless homing support
- Additional Feature:Dual‑Z stepper upgrade
Creality Original Upgrade Ender 3 V2 Intelligent HD Screen Kit
Need seeking a crisp, high‑resolution interface for your Ender‑3 V2, the Creality Original Upgrade Intelligent HD Screen Kit delivers a 24‑bit color display and JPEG storage, letting you navigate prints and view models without lag. You’ll mount the kit directly on the printer base, tilting the screen for a wide view and easy operation. It works out‑of‑the‑box with the Ender‑3 V2 and, after flashing the appropriate firmware, can upgrade an Ender 3 or Ender 3 Pro. The UI is English by default, but you can switch languages in two clicks without reinstalling firmware. Ample storage lets you keep reference images on‑board, and the 32‑bit board compatibility ensures smooth, responsive control.
- Screen Size:4.3 inches (HD screen)
- Touch Type:Capacitive (HD)
- Resolution:240 × 240 (HD)
- Power Source:Board power (5 V)
- Firmware Compatibility:Ender 3 V2 firmware (32‑bit)
- Multi‑Printer / Management Capability:Single‑printer control (Ender 3 V2)
- Additional Feature:24‑bit color display
- Additional Feature:JPEG picture storage
- Additional Feature:Two‑click language switch
Creality 5″ HD Touch Screen for Ender & FDM Printers
The Creality 5‑inch HD touch screen instantly upgrades any Ender or FDM printer with a crisp 854 × 480 display and responsive multi‑touch, making it the top pick for hobbyists who want a vivid, plug‑and‑play interface. You’ll love the animal‑texture skin that adds personality, while the built‑in Creality Cloud library lets you preview G‑code and print cute 3D pets with a single click. Installation is a breeze: the magnetic console‑base snaps on, and removal is equally simple. It supports 11+ languages, power‑failure resume, filament‑run‑out detection, and works with any Marlin‑based printer, from Ender 3 to CR‑10.
- Screen Size:5 inches
- Touch Type:Capacitive (HD)
- Resolution:854 × 480 (HD)
- Power Source:Board power (5 V)
- Firmware Compatibility:Marlin firmware (any FDM)
- Multi‑Printer / Management Capability:Single‑printer control (any FDM)
- Additional Feature:Animal texture skin effect
- Additional Feature:One‑click pet printing
- Additional Feature:Built‑in Creality Cloud library
BIGTREETECH PI TFT70 7″ Capacitive Touch Screen
Looking for a crisp, responsive interface that plugs straight into your Raspberry Pi‑based printer controller? The BIGTREETECH PI TFT70 gives you a 7‑inch capacitive display at 800 × 480, with five‑point touch and a 165 × 100 mm viewable area. You mount it securely with onboard studs and posts, adjust backlight via a rotary encoder, and connect through an FPC cable to the Pi’s DSI port. Running KlipperScreen on a Raspberry Pi 4B delivers smooth control for Klipper‑enabled printers. The metal‑plastic housing weighs 0.35 kg, runs on 3.3 V, and fits within a compact 6.5 × 3.94 × 3.39 cm footprint.
- Screen Size:7 inches
- Touch Type:Capacitive (5‑point)
- Resolution:800 × 480
- Power Source:Raspberry Pi 3.3 V DSI
- Firmware Compatibility:KlipperScreen (Raspberry Pi)
- Multi‑Printer / Management Capability:Single‑printer control via Raspberry Pi
- Additional Feature:Adjustable backlight via rotary encoder
- Additional Feature:Metal‑plastic hybrid mounting frame
- Additional Feature:5‑point capacitive touch
Makerbase Mks Robin Nano 3.1 3D Printer Motherboard
If you want a compact, high‑performance control board that instantly upgrades your printer’s interface, the Makerbase Mks Robin Nano V3.1 Eagle delivers a 32‑bit processor, built‑in Wi‑Fi, and a responsive 3D touch screen—all in a lightweight, plastic chassis. Its TMC2209 drivers keep motors quiet while preserving precision, and the 32‑bit architecture handles G‑code swiftly. You’ll appreciate the integrated Wi‑Fi for remote monitoring and the 3‑D touch display for real‑time management. The board supports multiple stepper motors, heated beds, sensors, and automatic bed‑leveling, fitting many printer models. We, it weighs 8 oz, measures 6 × 4 × 2 in, and comes with a three‑year warranty.
- Screen Size:3.5 inches (LCD)
- Touch Type:Capacitive (3D Touch)
- Resolution:240 × 240 (LCD)
- Power Source:Board power (12 V)
- Firmware Compatibility:Marlin / Klipper (MKS Robin)
- Multi‑Printer / Management Capability:Single‑printer control (MKS Robin)
- Additional Feature:Integrated Wi‑Fi connectivity
- Additional Feature:3‑D touch screen for bed leveling
- Additional Feature:3‑year warranty
Ender 3 LCD Display Screen with Knobs and Ribbon Cable
Need a reliable way to bring your Ender 3 back to full functionality? The Zyyini LCD display board with knobs and ribbon cable fits your Ender 3 or Ender 3 PRO perfectly. Its large, clear LCD lets you read menus at a glance, while the sturdy PCB resists deformation under long‑term use. Installation is straightforward: swap the old board, attach the supplied ribbon cable, and tighten the knobs. The compact, lightweight design doesn’t add bulk, and the blue accents match the printer’s aesthetic. This kit restores full control without extra accessories, giving you a durable, easy‑to‑use interface for reliable printing.
- Screen Size:3.5 inches (LCD)
- Touch Type:Capacitive (LCD with knobs)
- Resolution:240 × 240 (LCD)
- Power Source:Board power (5 V)
- Firmware Compatibility:Marlin (Ender 3 LCD)
- Multi‑Printer / Management Capability:Single‑printer control (Ender 3)
- Additional Feature:Includes ergonomic rotary knobs
- Additional Feature:Ribbon cable for easy wiring
- Additional Feature:Compact, lightweight PCB design
Factors to Consider When Choosing Touchscreen Display Upgrades for 3D Printer Control Panels
You should first compare screen size and resolution to guarantee the display fits your workspace and shows details clearly. Next, check the touch technology, interface compatibility, firmware support, and power requirements so the upgrade integrates smoothly with your printer. Finally, consider how easy the mounting and installation are to avoid lengthy modifications.
Screen Size & Resolution
What size and resolution will give you the clearest, most usable interface on your 3D printer? You’ll want a display that balances glance‑ability with detail. A 5‑inch panel at 800 × 480 px often feels spacious enough for multi‑column menus, while a 7‑inch screen at 1024 × 600 px lets you see richer status graphs without squinting. Higher pixel density sharpens text and icons, cutting eye strain during long prints. Check that the native resolution matches the printer’s firmware aspect ratio to avoid scaling artifacts. Larger screens also provide bigger touch targets, reducing accidental taps when you’re wearing gloves or using a stylus. Choose a size that fits your enclosure while delivering a crisp, readable UI.
Touch Technology Type
While you’re weighing upgrades, the dominant touch technology—capacitive versus resistive—sets the tone for responsiveness, durability, and usability on your 3D printer’s control panel. Capacitive screens, especially projected‑capacitive (PCAP), register finger movement instantly, support multi‑touch gestures, and deliver crisp visuals that stay readable in low‑light enclosures. They’re ideal if you want fluid navigation and quick tool‑path adjustments. Resistive panels, by contrast, need pressure, so they’re slower and limited to single‑touch, but they excel in dusty or oily environments where filament particles can interfere with a capacitive surface. Their rugged glass‑or‑plastic layers resist scratches and grime, making them a solid choice for harsh workshop conditions. Weighing speed against durability, plus how your enclosure lighting affects contrast, will guide you to the right touch tech for your printer.
Interface Compatibility & Firmware
Choosing the right touchscreen isn’t just about touch tech; it also hinges on how well the display talks to your printer’s firmware and hardware. First, verify the upgrade’s firmware version range matches your mainboard’s firmware to avoid losing features. Check that the screen supports your control protocol—Marlin, Klipper, or another—and note any required mode switches for full functionality. Look for a plug‑and‑play interface that fits your printer family, minimizing wiring conflicts. Be aware of firmware‑update risks, such as losing Panda Touch features, and see whether the vendor provides alerts or guidance. Finally, confirm the display’s memory, processor, and driver support—whether it’s STM32, TMC integration, or dual‑Z compatibility—align with your 32‑ or 8‑bit controller architecture. This ensures seamless integration and reliable performance.
Power Supply Options
If you want a touchscreen that stays responsive even when the printer’s main supply dips, check how the display draws power. Look for units with built‑in batteries or dual‑mode power that can switch to an internal cell when the 24 V/12 V line falters. A display that runs solely off the printer’s supply risks voltage drops during heavy printing, causing lag or resets. External docks or dedicated PSUs can isolate the touchscreen, preventing overheating and ensuring stable voltage. Battery‑backed or wireless‑powered models keep the UI alive during brief outages, but you’ll need to monitor battery health and replace cells periodically. Always match the display’s voltage and current specs to your printer’s capabilities to avoid under‑powering or overloading the system.
Mounting & Installation Ease
Ever wondered how a hassle‑free install can keep you printing instead of troubleshooting? Look for a plug‑and‑play touchscreen that comes with a simple base mount and minimal wiring. If the kit includes a pre‑wired harness or dedicated connectors, you’ll skip custom soldering and get up and running in minutes. Choose a model that mates with your printer’s frame—magnetic docks or fixed bases prevent wobble and keep the display steady during long jobs. Check that the screen’s dimensions fit inside your enclosure or open frame without hitting moving parts. Finally, consider a tilting or rotating hinge; it lets you adjust the viewing angle for comfort, reducing strain during marathon prints.
Durability & Build Quality
What makes a touchscreen upgrade truly resilient is the combination of sturdy materials and thoughtful engineering. You’ll want a panel built with a reinforced LCD hinge, a rigid bezel thread, and rugged connectors that stay tight despite frequent taps and printer vibrations. Look for integrated heatsinks and low‑heat components that keep the display cool, reducing thermal stress on both screen and controller. Protective features such as anti‑glare coatings and sealed enclosures guard against dust, splashes, and minor spills. Multiple mounting options and secure cable interfaces prevent wobble and loose connections, while efficient power management further extends lifespan. Choosing a unit that blends these details ensures your 3D printer’s control panel stays reliable for years.
Frequently Asked Questions
How Does Ambient Temperature Affect Touchscreen Responsiveness?
You’ll notice slower response when ambient temperature drops because the capacitive sensor’s conductivity declines, and higher heat can cause drift or false touches. Keep the panel within its specified range for optimum performance.
Can Touchscreen Upgrades Be Powered via Usb‑C Instead of the Main Board?
Yes, you can power touchscreen upgrades through USB‑C as long as the panel’s voltage and current draw match the port’s specifications, and you’ll need a reliable PD‑compatible cable to avoid power fluctuations.
What Firmware Settings Are Required for Multi‑Color Backlighting Control?
You’ll need to enable the RGB PWM module in your firmware, map each backlight channel to a separate PWM pin, set the color‑order flag, and define a lighting profile in the config file.
Is It Possible to Calibrate Touch Pressure Sensitivity After Installation?
Yes, you can calibrate touch pressure sensitivity after installation by accessing the panel’s settings menu, selecting “Calibration,” following the on‑screen prompts, and saving the new pressure thresholds.
Do Capacitive Screens Support Stylus Input for Precise Menu Navigation?
Yes, most capacitive screens accept active styluses, letting you tap menus with pinpoint accuracy. You’ll get smoother navigation, but ensure the stylus is compatible with the panel’s resolution and firmware.
Leave a Reply