You’re probably already juggling print quality, noise, and fumes, and a solid enclosure can solve all three without breaking the bank. The 2026 lineup offers kits that snap together, feature LED lighting, adjustable vents, and even carbon filters for resin odors—all while staying under budget. Each model promises six‑sided protection and easy temperature monitoring, but the real question is which one fits your printer’s size and your workflow best. Let’s compare the specs and see which kit earns a spot on your workbench.
| Multifunctional 3D Printer Enclosure with Adjustable Ventilation Kit |  | Best Overall | Compatibility: Any LCD/Resin 3D printer (e.g., Anycubic Photon Mono, Elegoo Saturn/Mars, Creality Halot) | Ventilation / Filtration: 12 V fan filter system, three‑layer filtration, optional stainless steel pipe | Lighting: No LED lighting mentioned | CHECK ON AMAZON | Read Our Analysis |
| 3D Printer Enclosure with LED Light & Exhaust Kit |  | Best Value | Compatibility: Bambu Lab A1 & A1 Mini | Ventilation / Filtration: High‑efficiency fan up to 4000 RPM, three‑layer composite pipe | Lighting: Integrated LED light strip, soft white diffuse illumination | CHECK ON AMAZON | Read Our Analysis |
| SKOUPHY Double Space Resin 3D Enclosure with Ventilation Kit LED Light | 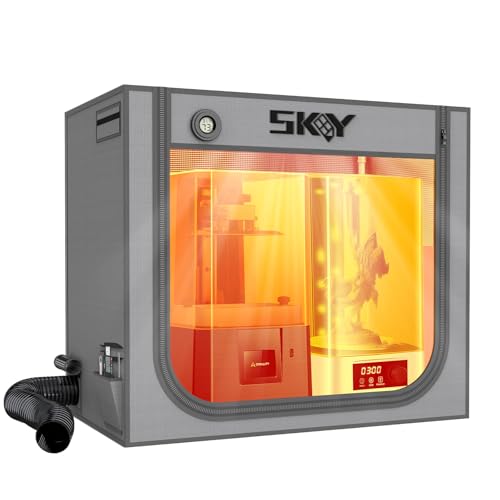 | Budget-Friendly Pick | Compatibility: LCD Resin printers & curing boxes (large space) | Ventilation / Filtration: Exhaust fan up to 4500 RPM, activated carbon box, three‑layer pipe | Lighting: Upgraded LED light, soft white diffuse illumination | CHECK ON AMAZON | Read Our Analysis |
| 3D Printer Enclosure with LED Light for Thermo‑Hygrometer (Creality Ender 3) |  | Editor’s Choice | Compatibility: Creality Ender 3 series and similar footprint printers | Ventilation / Filtration: No built‑in fan; relies on enclosure sealing | Lighting: Built‑in LED light strip | CHECK ON AMAZON | Read Our Analysis |
| Immdinogo 3D Printer Enclosure Kit for Flashforge AD5X Noise Reduction |  | Most Popular | Compatibility: Flashforge AD5X | Ventilation / Filtration: DIY design; ventilation not included, can add fan | Lighting: No LED lighting mentioned | CHECK ON AMAZON | Read Our Analysis |
| Flashforge Enclosure Kit for AD5X with Plates & Screws |  | Best For Beginners | Compatibility: Flashforge AD5X | Ventilation / Filtration: DIY design; ventilation not included, can add fan | Lighting: No LED lighting mentioned | CHECK ON AMAZON | Read Our Analysis |
| DELACK 3D Printer Enclosure Kit with LED Light |  | Professional Grade | Compatibility: Bambu Lab A1 Mini, Prusa MK4/Mini, IKEA LACK table | Ventilation / Filtration: No built‑in fan; optional ventilation possible | Lighting: LED light with 5 V power brick | CHECK ON AMAZON | Read Our Analysis |
| VEVOR 3D Printer Enclosure with LED Lighting |  | Most Versatile | Compatibility: Creality, ELEGOO, Anycubic, many popular FDM models | Ventilation / Filtration: Optional ventilation holes for fan installation (fan not included) | Lighting: LED lighting for clear visibility | CHECK ON AMAZON | Read Our Analysis |
| 3D Printer Enclosure with LED Light Fireproof Dustproof Temperature Controlled |  | Best Durability | Compatibility: Ender 3 Max Neo, Ender 3 S1 Plus, Ender 5 Pro/Plus, Neptune 4 Plus, CR‑10 series, ELEGOO Neptune series | Ventilation / Filtration: No built‑in fan; optional ventilation possible | Lighting: Built‑in LED light strip | CHECK ON AMAZON | Read Our Analysis |
| 3D Printer Enclosure with Ventilation Kit (800×1000×1200mm) |  | Best Heavy-Duty | Compatibility: Large FDM printers (CR‑10 series, Kobra Max, Neptune 3 Max, Artisan) and small FDM/resin printers | Ventilation / Filtration: Two exhaust ports for optional 4‑inch ventilation kit (kit sold separately) | Lighting: Lighting bar included | CHECK ON AMAZON | Read Our Analysis |
| Multifunctional Resin 3D Printer Enclosure with Ventilation Filter |  | Best for Resin | Compatibility: ELEGOO Photon Mono / Saturn / Mars / Halot Series LCD SLA/DLP printers | Ventilation / Filtration: Exhaust fans and expandable pipes, carbon filter sheet | Lighting: No LED lighting mentioned | CHECK ON AMAZON | Read Our Analysis |
More Details on Our Top Picks
Multifunctional 3D Printer Enclosure with Adjustable Ventilation Kit
Looking for a budget‑friendly enclosure that actually tames fumes while keeping an eye on your prints? You’ll fit the DORUNDEA multifunctional 3D printer enclosure with an adjustable ventilation kit. It fits most LCD/resin models—Anycubic Photon Mono, Elegoo Saturn/Mars 3/4, Creality Halot Series—so measure your printer before ordering. The UV‑blocking window lets you monitor jobs without harmful exposure, while fire‑resistant fabric adds safety. A 12 V fan with speed control and three‑layer filtration pulls smoke and gases away. The kit includes a stainless‑steel‑upgraded frame, power adapter (100‑240 V → 3‑12 V 2 A), and optional steel pipe upgrade. No printer is bundled; you get a ready‑to‑assemble, odor‑controlling housing.
- Compatibility:Any LCD/Resin 3D printer (e.g., Anycubic Photon Mono, Elegoo Saturn/Mars, Creality Halot)
- Ventilation / Filtration:12 V fan filter system, three‑layer filtration, optional stainless steel pipe
- Lighting:No LED lighting mentioned
- Temperature Control:No active temperature control; relies on enclosure insulation
- Material / Build:Fire‑resistant fabric, stainless steel pipe frame
- DIY / Assembly:Pre‑assembled enclosure kit (no printer included)
- Additional Feature:UV-blocking window
- Additional Feature:Fire‑resistant fabric
- Additional Feature:Stainless‑steel pipe upgrade
3D Printer Enclosure with LED Light & Exhaust Kit
If you want a compact, affordable way to keep your 3D prints dust‑free while maintaining optimal temperature and humidity, the D Printer Enclosure with LED Light & Exhaust Kit is the perfect match. Its high‑efficiency fan spins up to 4,000 RPM, pulling odors and particles out of the build area, while a three‑layer composite pipe traps smoke and dust on the walls. Integrated temperature and humidity sensors keep conditions steady, boosting first‑layer adhesion and cutting PLA edge curling. Soft‑white LED lights brighten the interior for easy camera monitoring, and the openable side window lets you service the printer quickly. The sturdy iron frame supports Bambu Lab A1 and A1 Mini units, measuring 840 × 580 × 580 mm.
- Compatibility:Bambu Lab A1 & A1 Mini
- Ventilation / Filtration:High‑efficiency fan up to 4000 RPM, three‑layer composite pipe
- Lighting:Integrated LED light strip, soft white diffuse illumination
- Temperature Control:Temperature & humidity sensor, maintains constant temperature
- Material / Build:Iron frame, multi‑window design
- DIY / Assembly:Kit ready to assemble, no DIY printing required
- Additional Feature:Openable side perspective window
- Additional Feature:High‑efficiency 4000 RPM fan
- Additional Feature:Three‑layer composite pipe
SKOUPHY Double Space Resin 3D Enclosure with Ventilation Kit LED Light
Need you need a spacious, odor‑free workspace for a resin printer, the SKOUPHY Double Space Enclosure with Ventilation Kit and LED Light delivers exactly that. Its 31.5 × 18.1 × 28.3‑inch interior fits most LCD UV printers and curing boxes, but double‑check dimensions first. The 4,500 RPM exhaust fan, paired with an activated‑carbon filter, scrubs volatile fumes, while the LED panel casts soft, uniform white light for clear monitoring. A built‑in thermo‑hygrometer lets you toggle Fahrenheit or Celsius, keeping temperature steady for accurate prints. The iron frame and double‑layer aluminum‑Oxford cloth cover are waterproof, dust‑proof, and noise‑reducing, ensuring a safe, quiet, efficient workflow.
- Compatibility:LCD Resin printers & curing boxes (large space)
- Ventilation / Filtration:Exhaust fan up to 4500 RPM, activated carbon box, three‑layer pipe
- Lighting:Upgraded LED light, soft white diffuse illumination
- Temperature Control:Thermo‑hygrometer (F/C switch) for constant temperature monitoring
- Material / Build:Iron frame, double‑layer aluminum mold Oxford cloth bonding
- DIY / Assembly:Kit ready to assemble, no DIY printing required
- Additional Feature:Double‑layer aluminum mold
- Additional Feature:Activated‑carbon odor box
- Additional Feature:Thermo‑hygrometer switchable
3D Printer Enclosure with LED Light for Thermo‑Hygrometer (Creality Ender 3)
You’ll love the built‑in LED strip paired with a real‑time thermo‑hygrometer because it gives you instant visibility and precise environmental data, keeping your Creality Ender 3 prints consistent and high‑quality. The six‑sided enclosure brightens the workspace, blocks printer noise, and seals dust while fire‑proof panels protect against hazards. Real‑time temperature and humidity readings let you fine‑tune conditions, reducing clogs, jams, and material waste. Its sturdy frame minimizes vibrations, boosting precision and longevity. You can snap it together in five minutes, disassemble for moves, and reuse indefinitely. It fits any printer within a 29.5×25.6×21.6 cm footprint, covering all Ender 3 variants and similar models.
- Compatibility:Creality Ender 3 series and similar footprint printers
- Ventilation / Filtration:No built‑in fan; relies on enclosure sealing
- Lighting:Built‑in LED light strip
- Temperature Control:Real‑time temperature & humidity readings; constant temperature environment
- Material / Build:Fire‑proof material, six‑sided cover
- DIY / Assembly:Quick 5‑minute installation, reusable
- Additional Feature:Six‑sided noise block
- Additional Feature:Quick‑release assembly
- Additional Feature:Pet‑proof lockout design
Immdinogo 3D Printer Enclosure Kit for Flashforge AD5X
Noise Reduction
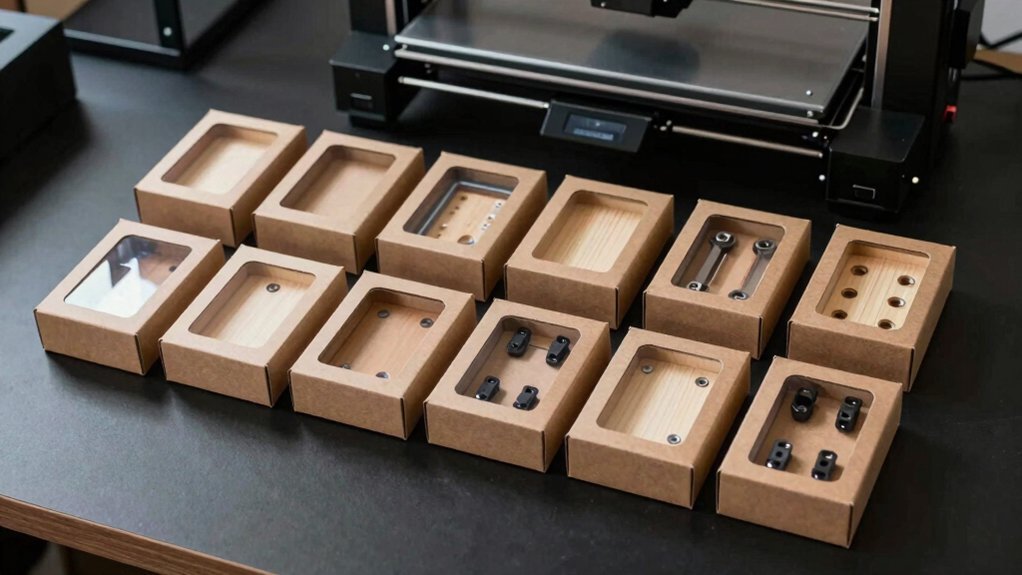
Looking for a quiet, odor‑controlled workspace for your Flashforge AD5X? The Immdinogo enclosure kit lets you build a sealed, temperature‑stable box that drowns fan and motor noise while filtering smells. You’ll print the PETG parts from the STL files, then assemble the top cover, front door, side plates, and perforated top side plate using the supplied screws, magnets, and hex nuts. The design shields the printer from dust and impacts, prolonging its life. Stable heat retention lets you tackle high‑temperature filaments like ABS or ASA without warping. Expect a few days of printing and patience, but the result is a quieter, cleaner, and more reliable printing environment.
- Compatibility:Flashforge AD5X
- Ventilation / Filtration:DIY design; ventilation not included, can add fan
- Lighting:No LED lighting mentioned
- Temperature Control:Constant temperature design (DIY enclosure)
- Material / Build:PETG‑printed parts, metal hardware, magnets
- DIY / Assembly:Unassembled DIY kit; requires STL download and 3D printing of parts
- Additional Feature:DIY PETG‑printed parts
- Additional Feature:Rounded neodymium magnets
- Additional Feature:Impact‑resistance shielding
Flashforge Enclosure Kit for AD5X with Plates & Screws
If you’re a hobbyist who wants to print ABS, ASA, or PC on a Flashforge AD5X without breaking the bank, the Flashforge Enclosure Kit with plates and screws is the perfect upgrade. This DIY set adds sturdy plates and all necessary screws, letting you seal the printer in minutes. With the enclosure closed, you’ll notice lower noise and a safer environment for pets, while temperature stability unlocks higher‑temperature filaments like ABS, ASA, and PC. The kit comes with clear, precise instructions and an online guide, so you can customize the build without hassle. Enjoy reliable, quieter prints and expanded material options on a budget.
- Compatibility:Flashforge AD5X
- Ventilation / Filtration:DIY design; ventilation not included, can add fan
- Lighting:No LED lighting mentioned
- Temperature Control:Constant temperature design (DIY enclosure)
- Material / Build:Metal plates & screws, DIY assembly
- DIY / Assembly:DIY enclosure kit with plates and screws; assembly required
- Additional Feature:ABS/ASA/PC enabled
- Additional Feature:Low‑noise door seal
- Additional Feature:Customizable plate layout
DELACK 3D Printer Enclosure Kit with LED Light
For hobbyists who want a compact, desk‑friendly enclosure without sacrificing illumination, the DELACK 3D Printer Enclosure Kit with LED Light delivers a perfect fit for the Bambu Lab A1 Mini and Prusa Mini models. Its 550 × 486 × 450 mm frame slides flush against an IKEA LACK table, saving desk space while keeping the printer stable. You’ll appreciate the built‑in filament tank that catches waste during swaps, and the 5 V LED with a power brick brightens night‑time prints. The kit supports Bambu A1 Mini, Prusa MK4, Mini, and MK3, but printed parts aren’t included—just 20+ accessory prints. We 8.5 lb, it’s sturdy yet portable.
- Compatibility:Bambu Lab A1 Mini, Prusa MK4/Mini, IKEA LACK table
- Ventilation / Filtration:No built‑in fan; optional ventilation possible
- Lighting:LED light with 5 V power brick
- Temperature Control:No active temperature control; relies on enclosure insulation
- Material / Build:IKEA LACK‑compatible metal frame, LED power brick
- DIY / Assembly:Parts printed separately; assembly required
- Additional Feature:IKEA LACK table fit
- Additional Feature:Filament waste tank
- Additional Feature:Compact 5 V LED driver
VEVOR 3D Printer Enclosure with LED Lighting
The VEVOR 3D Printer Enclosure with LED lighting is ideal for hobbyists who need a sturdy, dust‑proof shell that keeps temperature steady while letting them watch each layer in real time. Its Oxford cloth tent shields against dust and moisture, while flame‑retardant frames hold the enclosure firm. At 21.6 × 25.6 × 29.5 inches, it fits Ender 3 series, Anycubic, Elegoo, and similar models, and the built‑in LEDs illuminate prints for easy monitoring. Constant temperature reduces warping, clogging, and material waste, and the closed design cuts noise. You can add optional ventilation holes for fans, keeping smoke and dust away from the workspace.
- Compatibility:Creality, ELEGOO, Anycubic, many popular FDM models
- Ventilation / Filtration:Optional ventilation holes for fan installation (fan not included)
- Lighting:LED lighting for clear visibility
- Temperature Control:Constant temperature protective case (passive)
- Material / Build:Oxford cloth tent, flame‑retardant material
- DIY / Assembly:Ready‑to‑assemble enclosure, no DIY printing
- Additional Feature:Flame‑retardant Oxford cloth
- Additional Feature:Left‑side ventilation holes
- Additional Feature:Waterproof fabric tent
3D Printer Enclosure with LED Light Fireproof Dustproof Temperature Controlled
A fire‑proof, dust‑proof enclosure with built‑in LED lighting and temperature control is perfect for anyone wants wants reliable, high‑quality prints without constantly tweaking settings. You’ll appreciate the six‑sided design that isolates noise and stabilizes temperature, keeping your Ender 3 series, CR‑10, or Neptune models at a steady °C. The bright LED strip lets you spot filament jams or layer shifts in low light, while fire‑resistant panels protect kids and pets. Installation takes five minutes, and the lightweight frame (4.4 lb) disassembles for moves. Its robust construction minimizes vibrations, delivering consistent, fast prints without dust‑induced defects.
- Compatibility:Ender 3 Max Neo, Ender 3 S1 Plus, Ender 5 Pro/Plus, Neptune 4 Plus, CR‑10 series, ELEGOO Neptune series
- Ventilation / Filtration:No built‑in fan; optional ventilation possible
- Lighting:Built‑in LED light strip
- Temperature Control:Constant temperature environment (passive)
- Material / Build:Fire‑proof, dust‑proof tent material
- DIY / Assembly:Quick 5‑minute installation, reusable
- Additional Feature:Six‑sided noise isolation
- Additional Feature:5‑minute quick install
- Additional Feature:Child‑pet safety lock
3D Printer Enclosure with Ventilation Kit (800×1000×1200mm)
Need a spacious, airtight enclosure that can hold a large‑format printer and still fit on a standard workbench? This 800 × 1000 × 1200 mm kit gives you a waterproof fabric box with dual‑side openings—front for big machines like the CR‑10S5, side for two to four smaller FDM, resin, or wash‑and‑cure units. Airtight zippers and sealing solution keep dust and moisture out, while two 4‑inch exhaust ports (ventilation kit sold separately) purge fumes fast. A dark‑transparent window with UV filter lets you watch prints without premature resin curing. Installation takes 15‑20 minutes with help, and the thick walls cut noise and stabilize temperature for better print quality.
- Compatibility:Large FDM printers (CR‑10 series, Kobra Max, Neptune 3 Max, Artisan) and small FDM/resin printers
- Ventilation / Filtration:Two exhaust ports for optional 4‑inch ventilation kit (kit sold separately)
- Lighting:Lighting bar included
- Temperature Control:Warm ambient layer for stable temperature (passive)
- Material / Build:Waterproof fabric, airtight zippers, thick enclosure
- DIY / Assembly:Assembly takes 15‑20 minutes, may need assistance
- Additional Feature:Dual‑side opening design
- Additional Feature:Dark‑transparent viewing window
- Additional Feature:Thick noise‑reduction walls
Multifunctional Resin 3D Printer Enclosure with Ventilation Filter
Looking for a budget‑friendly way to keep resin fumes at bay while you print? This multifunctional enclosure wraps your printer in a six‑sided shell, shielding dust and splashes while a carbon‑filter sheet scrubs odors. Exhaust fans and expandable pipes vent polluted gases, so fresh air stays in the room. A high‑toughness PVC window lets you watch layers form without opening the cover, preventing fumes from escaping. Insulated walls keep temperature steady, improving resin flow and print precision. It fits ELEGOO Photon Mono, Saturn, Mars, and Halot series, measuring 28 × 18 × 17 in, with smaller models also compatible.
- Compatibility:ELEGOO Photon Mono / Saturn / Mars / Halot Series LCD SLA/DLP printers
- Ventilation / Filtration:Exhaust fans and expandable pipes, carbon filter sheet
- Lighting:No LED lighting mentioned
- Temperature Control:Internal heat insulation for relatively constant temperature
- Material / Build:PVC front window, six‑sided fully enclosed structure
- DIY / Assembly:Assembly required; includes carbon filter sheet and exhaust fan setup
- Additional Feature:PVC front window
- Additional Feature:Six‑sided full enclosure
- Additional Feature:Internal heat insulation layer
Factors to Consider When Choosing DIY Enclosure Kits for Budget-Friendly Printer Housing
When you pick a DIY enclosure, start by checking its compatibility with your printer’s dimensions and mounting points. Make sure the ventilation system can efficiently exchange air while keeping temperature fluctuations minimal. Also, consider how well the design muffles noise and integrates a filtration unit to trap particles.
Compatibility Checklist
What should you verify before committing to a DIY enclosure kit? First, match the kit’s listed dimensions to your printer’s W × D × H footprint and mounting allowances; a 29.5 × 25.6 × 21.6‑inch enclosure must comfortably house your machine and any accessories. Check whether the design is fully six‑sided or only partial, because that determines dust and noise control. Confirm the kit specifies a ventilation or filtration system with RPM ratings or multi‑layer filters if you need odor and particle mitigation. Look for clear notes on resin versus FDM compatibility, and note any required adjustments to printer height, footprint, or opening configurations. Finally, ensure the enclosure’s dimensional range (e.g., 800 × 1000 × 1200 mm) provides enough internal space for your printer and any curing equipment.
Ventilation Efficiency
A well‑designed ventilation system can dramatically curb odors, smoke, and dust, keeping your workspace safe and comfortable. Choose a kit that includes an adjustable or high‑speed exhaust fan—4000–4500 RPM is ideal—so you can quickly pull fumes out of the enclosure. Look for three‑layer or multi‑layer filters; they trap large particles and volatile gases before the air returns to the room. Opt for composite or stainless ventilation pipes, which resist odor and dust buildup on inner walls, preserving long‑term cleanliness. Make sure the kit offers external exhaust ports and can attach to side or front openings; this flexibility lets you direct airflow where it’s most effective. For larger enclosures, plan a dedicated ventilation setup, often sold separately, to maintain proper air exchange.
Temperature Stability
Ever wondered why some prints warp while others stay perfectly flat? You’ll notice that enclosures with constant‑temperature capabilities keep the bed warm, preventing warping and boosting layer adhesion. Look for a thermo‑hygrometer so you can monitor and tweak temperature in real time, minimizing fluctuations that disrupt filament flow. A sealed, six‑sided design with insulation retains heat, which is crucial for high‑temperature filaments like ABS or ASA and cuts down on clogs. Some kits add warming layers or controlled airflow to offset ambient room changes, while adjustable ventilation lets you balance odor control without sacrificing internal heat. Choose a model that lets you fine‑tune fan speed, ensuring stable temperatures for reliable, high‑quality prints.
Noise Reduction
Looking for a quieter workspace? Choose an enclosure with six‑sided walls and a sealed design; it traps vibrations and airflow, slashing printer noise. Opt for kits that use dense, fire‑ and dust‑resistant materials—these absorb fan and motor hum while keeping safety high. Modular frames with tight door seals give you noticeable noise reduction without the price tag of premium models. Quick‑install, reusable designs let you set up fast and keep the enclosure sealed, so you don’t lose the acoustic benefit during maintenance. While LED lights and observation windows don’t affect sound, they let you monitor prints without opening the door, preserving the quiet environment you’ve built.
Filtration System
What matters most in a DIY printer enclosure is how well its filtration system can keep odors, fumes, and dust at bay. You’ll want activated carbon filters that actually adsorb the volatile compounds your resin or filament emits. Look for kits that combine a three‑layer filter—carbon, HEPA, and a pre‑filter—with adjustable ventilation, letting you balance airflow against odor removal. Exhaust fans and expandable pipe sections should route pollutants outside, while tight seals around doors and seams prevent leaks. Match the filter’s capacity to your printer type: resin printers generate stronger smells and more VOCs than most FDM machines, so they need higher‑grade carbon. Finally, verify that the fan’s CFM rating can handle the enclosure’s volume without creating excess noise.
Lighting Features
When you pick a DIY printer enclosure, pay close attention to its lighting features, because good illumination not only makes the workspace easier to see but also improves print monitoring and photography. Look for kits that include LED strips or bars wired to a low‑voltage supply—5 V is common and safe to handle. Soft‑white LEDs with a diffuser reduce glare and spread light evenly, so you can spot filament jams or layer shifts without straining. Integrated LEDs also boost camera feeds and time‑lapse shots, giving clearer images for troubleshooting or sharing results. Some designs position the lamps to limit heat transfer, preserving the enclosure’s temperature stability while staying bright. Choose a lighting setup that’s easy to install, power‑efficient, and compatible with your printer’s enclosure size.
Material Durability
If you want a printer enclosure that lasts, focus on material durability. Choose kits with rigid frames—iron or stainless steel—to resist bending and stay stable under vibration. Opt for multi‑layer or reinforced panels, such as double‑layer Oxford cloth or aluminum/MDF composites, for superior wear resistance and protection against dust and splashes. Waterproof or water‑resistant coverings safeguard against humidity and accidental spills, preserving internal components. Examine joints and seals—zippers, gaskets, or sealed seams—to ensure they stay tight and keep out moisture over time. Finally, verify that fasteners and mounting hardware are corrosion‑resistant and sized for repeated assembly and disassembly, so the enclosure remains reliable year after year.
Assembly Simplicity
Ever wondered how quickly you can get a printer up and running? Look for kits that brag about a “5‑minute installation” or similar claims; those promises usually mean minimal setup. Check the box for all necessary hardware, clear step‑by‑step manuals, or printable STL files—everything should be ready to go. Kits with color‑coded parts and labels cut confusion and let you snap pieces together without guessing. Choose designs that disassemble cleanly, so you can transport or re‑use them later without hassle. Finally, prefer pre‑assembled components over those that demand multi‑day printing and assembly, because they dramatically lower the effort you’ll spend before you can start printing.
Frequently Asked Questions
Can I Customize the Enclosure Size for Larger Printer Models?
Yes, you can resize the enclosure by adjusting the frame cuts, extending the panel dimensions, and swapping out the modular brackets. Most kits include extra slotted bars and customizable panels for larger printers.
Do These Kits Support Automatic Filament Change Mechanisms?
You’ll find most kits lack built‑in automatic filament change, but you can integrate a separate feeder or upgrade with a compatible module, as long as the enclosure’s wiring and space accommodate the extra hardware.
Are the LED Lights Compatible With Different Voltage Supplies?
Yes, the LED lights work with 12 V, 24 V, and 5 V supplies; you just need the appropriate resistor or driver, and they’ll brighten your enclosure without any hassle.
How Do I Integrate a Temperature Sensor Without Voiding Warranty?
You can attach the sensor to the printer’s external port or spare‑wire it using the provided screw terminals, then secure it with zip ties; avoid opening the chassis, and keep all original seals intact.
Can the Enclosure Be Easily Disassembled for Printer Maintenance?
Yes, you’ll snap the panels apart in seconds; the clips release without tools, and the modular frame lets you pull out the printer, clean, or replace parts, then re‑lock everything effortlessly.
Leave a Reply