You’ve spent hours perfecting your 3D print design, but those layer lines and rough surfaces are keeping your project from looking truly professional. The difference between amateur and expert-level results often comes down to proper post-processing techniques and having the right smoothing tools at your disposal. Whether you’re dealing with PLA, ABS, or PETG filaments, specific equipment can transform your prints from good to exceptional—if you know which tools deliver the best results.
3D Printer Tool Kit (75 Pcs 3D Printer Accessories)
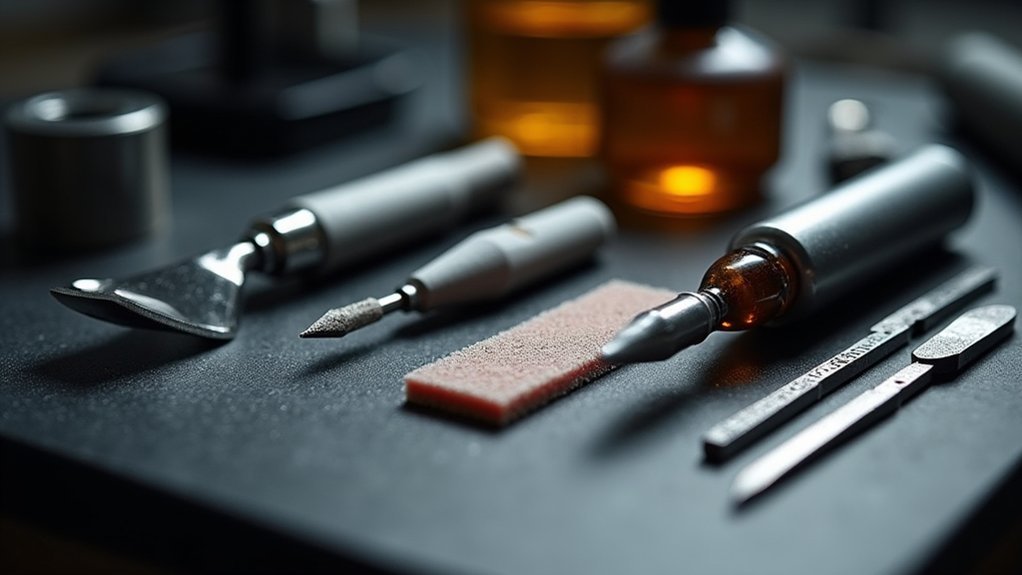
The 75-piece 3D printer tool kit transforms your post-processing workflow with its extensive collection of deburring tools, removal accessories, and precision instruments. You’ll find everything needed for finishing, cleaning, and preparing prints for display, including a tube cutter, ruler, cutting mat, and convenient storage bag. The ergonomic design reduces hand fatigue during extended use, while high-quality materials guarantee durability. You can use these versatile tools beyond 3D printing—they’re excellent for processing wood and plastic too. The organized storage keeps everything portable and accessible, making this thorough kit essential for shifting from basic to advanced finishing techniques.
Best For: 3D printing enthusiasts at any skill level who want to improve their post-processing workflow and create professional-quality finished prints.
Pros:
- Comprehensive 75-piece kit includes all essential tools for deburring, removal, cutting, and finishing with organized storage bag
- Ergonomic design reduces hand fatigue during extended use while high-quality materials ensure long-lasting durability
- Versatile functionality extends beyond 3D printing to work with wood and plastic materials for multiple applications
Cons:
- Some users have reported receiving incomplete kits with missing items or broken parts upon delivery
- Large number of tools may be overwhelming for absolute beginners who only need basic post-processing capabilities
- Storage bag organization may not keep all 75 pieces as systematically arranged as dedicated tool organizers
NovelLife 3D Printer Smoothing Finishing Tool Set
Since you’re looking for versatile finishing capabilities without investing in expensive specialized equipment, NovelLife’s 3D Printer Smoothing Finishing Tool Set transforms your existing soldering iron into a thorough post-processing station. You’ll get two heating tip adapters plus eight brass copper heads designed for hole making, scooping, carving, cutting, melting, and smoothing applications.
The screw installation design lets you swap heads quickly without removing the entire tip. Simply unscrew the current head and install your desired model. The brass copper construction delivers excellent heat conduction and fast heating times, ensuring efficient repair performance on rough corners, edges, and top layers. This tool set helps you avoid costly reprints while achieving professional finishing results on your 3D printed parts.
Best For: 3D printing enthusiasts who want to achieve professional-quality finishing on their prints without investing in expensive specialized equipment and already own a compatible soldering iron.
Pros:
- Transforms existing soldering iron into versatile post-processing station with 8 different brass copper heads for various applications
- Quick and easy head changes with screw installation design that doesn’t require removing the entire tip
- Cost-effective solution that helps avoid expensive reprints by enabling effective repair and finishing of 3D printed parts
Cons:
- Requires ownership of compatible soldering iron (Pine64, TS100, TS101, or 900M models) which may limit accessibility for some users
- Working with heated tools requires careful handling and safety precautions to avoid burns or damage
- Limited to compatible soldering iron models, restricting versatility compared to standalone finishing tools
3D Printing Smoothing Tool Kit, USB Powered (Yellow)
USB-powered convenience makes this 3D Printing Smoothing Tool Kit an ideal choice for makers who need portable finishing solutions without being tethered to wall outlets. You’ll get seven interchangeable tips with 8W power each, providing versatility for different smoothing tasks on plastic 3D prints. The 1.2-meter USB cord gives you workspace flexibility while the included tool stand keeps everything organized. You’ll also receive a cleaning brush for maintenance. When installing tips, carefully screw them on to prevent thread damage. If you need replacements, they’re available under ASIN B09TD159HP at Amazon’s kingtool store.
Best For: 3D printing enthusiasts and makers who need a portable, versatile tool for finishing and smoothing plastic 3D printed parts without requiring access to wall outlets.
Pros:
- USB-powered design provides excellent portability and workspace flexibility with a generous 1.2-meter cord
- Seven interchangeable tips with 8W power each offer versatility for different smoothing and finishing tasks
- Complete kit includes tool stand, cleaning brush, and organized storage solution for professional results
Cons:
- Limited to plastic 3D printing materials only, restricting use with other materials like metal or resin prints
- Electronic components are fragile and susceptible to damage from drops, crushing, or compression during transport
- Replacement tips require separate purchase and specific ASIN lookup, adding ongoing maintenance costs
3D Print Finishing Tools Kit with Digital Soldering Iron & Electric Polishing Machine
Professional-grade 3D printing enthusiasts who demand precision finishing will find this extensive toolkit invaluable for transforming rough prints into polished masterpieces. You’ll get a complete finishing arsenal including a 60W digital soldering iron with adjustable temperature control (180℃-500℃), electric polishing machine, deburring tool with ten replacement blades, pliers, and craft knife. The soldering iron’s digital display and 47-inch cord provide excellent control for detailed modifications. Everything stores in a waterproof, chemical-resistant case with foam protection. While users praise the kit’s overall durability and effectiveness, some note quality concerns with certain components and limited beginner instructions.
Best For: Professional-grade 3D printing enthusiasts who need a comprehensive toolkit for precision finishing work and post-print modifications.
Pros:
- Complete finishing arsenal with digital soldering iron featuring precise temperature control (180℃-500℃) and 47-inch cord for detailed work
- Durable deburring tool with aluminum handle and 10 high-speed steel replacement blades for long-term use
- Professional storage solution with waterproof, chemical-resistant case and protective foam interior
Cons:
- Some components like the craft knife and polishing machine have reported quality issues
- Limited instructions provided, making it challenging for beginners to use effectively
- Certain tools may be better suited for general applications rather than specifically optimized for 3D printing
3D Printer Smoothing Tool Kit (14 PCS with 80w LCD Digital Temperature Control)
The 3D Printer Smoothing Tool Kit with its 14-piece arsenal becomes your go-to solution when you need versatile post-processing capabilities for plastic 3D prints. You’ll get an 80w soldering iron with eight brass tips, adapter, stand, tweezers, and sanding sticks for thorough smoothing tasks. The LCD temperature control heats quickly, though actual tip temperatures may differ from displayed values. You’ll appreciate the organized storage solutions, but you should exercise caution with the unstable stand and lack of safety certifications. While it offers good value for 3D printing modifications, you’ll need to prioritize safety during operation.
Best For: 3D printing enthusiasts and hobbyists who need a comprehensive tool kit for post-processing, smoothing, and modifying plastic 3D printed parts with multiple tip options for versatile applications.
Pros:
- Comprehensive 14-piece kit with 8 different brass tips, tweezers, sanding sticks, and organized storage solutions for versatile 3D print post-processing tasks
- 80w high-power ceramic heating core with LCD digital temperature control and fast heating capabilities with effective heat ventilation
- Good overall value with 4.0/5 star rating and intuitive operation for smoothing and repairing 3D printed parts
Cons:
- Safety concerns due to lack of safety certifications (UL, ETL, CE) and unstable stand that may not securely hold the iron, posing accident risks
- Performance inconsistencies including actual tip temperatures differing from displayed values and potential difficulty reaching glass transition temperature of most filaments
- Poor documentation with no user manual for operation and safety instructions, plus reported issues with temperature display switching between units
Factors to Consider When Choosing 3D Print Smoothing Tools and Techniques
When selecting 3D print smoothing tools, you’ll need to evaluate several critical factors that directly impact your results and workflow. Consider the power output and temperature control capabilities, as these determine which materials you can effectively smooth and how precisely you can work. You should also examine tip material quality and variety, safety certifications, storage requirements, and whether the tools integrate with your existing equipment setup.
Power and Temperature Control
Since different 3D printing materials respond uniquely to heat application, you’ll need smoothing tools that offer precise power and temperature control to achieve professional results. Higher wattage tools heat faster and perform better on detailed work, but you must match the temperature to your material’s glass alteration point to prevent damage.
Look for tools with adjustable temperature settings that let you fine-tune heat output for specific applications. This precision enhances your finishing quality considerably. Choose tools with effective heat dissipation features like ventilation holes—they’ll prevent overheating during extended use and extend your tool’s lifespan.
The tip material matters too. Brass and copper tips provide superior heat conduction and durability, making your smoothing process more effective overall.
Tip Material and Variety
Five key factors determine your smoothing tool’s effectiveness, with tip material topping the list for good reason. You’ll want brass copper tips for their exceptional strength and heat conduction properties, ensuring consistent performance during detailed finishing work. The material’s durability directly impacts your tool’s longevity under high-intensity use.
Tip variety matters equally. You’ll need different shapes—scooping, carving, and cutting—to handle diverse finishing tasks across various project types. Look for interchangeable designs that let you switch functions quickly without removing the entire tool head. This feature streamlines your workflow considerably.
Having multiple tip types in your toolkit transforms efficiency. You’ll tackle intricate details and rough edges with precision, making professional-quality results achievable across all your 3D printing projects.
Safety Certifications Required
Although tip material and variety form the foundation of effective smoothing tools, safety certifications represent an equally critical factor you can’t afford to overlook. When selecting 3D print smoothing tools, you’ll want to verify they carry proper safety certifications like UL, ETL, or CE markings. These certifications indicate the device has undergone rigorous testing by accredited organizations, ensuring it meets specific electrical safety standards.
Tools lacking proper certifications pose serious risks including electrical shocks, overheating, and fire hazards—particularly dangerous during high-temperature smoothing applications. You’ll also face potential issues with insurance coverage and warranty claims if accidents occur with uncertified equipment. Always prioritize tools that include clear safety documentation and operational guidelines, as these help you maintain safe working conditions while achieving professional smoothing results.
Storage and Portability
When you’re investing in quality 3D print smoothing tools, proper storage and portability features can make the difference between a streamlined workflow and constant frustration. Effective storage solutions like tool organizers and dedicated bags keep your equipment organized and easily accessible during projects. You’ll want dedicated compartments that separate different tools, preventing damage while ensuring all components stay accounted for.
A portable design lets you transport your toolkit conveniently between locations, whether you’re working in different rooms or settings. Compact storage options reduce the risk of losing critical parts and enhance your workflow efficiency. When your tools are well-organized, you’ll minimize setup time and facilitate quicker shifts between tasks, greatly improving your overall user experience and professional results.
Tool Compatibility Options
Since different 3D printing materials respond uniquely to various smoothing methods, you’ll need to match your tool selection with the specific plastics and composites in your projects. Tools with interchangeable tips offer maximum versatility, letting you adapt your approach based on each print’s unique requirements and detail levels.
Consider your power preferences carefully. USB-powered tools deliver excellent portability and convenience for on-the-go work, while traditional electric options provide faster heating and more robust performance for intensive projects. Look for screw installation designs that enable quick head changes, streamlining your workflow during complex finishing tasks.
Check user reviews focusing on performance with your specific print types and geometries, as certain tools excel with particular materials and detail requirements.
Frequently Asked Questions
Can Chemical Smoothing Damage My 3D Printer’s Build Plate or Components?
You shouldn’t perform chemical smoothing directly on your printer’s build plate. Remove prints first, then smooth them separately. Acetone and other solvents can damage heated beds, glass surfaces, and nearby components if you’re not careful.
How Long Should I Wait Between Printing and Starting the Smoothing Process?
You should wait at least 24 hours after printing before starting chemical smoothing. This allows your print to fully cool and any residual moisture to evaporate, ensuring better results.
What Safety Equipment Is Required When Using Acetone Vapor Smoothing Methods?
You’ll need chemical-resistant gloves, safety goggles, and a respirator mask. Work in a well-ventilated area or use a fume hood. Don’t smoke or use open flames near acetone vapors.
Will Smoothing Techniques Work Equally Well on All Filament Brand Types?
You’ll find smoothing techniques don’t work equally across all filament brands. Different manufacturers use varying additives, molecular weights, and formulations that affect how each brand responds to chemical smoothing, heat treatment, or mechanical finishing methods.
Can Over-Smoothing Weaken the Structural Integrity of My 3D Printed Parts?
Yes, you’ll weaken your parts if you over-smooth them. Excessive chemical smoothing or sanding removes material layers, reducing wall thickness and compromising strength. Monitor your smoothing time and test structural integrity before finalizing your process.


Leave a Reply