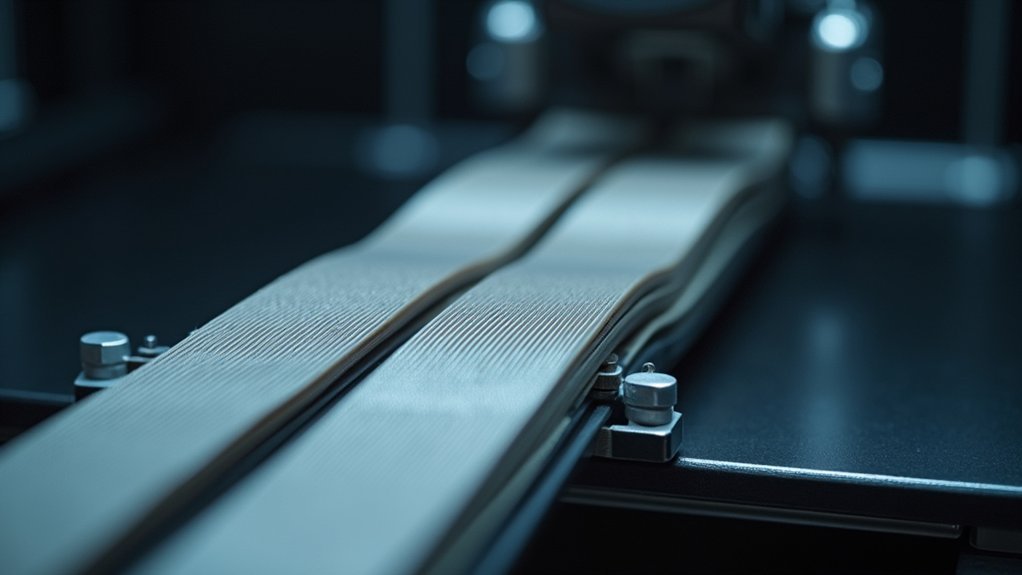
Your belt tension directly determines whether your 3D prints maintain proper layer alignment or suffer from frustrating shifts and misalignment. Loose belts cause slippage during movement, leading to missed positions and dimensional inaccuracies that compound over time. Over-tensioned belts strain your stepper motors, creating jerky movements and reducing precision. You’ll want to aim for that “stretched rubber band” feel with 80-100 Hz frequency measurement for ideal results. Mastering these fundamentals will transform your printing consistency.
Understanding Belt Tension’s Role in 3D Printing Accuracy

When you’re chasing perfect 3D prints, belt tension plays a surprisingly critical role in determining whether your layers align properly. Your printer’s X and Y axes depend entirely on properly tensioned belts to maintain consistent toolhead movement.
If you’ve got loose belts, they’ll slip during printing, causing noticeable layer shifts that ruin your model’s precision. On the flip side, overly tight belts strain your stepper motors, preventing them from reaching their intended positions accurately.
You’ll want to check your belt tension regularly – it should feel taut yet flexible, like a stretched rubber band without slack.
Getting this balance right guarantees precise positioning and prevents mechanical issues that compromise layer integrity, dramatically improving your overall print quality.
How Loose Belts Cause Layer Misalignment
When your belts lack proper tension, they’ll slip during printing movements, causing your toolhead to miss its intended positions.
This slippage prevents your stepper motors from accurately controlling print head movement, resulting in skipped steps that throw off layer alignment.
You’ll notice these issues most clearly during rapid movements when loose belts can’t maintain the precise positioning your printer needs for accurate layer stacking.
Belt Slippage Mechanics
Belt slippage occurs when loose belts lose their grip on pulleys, causing your print head to deviate from its programmed path and creating visible layer shifts in your finished prints.
When you don’t maintain proper tension, your belts can’t transfer motion accurately from stepper motors to the moving components. This mechanical failure happens because insufficient friction between the belt and pulley allows the belt to slip during rapid movements or direction changes.
You’ll notice belt slippage most during complex geometries requiring precise positioning. The print head misses its target coordinates, causing layers to shift horizontally.
Even minimal slippage compounds over time, resulting in prints with stairs-stepped walls, misaligned features, and dimensional inaccuracies. Understanding this mechanism helps you identify why consistent belt tension directly impacts your print quality and geometric precision.
Skipped Step Consequences
Skipped steps represent the most immediate consequence of inadequate belt tension, occurring when your stepper motors lose synchronization with actual print head movement. When your belt slips during rapid movements, the print head lags behind its intended position, creating noticeable layer shifts that disrupt your print’s structural integrity.
| Belt Condition | Movement Accuracy | Layer Alignment | Print Quality | Calibration Status |
|---|---|---|---|---|
| Properly Tensioned | Precise positioning | Perfect alignment | High quality | Maintained |
| Slightly Loose | Minor deviations | Subtle shifts | Reduced quality | Gradually lost |
| Moderately Loose | Noticeable lag | Visible misalignment | Poor quality | Considerably affected |
| Very Loose | Frequent skipping | Severe shifts | Failed prints | Completely lost |
| Extremely Loose | Constant slippage | Random placement | Print failure | Requires recalibration |
Regular belt maintenance prevents these cascading failures that compromise your printer’s precision.
Effects of Over-Tensioned Belts on Print Quality

While loose belts create their own problems, you’ll face equally serious issues when your belts are over-tensioned.
Excessive tension forces your stepper motors to work harder, leading to overheating and potential damage that’ll compromise your printer’s reliability.
You’ll also notice accelerated wear on your belts and a significant drop in print precision as the rigid system struggles to execute smooth, accurate movements.
Motor Strain and Overheating
Although proper belt tension might seem like a minor detail, over-tensioning creates a cascade of problems that directly impacts your print quality through motor strain and overheating.
When you tighten belts excessively, your stepper motor works harder against increased friction and resistance. This additional load causes the motor to generate excess heat, potentially triggering thermal shutdowns that halt your prints mid-process. You’ll notice reduced performance as the overheated motor struggles to maintain precise positioning.
The excessive strain doesn’t just affect immediate print quality—it accelerates wear on your motors and pulleys, leading to mechanical failures over time.
Monitor your stepper motor temperatures regularly, as elevated heat often signals over-tensioned belts. Remember, ideal tension allows slight flex while remaining taut, like a stretched rubber band.
Accelerated Belt Wear Patterns
Beyond motor stress, over-tensioned belts develop distinct wear patterns that directly compromise your print quality over time.
When you maintain excessive belt tension, you’ll notice accelerated deterioration that manifests as fraying along the belt edges and tooth degradation. This wear creates inconsistent movement patterns, causing layer misalignment and dimensional inaccuracies in your prints.
The deterioration process follows predictable stages:
- Edge fraying – Excessive tension causes belt fibers to separate and fray at contact points.
- Tooth deformation – Over-stressed belt teeth wear unevenly, creating gaps and slip points.
- Material fatigue – Continuous high tension weakens the belt’s structural integrity, leading to sudden failure.
Regular belt tension monitoring prevents these wear patterns, ensuring consistent print quality and extending your belt’s operational lifespan considerably.
Reduced Print Precision
When you over-tension your printer’s belts, you’ll immediately notice a decline in print precision as the excessive force creates mechanical stress throughout your entire motion system.
Your stepper motors will struggle against this resistance, frequently missing steps that translate directly into layer misalignment. The print head’s movement becomes jerky and inconsistent, undermining the smooth motion required for accurate layer placement.
Excessive belt tension wears down pulleys and bearings, introducing play and backlash that compound positioning errors.
You’ll observe visible distortions in your prints, with layers appearing offset or wavy. The restricted movement prevents your printer from maintaining the tight tolerances essential for detailed work.
Proper belt tension acts like a stretched rubber band – firm enough for control without creating destructive mechanical stress.
Identifying Optimal Belt Tension for Your Printer

Finding the right belt tension for your 3D printer requires a balance between providing adequate resistance for precise movement while avoiding excessive strain on components.
Your belt should feel like a stretched rubber band when pressed, offering resistance while maintaining flexibility without slack.
The ideal belt tension strikes a perfect balance between firm resistance and flexible movement without any looseness or slack.
Test your belt tension using these methods:
- Press Test: Push down on the belt midway between pulleys – it should provide moderate resistance and snap back immediately when released.
- Frequency Measurement: Use a belt tension meter to achieve readings between 80-100 Hz for ideal performance.
- Regular Inspection: Check belt tension before long prints, adjusting as needed to prevent layer shifting or premature wear.
Proper belt tension guarantees consistent movement and maintains print quality throughout your projects.
Tools and Methods for Measuring Belt Tension
You’ll need reliable tools to measure your belt tension accurately and consistently.
Digital belt tension apps might seem convenient, but they’re often unreliable compared to DIY measurement tools that the 3D printing community recommends for better results.
Manual tension testing through visual inspection and physical deflection measurements can also help you assess whether your belts are properly tensioned.
Digital Belt Tension Apps
While traditional methods of checking belt tension rely on manual feel and guesswork, digital belt tension apps transform your smartphone into a precision measurement tool.
These apps use frequency analysis to measure your belt’s vibrations, providing real-time tension readings that eliminate guesswork from your 3D printer maintenance routine.
Most digital belt tension apps recommend keeping GT2 belts between 80 Hz and 100 Hz for peak performance.
Popular options include the Belt Tension Meter from GitHub and various alternatives on Printables, both earning strong community reviews.
Key setup requirements:
- Enable microphone permissions on your device for accurate sound capture
- Download community-tested apps like those from GitHub or Printables
- Calibrate measurements against manufacturer specifications for your specific belt type
These apps offer precision that manual methods simply can’t match.
DIY Measurement Tools
Building your own belt tension measurement tools offers a cost-effective alternative that puts precise calibration directly in your hands. You can create effective DIY tension measurement tools using a ruler and scale to measure belt deflection under specified weight. Community platforms like GitHub and Printables provide downloadable designs for printable measurement tools tailored to specific belt types.
| Method | Target Range | Materials Needed | Accuracy Level | Cost |
|---|---|---|---|---|
| Ruler/Scale Deflection | 1-2mm deflection | Ruler, weight, scale | High | $5-10 |
| Frequency Apps | 70-90 Hz | Smartphone app | Moderate | Free |
| Manual Press Test | Rubber band feel | Hands only | Low | Free |
| 3D Printed Tools | Belt-specific | Printed parts | High | $2-5 |
| Community Designs | Variable | Downloaded files | High | Free |
Regular use maintains consistent tension for improved layer alignment.
Manual Tension Testing
Three fundamental approaches form the foundation of manual belt tension testing, each offering different levels of precision and ease of use. You can assess belt tension through physical deflection measurement, auditory frequency analysis, or basic tactile evaluation.
Manual Belt Tension Testing Methods:
- Deflection Measurement – Use a ruler or caliper to press the belt and measure its deflection distance, aiming for a firm but flexible response similar to a stretched rubber band.
- Frequency Testing – Pluck the belt and listen to the pitch; higher frequencies indicate proper tension while lower tones suggest looseness requiring adjustment.
- Tactile Assessment – Apply gentle finger pressure to gauge tension through feel, though this method offers the least precision compared to measurement-based approaches.
Step-by-Step Belt Adjustment Process
Before you begin adjusting your 3D printer’s belt tension, locate the tension adjustment points near your X and Y axis stepper motors and gather the necessary tools—typically an Allen wrench or hex key.
Start by loosening the screws holding the belt in place, but don’t completely detach the belt from the pulleys. Pull the belt to achieve proper tension—it should feel taut but not overly tight, similar to a stretched rubber band.
Once you’ve reached the desired tension, secure the screws back in place. Test the movement of your print head or bed to verify smooth operation without excessive resistance or slippage.
Regular maintenance and inspection will prevent layer misalignment and maintain consistent print quality.
Recognizing Belt-Related Layer Shift Patterns
After adjusting your belt tension, you’ll want to identify whether your print issues stem from belt problems by examining specific layer shift patterns.
Recognizing these patterns helps distinguish belt-related failures from other mechanical issues that can cause similar print defects.
Pattern recognition separates belt tension failures from other mechanical problems causing identical print quality issues.
Several distinct patterns indicate belt tension problems:
- Sudden offset shifts – Layers abruptly shift in one direction and continue printing in that new position, typically indicating loose belts that allowed missed steps during rapid movements.
- Gradual diagonal shifts – Layers progressively drift over multiple layers, suggesting inconsistent belt tension that causes intermittent slipping during direction changes.
- Speed-dependent misalignment – Layer shifts occur only at higher print speeds but disappear when you reduce printing velocity, confirming belt tension inadequacy.
Motor Performance and Belt Tension Correlation
Understanding the intricate relationship between belt tension and motor performance becomes essential when troubleshooting persistent layer alignment issues.
When you’ve got loose belts, your stepper motors will miss steps, creating those frustrating misaligned layers you’re seeing in your prints. Conversely, overtightened belts strain your motors, potentially causing overheating and failure during long print jobs.
You’ll want to achieve that sweet spot where belt tension feels like a stretched rubber band. This ideal tension allows your motors to operate efficiently while ensuring accurate print head positioning.
Too much slack delays motor engagement, while excessive tightness hinders smooth movement, both resulting in layer shifts. Regular belt tension checks enhance motor performance and longevity, ultimately delivering improved print quality and consistency.
Frame Stability Requirements for Proper Belt Function
While your belt tension might be perfectly calibrated, a wobbly or unstable frame will sabotage your layer alignment every time.
Your printer’s frame serves as the foundation that enables proper belt function, and without stability, even perfect tension settings become meaningless.
A stable frame minimizes vibrations that disrupt layer alignment during printing, guaranteeing consistent motion of your print head and bed.
You’ll need to check that all bolts and screws are properly tightened to prevent wobbling or movement that leads to misalignment.
Here’s what you must verify for ideal frame stability:
- Use a carpenter’s square to check frame alignment and guarantee all components are level
- Place your printer on a sturdy surface to reduce external disturbances
- Maintain firm foundation support to preserve belt tension without additional strain
Belt Maintenance Schedule and Inspection Points
Three critical inspection points form the backbone of effective belt maintenance: pre-print tension checks, visual wear assessments, and regular cleaning protocols. Your belt maintenance schedule should prioritize these areas to prevent layer shifting and maintain print quality.
Before starting long prints, inspect belt tension to guarantee peak performance. Check for visible cracks or fraying during each inspection to prevent unexpected failures. Maintain consistent cleaning routines to remove dust and contaminants affecting movement accuracy.
| Maintenance Task | Frequency |
|---|---|
| Pre-print tension checks | Before long prints |
| Visual wear inspection | Each operation |
| Cleaning routine | Weekly |
Schedule detailed pulley and set-screw inspections every few weeks, confirming they’re securely tightened. Replace belts every 6-12 months, or sooner if significant wear’s detected, maintaining consistent performance.
Speed and Acceleration Settings for Belt Longevity
Although faster print speeds might seem appealing for productivity, they’re often the silent culprit behind premature belt wear and frustrating layer misalignments.
You’ll need to balance speed with belt longevity by implementing proper acceleration settings that protect your printer’s mechanical components.
Here’s how to optimize your settings for belt preservation:
- Reduce print speeds to 40–60 mm/s to prevent overwhelming stepper motors and avoid missed steps that cause layer shifts.
- Set acceleration between 500–1000 mm/s² to minimize jerky movements that strain belts and compromise layer alignment.
- Enable jerk control to soften sudden direction changes, reducing mechanical stress on your belt system.
Start with conservative settings during test prints, then gradually increase speed while monitoring print quality.
This approach helps you find the sweet spot where productivity meets belt longevity.
Troubleshooting Persistent Layer Alignment Issues
When layer alignment problems persist despite enhanced speed settings, you’re likely dealing with fundamental belt tension issues that require systematic troubleshooting.
Start by inspecting your belt tension—properly tensioned belts should resemble stretched rubber bands that snap back without slack. Loose belts cause slipping and misalignment, while overtight belts strain motors and trigger skipped steps.
Use a belt tension meter to gauge accuracy, targeting 80-90 Hz for peak performance.
Don’t overlook mechanical components during inspection. Confirm pulleys are securely fastened and stepper motor screws are tight to prevent operational misalignment.
If belt tension appears correct, reduce print speeds and acceleration settings. This helps struggling printers maintain precise movement when minor tension inconsistencies exist.
Preventing Belt-Related Print Failures
Since belt-related failures can devastate print projects and waste filament, establishing a proactive maintenance routine becomes essential for consistent results.
You’ll prevent costly mistakes by monitoring your belt condition regularly and addressing tension issues before they affect print quality.
Here’s your preventive maintenance checklist:
- Weekly tension checks – Press down on each belt to guarantee it snaps back without slack, maintaining that stretched rubber band feel.
- Monthly visual inspections – Look for fraying, stretching, or wear patterns that indicate replacement needs.
- Quarterly calibration prints – Run test prints specifically designed to reveal layer alignment issues before they compromise important projects.
Frequently Asked Questions
Why Is My 3D Print Misaligned?
Your 3D print’s misaligned because you’ve got loose belts causing skipped steps, you’re printing too fast for your stepper motors, or there’s insufficient electrical current reaching your motors.
What Causes Layer Shifting in 3D Prints?
Layer shifting happens when you’ve got loose belts, excessive print speeds, or mechanical issues like worn pulleys. Your stepper motors might miss steps from overheating drivers or insufficient current, causing misaligned layers.
Why Is Belt Tension and Alignment Important?
You’ll get precise layer alignment when your belts have proper tension. Loose belts cause layer shifts and misalignment, while over-tightened belts strain motors and create missed steps, ruining your print’s accuracy.
How to Calibrate 3D Printer Belt Tension?
You’ll adjust belt tension using an Allen key to tighten the tensioning mechanism until the belt feels taut like a stretched rubber band, then secure the screws firmly.


Leave a Reply