
You’ll want to start with an SLA or DLP resin printer capable of 10-15 micrometer layers for crisp miniature details. Master your slicer settings by adjusting exposure times between 5-12 seconds depending on layer height, and don’t forget to hollow models with 2mm walls to save resin. Place supports strategically to prevent failures while preserving fine features. Set up a well-ventilated workspace and always wear protective gear when handling resin. Perfect your post-processing with proper alcohol washing and UV curing to achieve professional results that’ll elevate your entire miniature collection.
Choose the Right Resin Printer for Miniature Quality and Detail

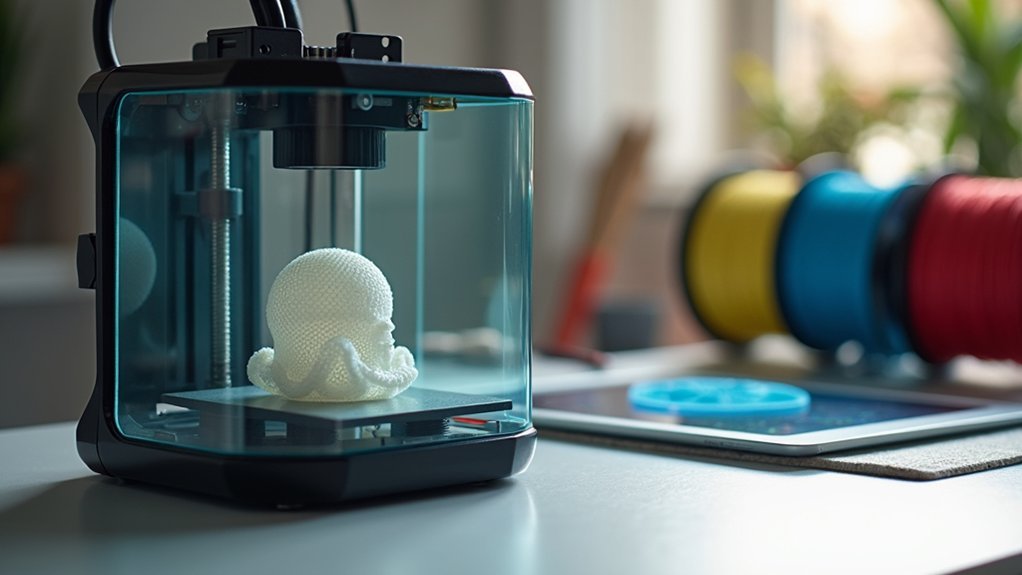
When you’re starting your miniature printing journey, selecting the right resin printer makes all the difference between crisp, detailed figures and frustrating disappointments.
Choose the right resin printer by prioritizing SLA or DLP technology over FDM models, as they deliver superior miniature quality and detail with smoother finishes.
SLA and DLP printers crush FDM when printing miniatures—delivering sharper details and smoother surfaces every time.
Look for layer height capability between 10-15 micrometers to capture intricate designs accurately.
Consider build volume carefully—larger plates let you print multiple miniatures simultaneously, boosting efficiency.
Guarantee strong community support and available parts for easier maintenance down the road.
Features like self-leveling build plates and customizable exposure settings streamline the printing process considerably.
These specifications will help you achieve professional-quality results while simplifying your workflow as a beginner.
Master Your Slicer Settings for Layer Height and Exposure Times
Most miniature printing failures stem from incorrect slicer settings, making layer height and exposure time mastery essential for consistent results.
Set your layer height between 10-15 micrometers for detailed miniatures requiring high precision, while standard STL files print effectively at 50 micrometers for balanced speed and quality.
Adjust exposure times accordingly—shorter 10-micrometer layers need up to 12 seconds, while 50-micrometer layers typically require 5-8 seconds in resin 3D printing.
Test print files in small increments since exposure times vary by resin type.
Utilize the hollowing feature with 2mm minimum wall thickness to reduce resin usage.
Always preview your sliced model to verify support structures and layer distribution before printing, preventing common print failures and ensuring peak quality of the print.
Learn Proper Support Placement and Hollowing Techniques
Beyond optimizing your slicer settings, you’ll need to master support placement and hollowing techniques to achieve professional-quality miniatures. Proper support placement prevents print failures and guarantees delicate details remain intact.
Mastering support placement and hollowing techniques is essential for preventing print failures and preserving intricate miniature details.
In Lychee slicer, add supports manually to tailor support structures for your specific design’s needs. Hollowing techniques reduce resin usage while maintaining structural integrity.
Here’s your essential workflow:
- Use “Hollowing 3D” option in Lychee slicer with minimum 2mm wall thickness for stability.
- Add internal supports to prevent collapse during miniature printing of complex designs.
- Create drainage holes during hollowing to facilitate cleaning post-printing and excess resin removal.
Always test print settings with smaller models first. This lets you fine-tune support placement and parameters before committing to larger, detailed pieces.
Set Up a Safe and Well-Ventilated Workspace
Before you start printing your first miniature, you’ll need to establish a workspace that prioritizes safety and proper ventilation.
Verify your workspace measures at least 110 cm x 110 cm x 45 cm to accommodate your printer and tools without clutter. Since resin fumes are toxic, maintain proper airflow by working near windows or using an air purifier.
While printers with built-in carbon filters help reduce odors, don’t rely solely on them for air quality. Regularly check your ventilation system’s effectiveness.
Implement essential safety measures by wearing gloves and a mask when handling resin to prevent skin contact and inhalation of harmful chemicals.
These precautions protect your health while guaranteeing ideal printing conditions.
Perfect Your Post-Processing With Washing and Curing Methods

Once your miniature finishes printing, you’ll need to wash it thoroughly in denatured alcohol with 95% concentration or higher to remove all uncured resin from the surface.
This washing and curing process is essential for achieving peak strength and a flawless surface.
After washing, expose your prints to UV light for 2-10 minutes to complete curing.
Consider these post-processing workflow improvements:
- Invest in a wash and cure machine for simultaneous washing and curing of multiple miniatures
- Ensure prints are fully dried after washing to prevent contamination before painting
- Practice careful handling of cured prints, as they remain delicate despite proper processing
Store finished miniatures in cool, dark places to maintain their integrity and prevent degradation over time.
Frequently Asked Questions
What Is the First Thing I Should Print on My 3D Printer?
You should print a calibration cube or 3D benchy first. These test prints’ll help you fine-tune your printer’s settings like exposure time and layer height before attempting more complex models.
What Is the 45 Degree Rule for 3D Printing?
You’ll need supports for overhangs steeper than 45 degrees from vertical. This rule prevents sagging and print failures by ensuring layers bond properly. Angles at or below 45 degrees typically print successfully without additional support structures.
What Layer Height for 28MM Miniatures?
You should use 10-15 micrometers for exceptional detail on 28mm miniatures, though 50 micrometers offers a good balance between quality and speed. Experiment with different heights to find what works best for your specific designs.
How to Improve 3D Print Quality for Beginners?
You’ll improve print quality by adjusting layer height to 10-15 micrometers, optimizing exposure times, using strategic supports, hollowing miniatures to reduce failures, and regularly maintaining your printer’s LCD screen and FEP film.


Leave a Reply