Acetone vapor smoothing transforms your rough ABS 3D prints into smooth, glossy objects by exposing them to acetone vapors in a sealed container. The process dissolves your print’s outer layer, eliminating visible layer lines and creating an injection-molded appearance. You’ll suspend your ABS part above acetone-soaked material, allowing vapors to work for several minutes to 15 minutes depending on conditions. While it enhances durability and saves sanding time, you’ll need proper safety equipment and ventilation to handle acetone’s health risks and flammability. Understanding the complete process guarantees best results.
Understanding Acetone Vapor Smoothing Process

When you’re looking to achieve professional-quality surface finishes on your ABS 3D prints, acetone vapor smoothing transforms rough, layered surfaces into smooth, glossy masterpieces.
This chemical smoothing technique works by creating acetone vapors that dissolve the outer layer of your ABS prints, effectively eliminating those visible layer lines that typically characterize 3D printed objects.
The process involves placing your printed model in a sealed container where it’s suspended above liquid acetone. As the acetone evaporates, the vapors coat your print’s surface, melting and reshaping the plastic layers into a continuous, smooth finish.
You’ll need to monitor the exposure time carefully, as this determines the final quality. The result is a professional-grade surface that looks injection-molded rather than 3D printed.
Benefits of Acetone Vapor Smoothing for ABS Prints
The transformation you’ll achieve with acetone vapor smoothing goes far beyond simple aesthetics.
When you treat your ABS 3D prints with acetone vapor, you’re eliminating visible layer lines and creating a glossy, injection-molded appearance that’s perfect for prototypes and decorative models.
You’ll also strengthen your prints considerably.
The acetone seals gaps between layers, improving z-axis bonding and making your parts more durable. This enhanced structural integrity translates to better leak-proof properties, making your ABS prints ideal for functional containers and assemblies.
Time efficiency is another major advantage.
Instead of spending hours manually sanding, you’ll achieve superior results without risking dimensional changes to your carefully designed parts.
Drawbacks and Limitations of ABS Smoothing

While acetone vapor smoothing offers impressive benefits, you’ll face several significant limitations that could impact your project’s success.
The drawbacks and limitations of ABS smoothing include compromised accuracy, where fine details like threads and engravings risk blending together as acetone dissolves outer layers. You’ll lose intricate design elements and defined features during this process.
Health hazards associated with acetone exposure pose serious concerns, including headaches, nausea, and skin irritation. You must wear proper safety gear throughout the smoothing process.
Acetone’s highly flammable nature creates additional safety risks, requiring careful handling in well-ventilated areas away from ignition sources.
Uneven acetone application can produce inconsistent results, leaving some areas rough while over-melting others, ultimately affecting your print’s overall finish quality.
Safety Precautions When Working With Acetone
When working with acetone for vapor smoothing, you’ll need to prioritize safety through proper personal protective equipment and workspace preparation.
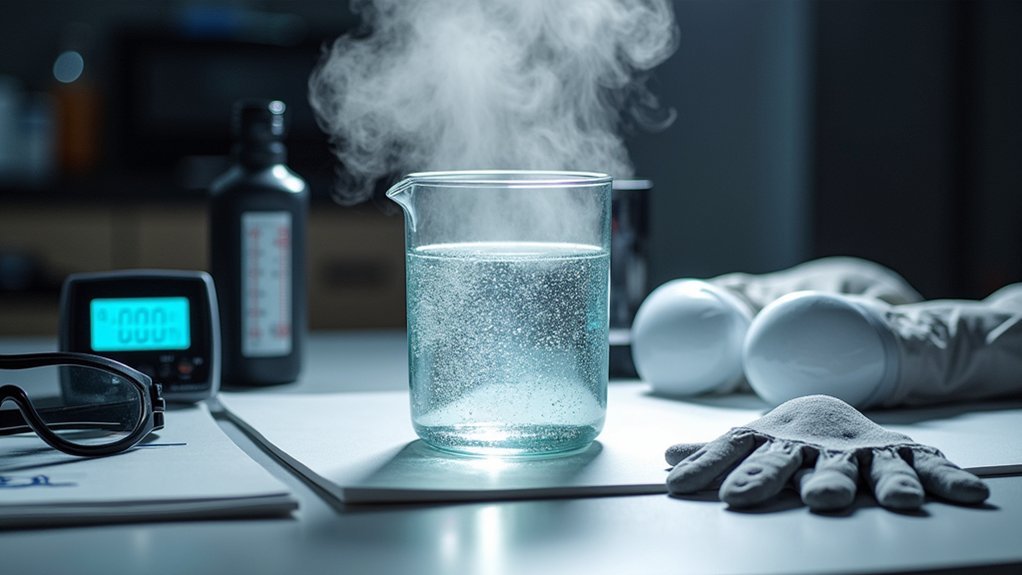
You must wear rubber gloves, safety goggles, and a respirator to protect against skin contact, eye irritation, and harmful vapor inhalation.
Additionally, you’ll want to guarantee adequate ventilation in your work area and store acetone safely away from heat sources due to its highly flammable nature.
Personal Protective Equipment
Because acetone poses serious health and safety risks, you must wear appropriate personal protective equipment before beginning any vapor smoothing project.
Essential PPE includes chemical-resistant gloves to prevent skin contact and irritation. Safety goggles are vital since acetone can cause severe eye damage upon contact. You’ll also need a respirator or mask designed for organic vapors to protect against inhaling toxic acetone fumes. Standard dust masks won’t provide adequate protection against chemical vapors.
Ensure all personal protective equipment fits properly and remains in good condition. Replace worn or damaged items immediately. Never skip PPE to save time—acetone exposure can cause immediate irritation and long-term health problems.
Having an eye wash station nearby provides additional safety backup if accidental contact occurs despite wearing protective equipment.
Ventilation and Storage
Proper ventilation forms the cornerstone of safe acetone vapor smoothing operations. You must work in well-ventilated areas, preferably outdoors, to minimize inhalation risks and fire hazards. Acetone vapors concentrate quickly in enclosed spaces, creating dangerous conditions.
Essential ventilation and storage practices include:
- Work outdoors whenever possible – fresh air circulation saves your lungs and prevents vapor buildup
- Store acetone away from heat sources – one spark could ignite accumulated vapors instantly
- Use solvent-resistant, labeled containers – proper storage prevents leaks and confusion
- Keep storage areas cool and dry – heat accelerates evaporation and increases fire risk
- Position ventilation fans strategically – direct airflow carries dangerous vapors away from your workspace
Smart ventilation and storage practices protect you from acetone’s volatile nature while ensuring successful smoothing results.
Required Supplies and Equipment Setup

Five essential safety items must be gathered before starting any acetone vapor smoothing project: eye protection, rubber gloves, a respirator, a fire extinguisher, and access to an eye washing station.
These protect you from harmful fumes and potential accidents during the acetone bath process.
For equipment setup, you’ll need an empty paint can or non-reactive container as your vapor chamber.
Add a hot plate and digital thermometer to heat the setup, reducing smoothing time to approximately 15 minutes.
Pour acetone into the container’s bottom, ensuring it doesn’t create a direct acetone bath for your print.
Suspend your ABS print using string so it hangs above the liquid acetone without touching it.
This positioning allows vapor exposure while preventing surface damage from direct contact.
Preparing Your ABS Print for Smoothing
Once your vapor chamber is ready, you’ll need to prepare your ABS print for the smoothing process. Proper preparation is vital for achieving professional results with smoothing techniques. Your printed ABS parts require careful handling to guarantee the acetone vapor works effectively.
Follow these essential preparation steps:
- Sand away rough surfaces – Remove support structures and coarse textures that could interfere with even smoothing.
- Clean your print thoroughly – Eliminate dust, oils, and debris that might create imperfections.
- Set up a non-dissolving base – Use metal foil to support your part without acetone contact.
- Soak paper towel in acetone – Place it inside the container without touching your ABS part.
- Prepare for multiple sessions – Plan several smoothing rounds to achieve your desired finish.
Creating Acetone Vapor in Your Container
After you’ve prepared your ABS print, generating acetone vapor requires careful attention to safety and technique.
Pour a small amount of acetone into a non-reactive glass or metal container’s bottom, ensuring it doesn’t touch your printed parts. Soak a paper towel in acetone and place it inside the container without contacting your model to prevent excessive dissolution.
Use minimal acetone in glass containers, keeping liquid away from prints while allowing vapor contact for controlled smoothing.
Cover the container with a lid, but don’t seal it completely—allow acetone vapor to escape and accumulate within the enclosed space. Place the container in a warm area or use gentle heat like a hot plate to encourage evaporation without directly heating the acetone.
Monitor exposure time carefully based on your print’s size and complexity to prevent detail loss.
Step-by-Step Vapor Smoothing Process
You’ll need to follow a systematic approach to achieve professional results with acetone vapor smoothing.
The process breaks down into three essential phases: preparing your workspace and positioning the print, generating consistent vapor within your container, and carefully monitoring the smoothing while ensuring proper drying afterward.
Each step requires attention to timing and safety to transform your ABS print’s surface effectively.
Preparation and Setup
Before starting the acetone vapor smoothing process, you’ll need to prepare your ABS part and gather the necessary materials. Proper preparation and setup guarantee ideal results while preventing damage to your 3D printed model.
Start by sanding your ABS part to remove coarse surfaces and support material remnants. This creates a smoother foundation for the acetone vapor treatment.
Here’s what you’ll need for setup:
- Non-dissolving metal foil base – Protects your part from direct acetone contact
- Sealed container with secure lid – Traps vapor effectively without being completely airtight
- Paper towel soaked in acetone – Creates the vapor source
- Timer for monitoring exposure – Prevents over-dissolution of your part
- Well-ventilated workspace – Guarantees safety during the smoothing process
Position everything carefully before beginning the vapor exposure phase.
Vapor Generation Process
Once you’ve assembled your materials, begin by placing the paper towel soaked in acetone at the bottom of your sealed container, guaranteeing it doesn’t contact your ABS part directly.
Position your 3D print on a platform or support structure above the acetone-soaked towel. Cover the container loosely to allow acetone evaporation while maintaining vapor concentration inside. The acetone will create fumes that dissolve the ABS surface, blending layer lines for a smooth finish.
Monitor your part throughout the process, as timing varies based on part size and acetone concentration.
You’ll notice the surface becoming glossy as vapor works on the plastic. Don’t rush this step—proper exposure guarantees ideal smoothing without over-dissolving details or compromising structural integrity.
Monitoring and Drying
How do you know when your ABS part has achieved the ideal smoothing? Monitoring your part during acetone vapor exposure is critical.
You’ll need to watch closely as overexposure destroys fine details and warps shapes. Ideal timing depends on part size, acetone concentration, and ambient conditions—there’s no universal formula.
Once you remove the part from the vapor chamber, place it in a well-ventilated area for proper drying. The waiting game begins as excess solvents evaporate completely.
Key monitoring and drying considerations:
- Never touch the soft surface—you’ll leave permanent fingerprints
- Observe constantly—seconds can mean the difference between success and failure
- Expect variable drying times—from hours to days depending on thickness
- Ensure proper ventilation—trapped solvents compromise finish quality
- Resist impatience—premature handling ruins your work
Monitoring and Timing During Smoothing
Since acetone vapor smoothing operates through chemical dissolution rather than heat, you’ll need to watch your part closely throughout the entire process.
Monitoring the part during smoothing is critical because exposure time varies dramatically based on environmental conditions, print size, and your desired finish quality.
Smoothing sessions typically range from a few minutes to 15 minutes, requiring continuous observation to prevent overexposure that destroys fine details.
Check frequently for signs of melting or distortion—excessive exposure creates undesirably soft or overly smooth surfaces.
Document your timing for each session to build a reference library for future projects, as exposure time greatly affects results.
After removing your part from the vapor chamber, let it solidify for at least 30 minutes before handling to guarantee complete surface reconstitution.
Drying and Post-Processing Steps
After your ABS part completes the acetone vapor smoothing process, you’ll need to place it in a well-ventilated area where excess vapors can evaporate completely over several hours to days.
Don’t handle the part while it’s still soft, as this can cause unwanted deformities that’ll ruin your smooth finish.
Once fully dried and solidified, you can inspect the surface quality and perform light sanding on any uneven areas if needed.
Proper Drying Times
Once you’ve completed the acetone vapor smoothing process, proper drying becomes critical for achieving the best results.
You must allow your part to dry in a well-ventilated area for several hours minimum, though complete curing may take days depending on thickness and environmental conditions.
The drying time varies greatly based on multiple factors that directly impact your final results:
- Initial acetone amount – More vapor means longer waiting periods
- Part size and thickness – Larger pieces require extended drying time
- Ambient temperature – Warmer conditions accelerate evaporation
- Overexposure recovery – Heavily treated parts need additional hardening time
- Structural integrity – Patience prevents permanent damage
Don’t touch the softened surface during drying, as you’ll create fingerprints and deformities that’ll ruin your smooth finish.
Final Surface Inspection
When your part feels firm to the touch and no longer gives under gentle pressure, you’re ready to examine the final results.
During your final surface inspection, carefully check for any areas showing uneven smoothing or inconsistent finishes. These imperfections typically occur when vapor exposure wasn’t uniform across the part’s surface. Look for spots that appear rougher than surrounding areas or regions where details may have been over-smoothed.
The visual quality should show a glossy, uniform finish across the entire surface. If you discover areas needing improvement, mark them for potential touch-ups.
Remember to wait at least 24 hours before performing additional smoothing sessions to prevent overexposure and preserve important details in your print.
Alternative Acetone Application Methods
Why settle for vapor chambers when you can explore other acetone application techniques? While acetone vapor smoothing remains the gold standard, alternative methods offer unique advantages for specific situations.
Alternative acetone application approaches:
- Brush application – Paint acetone directly onto your ABS surface for surgical precision, though you’ll face uneven results and waste precious solvent.
- Quick acetone bath – Submerge parts rapidly for speed, but risk devastating warping and detail loss.
- Controlled dipping – Partially immerse sections for targeted smoothing effects.
- Saturated cloth wiping – Apply acetone through fabric for moderate control over coverage.
- Spray bottle misting – Create fine acetone droplets for gentle surface treatment.
Each method demands careful monitoring to prevent overexposure and preserve your print’s intricate features.
Automated Vapor Smoothing Equipment Options
Professional-grade automated vapor smoothing equipment transforms acetone smoothing from a manual craft into a precise, repeatable process. The Zortrax Apoller exemplifies this technology, featuring built-in vacuum and air-circulation systems that evenly distribute acetone fumes throughout the chamber.
This automated vapor smoothing machine maintains ideal conditions, eliminating the inconsistent results you’d encounter with manual methods.
At approximately $5,990, the Zortrax Apoller targets businesses rather than hobbyists. You’ll benefit from programmable settings that accommodate different materials and part sizes, ensuring customized smoothing for your specific needs.
These systems require minimal hands-on time, letting you focus on other tasks while the machine completes the smoothing process. The controlled environment reduces overexposure risks while delivering consistently smooth finishes across multiple parts simultaneously.
Troubleshooting Common Smoothing Issues
How can you rescue a smoothing session that’s gone wrong? When smoothing with acetone goes awry, don’t panic. Most issues stem from controllable factors that you can address with proper technique adjustments.
Don’t panic when acetone smoothing goes wrong—most problems come from controllable factors you can fix with proper technique adjustments.
Common problems during ABS smoothing include:
- Warped models – Your print touched liquid acetone instead of staying suspended in vapor
- Lost fine details – You’ve overexposed delicate features to acetone vapor
- Incomplete smoothing – Insufficient vapor generation from poorly placed acetone-soaked towels
- Inconsistent results – Different ABS filament brands respond uniquely to acetone exposure
- Persistent layer lines – You need longer exposure time or multiple smoothing sessions
Monitor your process closely and limit exposure time based on your model’s complexity.
Guarantee proper suspension and container sealing for ideal vapor distribution.
Comparing Different ABS Surface Finishing Techniques
You’ll find several methods available for finishing ABS prints, each with distinct advantages and trade-offs.
Acetone vapor smoothing offers the most dramatic transformation with its glossy, injection-molded appearance, while manual sanding gives you precise control at the cost of significant time investment.
Chemical coating alternatives like XTC-3D provide a middle ground by masking layer lines without the safety concerns of solvent vapors.
Acetone Vapor Method
While manual sanding can take hours and often produces uneven results, acetone vapor smoothing transforms rough ABS prints into glossy, injection-molded-quality parts in a fraction of the time.
You’ll achieve professional-grade finishes by exposing your prints to acetone vapors in a controlled environment.
Here’s what makes this method superior:
- Time savings – Complete smoothing in minutes instead of hours
- Flawless consistency – No brush marks or uneven surfaces
- Detail preservation – Maintains intricate features that sanding destroys
- Professional appearance – Creates injection-molded quality finishes
- Minimal waste – Uses less acetone than brush or bath methods
You simply suspend your ABS print in a vapor chamber without direct contact with liquid acetone.
The controlled environment guarantees even coverage while preventing warping that occurs with alternative acetone application methods.
Manual Sanding Approach
Manual sanding offers complete control over your ABS surface finishing process, though it demands considerably more time and physical effort than vapor smoothing.
You’ll need various grits of sandpaper to physically remove layer lines, allowing precise material removal but potentially leaving visible scratches.
Unlike acetone vapor smoothing’s uniform sheen, manual sanding typically requires additional polishing with rubbing or polishing compounds to achieve a glossy surface finish.
This approach works well for intricate parts where you need targeted smoothing. However, you risk over-sanding and losing fine details.
While manual sanding represents a viable finishing option for your ABS prints, it won’t match acetone vapor smoothing’s efficiency or quality level within the same timeframe.
Chemical Coating Alternatives
Several chemical coating alternatives can deliver smooth ABS surfaces without acetone vapor’s solvent-based approach.
You’ll find these options particularly useful when working in poorly ventilated spaces or seeking different finish characteristics.
Popular coating methods include:
- XTC-3D epoxy coating – Creates glass-like surfaces that’ll make your prints look professionally manufactured
- ABS glue mixed with acetone – Apply this solution that’ll chemically bond while smoothing imperfections
- Acetone with a brush – Direct application gives you precise control over specific areas needing attention
- Polyurethane clear coats – Protective finishes that’ll shield your prints from UV damage and wear
- Primer-based systems – Build smooth foundations that’ll prepare surfaces for paint applications
These alternatives offer controlled application without requiring specialized vapor chambers or safety equipment.
Frequently Asked Questions
What Is Acetone Vapor Smoothing?
You’ll use acetone vapor smoothing as a post-processing technique where acetone fumes dissolve your ABS print’s outer layer, creating smoother surfaces by blending layer lines and strengthening interlayer bonds.
What Does Acetone Vapor Do?
Acetone vapor dissolves your ABS print’s outer layer, melting and blending those visible layer lines together. You’ll get a glossy, smooth surface that looks injection-molded while strengthening the part’s overall structure.
How Long Does Acetone Take to Dissolve ABS?
You’ll see acetone dissolve ABS in minutes to hours, depending on concentration and thickness. For vapor smoothing, you’ll need about fifteen minutes of exposure, though thicker parts require longer treatment times.
How to Smooth Plastic With Acetone?
Place your plastic print in a sealed container with acetone-soaked paper towel, ensuring it doesn’t touch directly. Monitor closely to prevent detail loss, then dry thoroughly in ventilated area.


Leave a Reply