
You’ll achieve professional ABS smoothing results using vapor bath chambers with acetone-soaked towels, precision brush application for detailed areas, and airbrush techniques for even coverage. Start with proper surface preparation by cleaning prints and removing supports, then optimize exposure times based on wall thickness—thin sections need 2-5 minutes while thicker areas require longer treatment. Always work in well-ventilated spaces wearing protective equipment, and test different filament brands for compatibility since quality varies considerably. Master these fundamentals to access advanced finishing secrets.
Vapor Bath Chamber Setup and Configuration
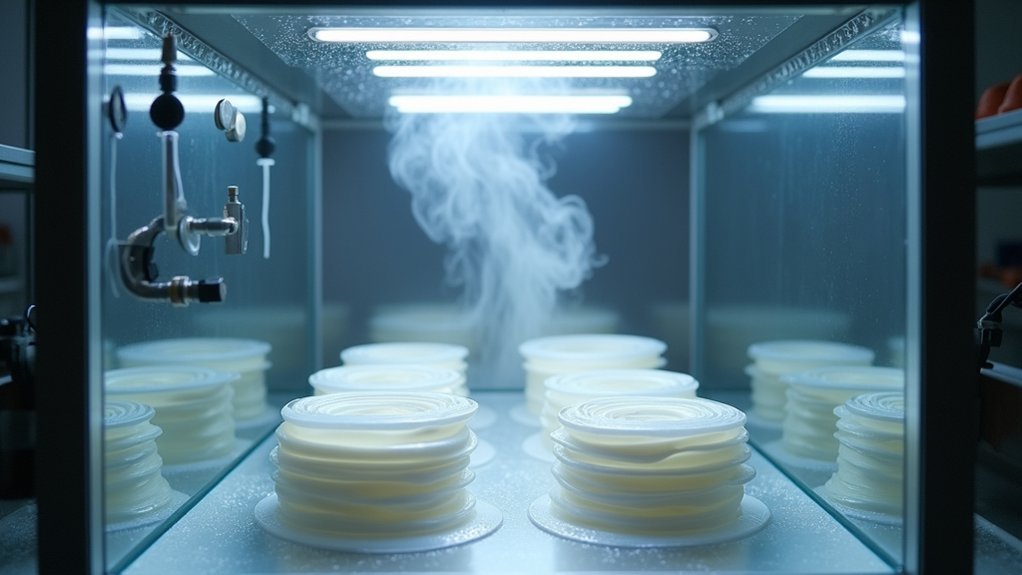
When setting up a vapor bath chamber for ABS filament smoothing, you’ll need to select an appropriate container that resists acetone degradation while providing clear visibility of the process.
Glass jars or transparent polypropylene storage containers work best, ensuring they’re large enough for your prints and vapor circulation.
Place a raised platform like a metal plate covered with aluminum foil inside to keep parts elevated from the chamber bottom. Position acetone-soaked paper towels along the edges to generate vapor.
Elevate prints on foil-covered platforms while positioning acetone-soaked towels strategically around chamber edges for optimal vapor distribution.
Seal the chamber lightly while creating small ventilation holes to prevent pressure buildup. The transparent walls let you monitor progress without opening the container, maintaining consistent vapor concentration throughout the smoothing process. Always wear safety equipment including gloves and goggles when handling acetone to protect yourself from potential exposure.
Precision Brush Application Methods
You’ll achieve professional results by selecting the right brush size for each area of your ABS print.
Start with fine-tipped brushes for intricate details and switch to flat brushes for larger surfaces that need smoothing.
Focus on applying multiple thin coats rather than heavy applications, which lets you target specific areas while maintaining control over the smoothing process. Monitor your work closely to prevent over-smoothing that can damage fine details or create uneven surfaces on your ABS parts.
Brush Size Selection
Although precision brush application offers excellent control over acetone smoothing, selecting the right brush size determines whether you’ll achieve professional results or damage your ABS print.
Fine-tipped brushes excel at smoothing small features and intricate details without affecting surrounding areas. They allow precise acetone placement and help preserve delicate geometries that larger brushes might damage.
For broader surfaces, flat brushes provide even coverage and reduce application time. Choose brushes made from acetone-resistant materials that won’t degrade during use.
The brush size directly controls acetone quantity – smaller brushes prevent over-application that can dissolve thin walls or cause deformation. Match your brush selection to the specific areas you’re smoothing, using fine brushes for details and flat brushes for larger surfaces.
Apply acetone in thin layers to maintain consistency and avoid excess buildup that could create uneven smoothing results across your ABS print.
Layering Thin Coats
Success in acetone smoothing depends on building up thin, controlled layers rather than applying heavy coats that risk damaging your ABS print.
You’ll need to dip your brush lightly into acetone to prevent excessive solvent pick-up, then spread it thinly across the surface using controlled brush strokes.
Apply each layer gradually, allowing complete drying between coats to prevent acetone accumulation. This approach prevents over-smoothing, which can cause deformation, detail loss, or uneven finishes on thin walls.
You should inspect your part after each coat to assess progress and determine when you’ve achieved the desired smoothness. Brush application can create uneven results and may damage your print compared to other smoothing methods.
Store parts in well-ventilated areas during curing, and handle them carefully to avoid smudging.
Multiple thin coats will consistently deliver better results than single heavy applications.
Targeted Detail Work
Fine details on ABS prints require a more surgical approach than broad surface smoothing.
You’ll need precision tools and controlled techniques to target specific areas without damaging surrounding features.
Use fine-tip brushes with synthetic bristles that won’t shed fibers onto your print.
Dip only the brush tip lightly into acetone to control application amount.
Work in thin, controlled strokes with multiple light passes rather than heavy applications that can cause warping.
Always work in a well-ventilated area to ensure proper air circulation and safety during the acetone smoothing process.
Essential Targeted Smoothing Steps:
- Practice on test prints to calibrate acetone amount and brush pressure before working on final models
- Use magnifying equipment for better visibility and accuracy on very fine details during application
- Monitor drying times carefully to detect early signs of deformation or excessive plastic softening
- Allow complete drying between passes to prevent over-smoothing and surface degradation
Exposure Time Optimization for Different Part Geometries
You’ll need to adjust your exposure times based on your part’s wall thickness to achieve ideal smoothing results.
Thin-walled sections require considerably shorter exposure periods since they’ll absorb acetone vapor faster and risk over-dissolution.
Thick sections demand longer exposure times to guarantee the smoothing effect penetrates adequately through the material’s surface layers. Higher temperatures will accelerate acetone evaporation during the smoothing process, allowing you to reduce overall exposure times while maintaining effective results.
Thin Wall Timing
When smoothing ABS parts with thin walls, precise timing becomes critical since these delicate sections can quickly deform or dissolve under extended acetone exposure.
You’ll need to carefully monitor your parts and adjust timing based on wall thickness and geometry complexity.
Here’s how to enhance timing for thin walls:
- Start with short exposures – Begin with 2-5 minute intervals and check progress frequently to prevent overexposure.
- Use incremental smoothing – Apply multiple short exposure cycles with drying time between each session.
- Monitor visually – Watch for surface changes and stop immediately if you notice warping or dimensional shifts.
- Test on samples first – Practice timing on identical geometry samples to establish ideal exposure duration for your specific parts.
The vapor circulation created by PC fans helps ensure even acetone distribution across all surfaces, preventing uneven smoothing that can occur with thin-walled geometries.
Thick Section Adjustments
Thick sections present the opposite challenge and require notably longer acetone exposure times to achieve complete smoothing throughout the material volume.
You’ll need to extend exposure times considerably since the acetone must penetrate deeper into the ABS material to eliminate layer lines effectively. However, don’t simply double or triple your timing—start with incremental increases and test iteratively to find the sweet spot for your specific geometry.
Monitor your parts closely during extended exposure to prevent over-softening that can cause deformation or structural compromise.
You’ll achieve better results by maintaining consistent acetone concentration and temperature throughout the process. The acetone smoothing technique is particularly effective for ABS because it chemically dissolves the surface layer to create a uniform, glossy finish.
Remember that thicker sections retain acetone longer, so allow adequate drying time afterward to restore full structural integrity before handling.
Safety Protocols and Workspace Ventilation
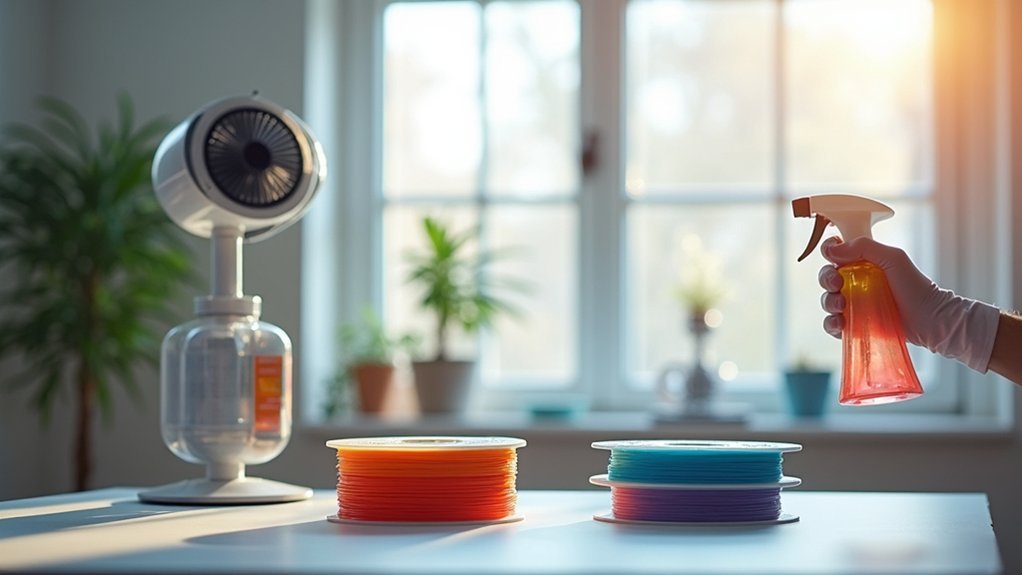
Before attempting any acetone smoothing technique, you must establish proper safety protocols and workspace ventilation to protect yourself from serious health risks and fire hazards.
Safety protocols and proper ventilation are absolutely critical before starting any acetone smoothing work to prevent serious health and fire risks.
Essential Safety Requirements:
- Create a well-ventilated workspace with a fume hood if possible, and guarantee all ventilation equipment functions properly before starting work.
- Wear complete protective equipment including nitrile gloves, safety goggles, long-sleeved clothing, and a respirator with organic vapor filters to prevent exposure.
- Eliminate ignition sources by keeping acetone containers away from flames, sparks, and heat sources, while posting warning signs and having a Class B fire extinguisher nearby.
- Prepare emergency protocols with eyewash stations, spill cleanup materials, and proper chemical waste containers for acetone-soaked materials.
Never work in confined spaces, and always allow smoothed parts to dry completely before storage. Remember that smoothed models may remain soft for hours after the smoothing process is complete.
Pre-Smoothing Surface Preparation Techniques
Although proper safety protocols form the foundation of acetone smoothing, the quality of your final results depends heavily on how well you prepare your ABS print’s surface before applying any smoothing technique.
Start by thoroughly cleaning your print to remove dirt, oils, and fingerprints that’ll interfere with acetone adhesion. Remove all support material completely, exposing every surface you plan to smooth.
Inspect your print for weak points or defects that might worsen during smoothing. Ensure your print’s completely dry, as moisture prevents proper acetone bonding.
Light sanding with fine-grit sandpaper eliminates minor imperfections and rough spots. This preparation creates an ideal surface for acetone application, whether you’re brush-smoothing or vapor-smoothing, ultimately delivering professional-quality results. Be aware that the smoothing process can warp prints and affect dimensional accuracy, so consider your model’s geometry carefully.
Multi-Coat Brush Layering Strategy
With your print surface properly prepared, multi-coat brush layering gives you precise control over acetone application and smoothing intensity. This technique lets you selectively smooth specific areas while leaving others untouched, perfect for preserving important details or textures in your design.
Here’s your step-by-step approach:
- Select appropriate brushes – Use fine-tip brushes for intricate details and flat brushes for larger surface areas.
- Apply thin, consistent coats – Work in steady strokes, allowing each layer to dry slightly before adding the next.
- Monitor absorption rates – Adjust acetone amounts based on how quickly your ABS material absorbs the solvent.
- Inspect regularly – Check the surface frequently to prevent over-smoothing and maintain desired texture levels.
This cost-effective method reaches complex geometries other techniques can’t access. Keep in mind that acetone’s low boiling point can cause rapid evaporation during application, so work efficiently to maintain consistent coverage.
Airbrush Acetone Application for Even Coverage
When you’re ready to achieve professional-level smoothing results, airbrush acetone application offers superior control over the smoothing process.
You’ll need a small airbrush with adjustable settings, proper ventilation equipment, and safety gear including gloves and a respirator mask.
Mastering your spray pattern through consistent distance and overlapping passes guarantees you’ll get uniform coverage without creating puddles or missed spots. Check your print every 5 minutes during the airbrush smoothing process to monitor progress and prevent over-exposure.
Equipment Setup Requirements
Four essential components form the foundation of an effective airbrush acetone smoothing setup for ABS filament.
You’ll need specialized equipment that can handle acetone’s corrosive properties while delivering consistent results.
- Solvent-resistant airbrush system – Choose an airbrush rated for solvent use with adjustable nozzle size and flow control to prevent damage and clogging from acetone exposure.
- Consistent compressed air supply – Use equipment capable of delivering low-pressure atomization for even acetone mist distribution across your ABS parts.
- Proper solvent reservoir – Select a reservoir that prevents evaporation loss and allows controlled acetone dispensing throughout your smoothing session. Remember that ASA composites can also be effectively smoothed using acetone, expanding your material options beyond standard ABS.
- Ventilation system – Install a spray booth or fume extraction system to protect yourself from harmful acetone vapors during operation.
Spray Pattern Control
Although acetone’s aggressive solvent properties make ABS smoothing highly effective, controlling your spray pattern determines whether you’ll achieve professional results or create an uneven, blotchy mess.
You’ll need to maintain consistent nozzle distance and angle for uniform acetone deposition across your print’s surface. Apply thin, layer-by-layer mists rather than heavy coats to prevent pooling and dripping. Keep your hand moving steadily or use mechanical arm control to avoid blotches.
| Setting | Recommended Value | Effect |
|---|---|---|
| Air Pressure | Low-Medium | Reduces drips, controls coverage |
| Nozzle Distance | 6-8 inches | Even distribution |
| Spray Angle | 45-90 degrees | Uniform coating |
Pre-test your spray coverage on similar ABS samples to calibrate intensity and duration before treating your actual print. Work in a well-ventilated area to ensure proper airflow and prevent solvent vapor buildup during application.
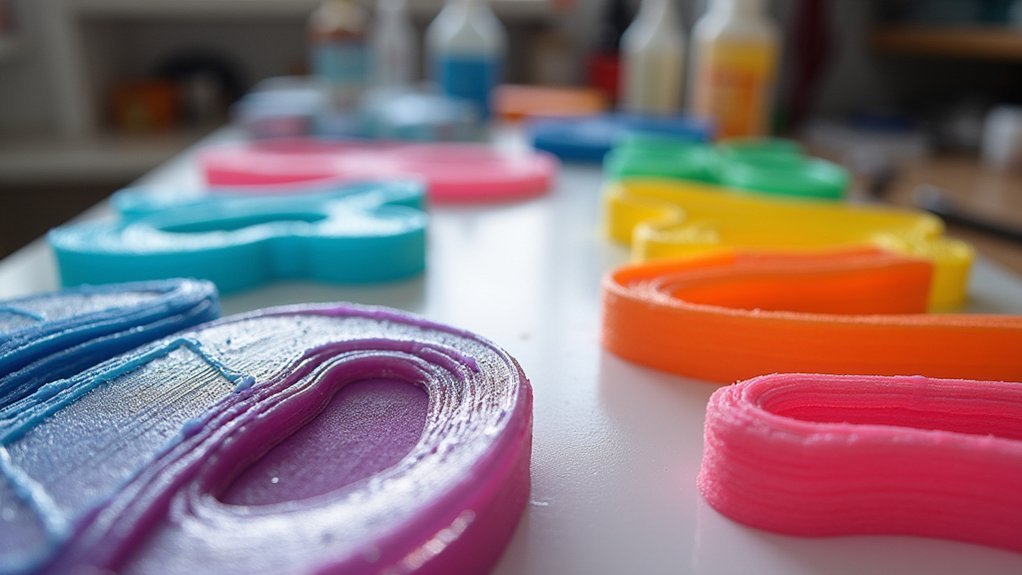
Filament Brand Compatibility and Testing
The foundation of successful acetone smoothing lies in understanding how different ABS filament brands interact with the solvent.
You’ll find that high-quality filaments from reputable manufacturers offer consistent diameter and minimal impurities, ensuring better acetone interaction and predictable results.
Economy filaments may require adjustments in application methods due to their variable composition and impurities.
Testing compatibility prevents serious deformation and disappointing outcomes. This post-manufacturing process effectively eliminates surface imperfections by breaking down the outermost layer of compatible ABS materials.
Here’s your testing approach:
- Sample small pieces from each new filament brand before committing to larger prints
- Use high-purity acetone (99% or higher) to eliminate variables from contaminated solvents
- Document your results for different brands to build a reliable reference guide
- Test specialized blends separately, as additives like carbon fiber alter acetone interaction considerably
Post-Smoothing Polishing and Finishing
Once acetone smoothing transforms your ABS print’s surface, you’ll need strategic polishing techniques to achieve professional-grade results.
Start with manual touch-ups using fine sandpaper to correct small imperfections, then progress through grits from coarse to fine for ideal surface finish. Fill any gaps with epoxy or superglue before proceeding.
For advanced polishing, use wet sanding followed by specialized polishing compounds and buffing wheels with cotton or wool materials. Rotary tools provide precision for intricate details.
When painting, apply primer first, then use plastic-specific paint with light misting technique. Clear coats protect and enhance gloss. For delicate surfaces, try dipping a soft mop brush in acetone to gently tease the surface instead of mechanical polishing.
Maintain dimensional accuracy through vapor smoothing and temperature control.
Always work in well-ventilated areas wearing protective equipment including gloves and safety glasses.
Troubleshooting Common Smoothing Defects
Even perfect polishing techniques can’t salvage prints damaged during the smoothing process itself.
You’ll need to identify and prevent common defects that can ruin your ABS parts during acetone smoothing.
Common Smoothing Problems You Can Fix
- Layer Line Merging – Apply acetone in thinner, more controlled layers to preserve fine details and prevent fitting issues with threaded components.
- Part Warping – Reduce acetone exposure time and maintain consistent temperature during smoothing to prevent twisting or distortion.
- Uneven Surface Results – Use high-purity acetone (99% or higher) and guarantee uniform vapor exposure throughout the entire part.
- Over-Dissolution – Monitor your smoothing process closely and avoid acetone baths that can cause excessive material removal and detail loss. Consider sanding as alternative finishing methods when acetone produces inconsistent results on your specific filament brand.
Frequently Asked Questions
Can Acetone-Smoothed ABS Parts Be Painted or Have Decals Applied Afterward?
You can paint and apply decals to acetone-smoothed ABS parts. The smooth surface actually improves adhesion, but you’ll need special paint formulations for chemical stability and careful surface preparation.
How Long Should I Wait Before Handling Smoothed Parts Safely?
You should wait at least 24 hours before handling acetone-smoothed ABS parts. Don’t touch them until they’re completely dry, non-tacky, and have a uniform gloss without wet patches.
Will Acetone Smoothing Affect Threaded Holes or Mechanical Fitments?
You’ll find acetone smoothing can deform threaded holes and affect mechanical fitments by softening surfaces. Use vapor methods, mask critical features, and allow complete re-hardening before assembly to preserve fit integrity.
Can I Reuse Acetone Vapor After Multiple Smoothing Sessions?
You shouldn’t reuse acetone vapor after multiple smoothing sessions. Contaminated vapor reduces effectiveness, creates unpredictable results, and poses safety risks. Fresh acetone guarantees consistent quality and maintains proper solvent concentration.
Does Acetone Smoothing Make ABS Parts Food-Safe for Kitchen Use?
No, acetone smoothing doesn’t make ABS parts food-safe. You’re still dealing with potentially toxic ABS material and harmful colorants. You’ll need food-grade filaments or safe coatings for kitchen applications.
In Summary
You’ve now mastered the essential acetone smoothing techniques for ABS filaments. Don’t rush the process—proper preparation and safety measures will secure professional results. Remember to test your specific filament brand first, maintain consistent exposure times, and guarantee adequate ventilation throughout. With practice, you’ll achieve that glossy, injection-molded finish that transforms your 3D prints from amateur to professional quality. Keep experimenting with different methods to find what works best for your projects.

Leave a Reply