You’ll need proper safety equipment including heat-resistant gloves, goggles, and ventilation when finishing metal-filled prints. Start by cleaning parts with solvent, then sand progressively from 80-grit to 2000-grit for smooth surfaces. Use rock tumbling for 6-24 hours with ceramic or steel media for even finishes. Wire wheel grinding removes imperfections effectively, while polishing compounds applied with rotary tools at 3000+ RPM create mirror-like results. Create authentic patina effects using vinegar and hydrogen peroxide to accelerate oxidation. These fundamental techniques will transform your prints into professional-grade pieces.
Understanding Metal-Filled Filament Composition and Properties

When you’re working with metal-filled filaments, you’ll discover they’re fundamentally hybrid materials that combine a polymer matrix—typically PLA or PETG—with finely dispersed metal powders like iron, bronze, or copper.
This composition creates filaments with higher density than standard polymers while delivering an authentic metallic appearance.
You’ll find these filaments retain the mechanical strength of their base polymer but often sacrifice toughness and flexibility.
They’re particularly limited in iron-filled variants.
Temperature resistance mirrors the polymer matrix, so don’t expect improved heat performance.
Metal-filled filaments maintain the thermal limitations of their polymer base, offering no enhancement in heat resistance despite their metallic appearance.
While they provide metallic aesthetics, they lack full metal properties like significant electrical conductivity.
Be prepared for increased nozzle wear due to their abrasive nature, and note that some variants can undergo debinding and sintering for solid metal characteristics. Professional-grade software with comparison tools can help you evaluate different metal-filled filament properties to select the optimal material for your specific application requirements.
Essential Equipment and Safety Requirements for Metal Finishing
Before you begin transforming your metal-filled prints into authentic metal objects, you’ll need specialized equipment that goes far beyond your standard 3D printing setup.
A kiln is your most critical investment for debinding and sintering metal-filled filaments. You’ll also need crucibles to hold parts during sintering and refractory ballast for uniform heat distribution.
Safety can’t be overlooked in this high-temperature process. Heat-resistant gloves protect against burns, while goggles and masks shield you from metal particles. Proper ventilation prevents inhalation hazards, and keeping a fire extinguisher nearby addresses thermal risks.
Maintain a secure workspace free of flammable materials.
For post-sintering finishing, equip yourself with rotary tumblers, wire brushes, sandpaper, files, and polishing compounds to achieve professional results. Different materials require specific refractory ballasts during the sintering process, with Al₂O₃ needed for Bronze and Copper materials while Steel Blend and Sintering Carbon work best for stainless steel and Inconel® 718.
Surface Preparation and Initial Sanding Techniques
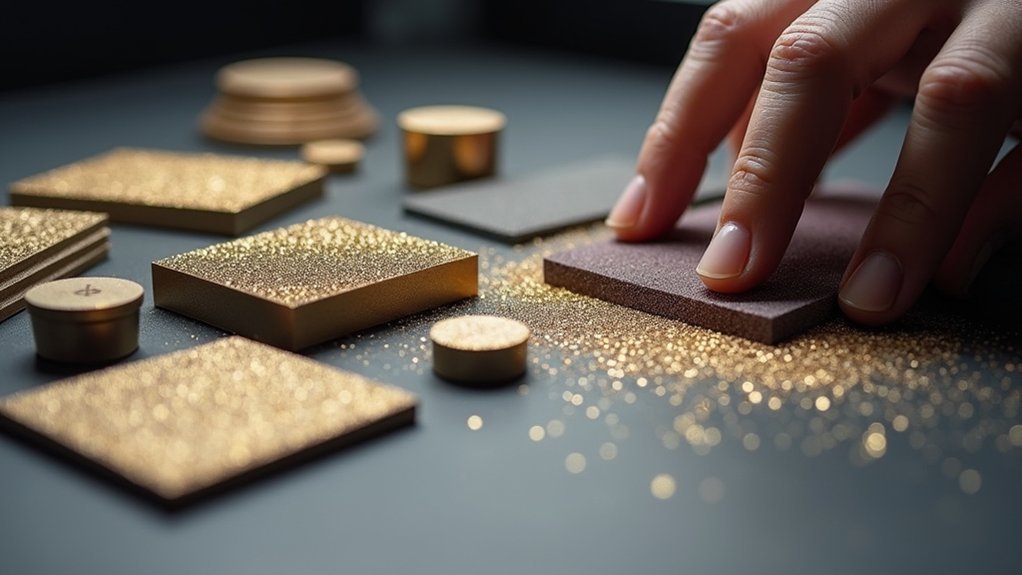
Three fundamental steps will determine the quality of your metal-filled filament finish: proper surface preparation, contaminant removal, and strategic sanding.
Start by cleaning your printed part with solvent and a lint-free cloth to remove oils and grease. Confirm complete drying before proceeding.
Begin sanding with low-grit paper (80-grit) to break down visible layer lines effectively. Progress systematically through higher grits—moving to 220, 400, 800, and finally 1000-2000 grit for smooth finishes. This progressive approach prevents deep scratches while maintaining surface integrity. The roughening process increases adhesion for any subsequent coatings or adhesives you may apply.
For quicker results, you can use steel wool burnishing, though this won’t eliminate layer lines completely.
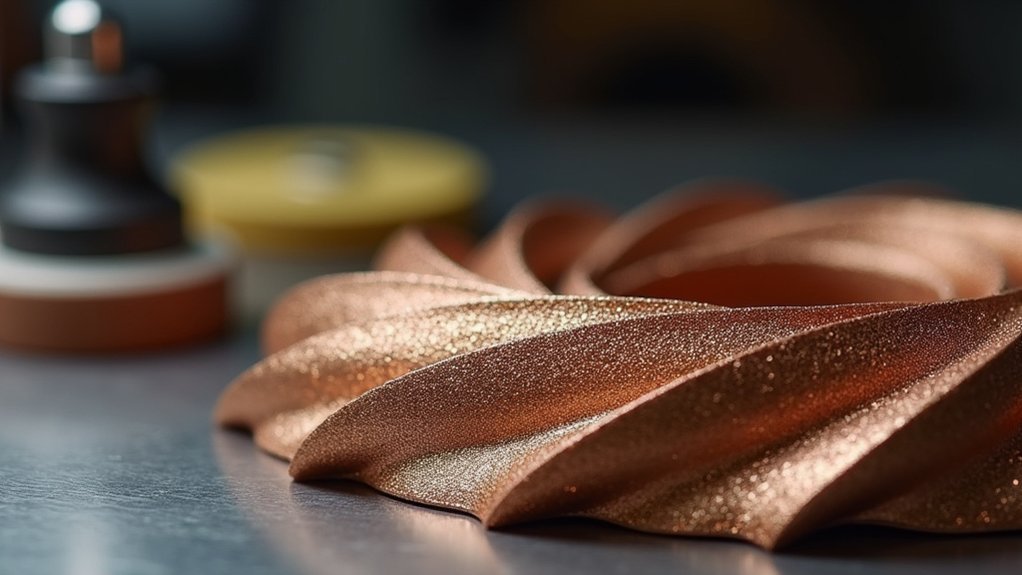
After high-grit sanding, apply polishing compounds to achieve that coveted shiny finish. Remember, patience during this phase directly impacts your final result’s professional appearance.
Rock Tumbling Methods for Smooth Metallic Finishes
When you’re ready to tumble your metal-filled prints, you’ll need to select the right media based on your part’s geometry and desired finish quality.
Choose from options like ceramic chips, steel media, or synthetic abrasives, ensuring the media size can reach into detailed areas without causing damage. Fill your tumbler barrel 3/4 full with parts of similar hardness to ensure even processing and prevent differential wear rates.
Your processing time will typically range from 6 to 24 hours depending on the initial surface condition and smoothness level you’re targeting.
Tumbling Media Selection
The foundation of achieving professional metallic finishes lies in selecting the right tumbling media for your specific project requirements.
You’ll want plastic media for delicate metal-filled prints, as it won’t discolor surfaces or cause burr peening while producing smooth finishes ideal for post-processing.
Stainless steel media offers corrosion-resistant performance for high-volume operations, maintaining quality through repeated use.
Carbon steel media provides aggressive burr removal and uniform surfaces at lower costs.
Ceramic media delivers weighted polishing action without excessive material loss.
Consider shape carefully—triangular pellets reach corners effectively, while tetrahedrons access interior surfaces and holes.
Larger media accelerates heavy cutting, smaller pieces excel at fine polishing.
You can reuse uniform-sized media between cutting and polishing steps, saving time and costs while achieving consistent results. The bonding agent in preformed abrasive media wears gradually during use while maintaining the media’s original shape for consistent performance.
Optimal Processing Times
After selecting your tumbling media, timing becomes your next critical decision for achieving smooth metallic finishes.
You’ll typically need anywhere from a few hours to several days, but plan for about a week for initial passes. Start with 60-90 grit for your first run, focusing on removing layer lines through continuous tumbling.
Check your prints daily during extended sessions to prevent over-tumbling. While rock tumbling’s slower than manual sanding, it delivers more uniform results.
Follow a grit sequence from coarse to fine for best outcomes. Remember that different metal-filled filaments like brass, bronze, or copper may require timing adjustments.
Lower initial layer heights greatly improve your final smoothness, so consider this when planning your processing duration. Handle your metal-infused prints with extra care during removal from the tumbler, as these materials are significantly more brittle than standard filaments.
Wire Wheel Grinding and Advanced Surface Treatment
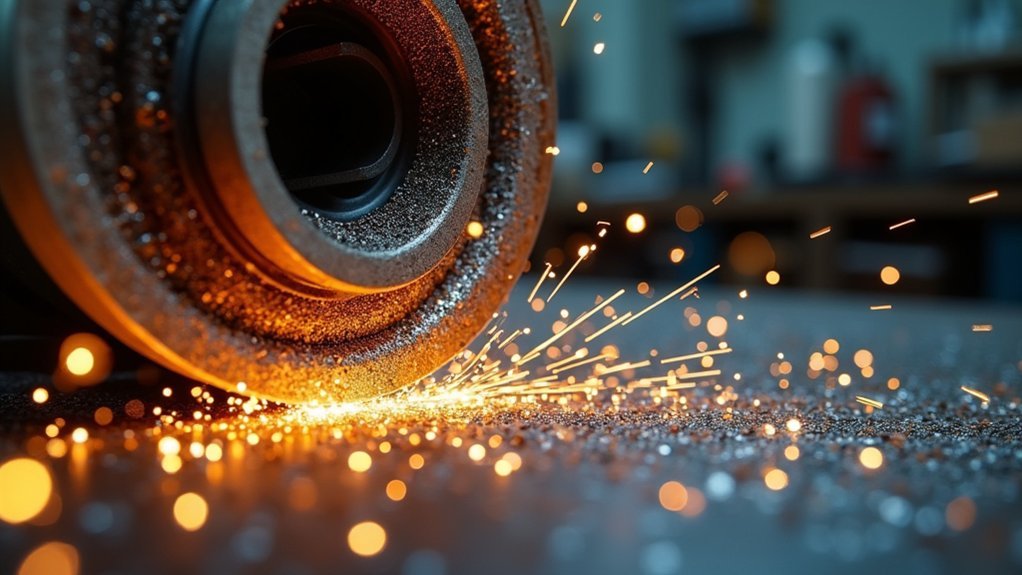
You’ll need to establish proper safety protocols before starting wire wheel grinding, as loose wire fragments and debris pose serious hazards to your eyes and respiratory system.
Your surface texture control depends on selecting the right wire type and brush configuration—crimped wires for gentler finishes and knotted wires for aggressive material removal.
You can achieve superior results by implementing progressive grinding techniques that combine wire brushing with other finishing methods in sequential stages. Wire abrasives maintain their effectiveness through self-sharpening properties, continuously exposing fresh cutting surfaces as strands naturally break down during use.
Wire Wheel Safety Protocols
When working with wire wheels to finish metal-filled filaments, extensive safety protocols become your first line of defense against serious injury.
You’ll need safety goggles, protective clothing, and gloves to prevent abrasions and burns. Position guards securely and check brushes for rust or degradation before use. Maintain proper brush size and speed ratings while applying steady pressure—excessive force causes wire breakage and creates hazards.
| Safety Component | Requirement |
|---|---|
| Eye Protection | Safety goggles or full face shields |
| Work Area | Clear 50-foot radius of bystanders |
| Tool Setup | Secure workpiece, position guards |
| Brush Condition | Check for rust, corrosion, damage |
| Operating Pressure | Steady force, avoid excessive pressure |
Always operate tools away from your body and follow ANSI B165.1 guidelines for compliance. Verify that the RPM ratings of your wire wheel attachments precisely match your grinder’s specifications to prevent dangerous speed mismatches that can lead to wheel failure.
Surface Texture Control Methods
Multiple surface texture control methods can transform your metal-filled filament prints from rough, layered surfaces into professionally finished parts.
You’ll find mechanical methods like sanding and polishing offer significant roughness reduction, while chemical treatments such as vapor smoothing achieve smoother finishes.
Wire wheel grinding serves as effective pre-treatment, removing large imperfections and cleaning debris before applying advanced techniques.
For precision applications, you can utilize laser polishing to achieve 2-3μm roughness, though it requires substantial equipment investment.
Electropolishing and chemical polishing remove thin material layers, improving surface quality but potentially affecting dimensions.
Abrasive flow machining works well for complex geometries, while shape adaptive grinding handles free-form parts effectively.
You’ll often combine multiple techniques to achieve best results balancing cost, precision, and material compatibility requirements. These surface improvement techniques also reduce friction and wear for moving parts, improving overall contact performance.
Progressive Grinding Techniques
Progressive grinding techniques transform metal-filled filament prints through systematic material removal, starting with coarse abrasives and advancing through increasingly finer grits to achieve surface finishes as smooth as 3-6 micro inch Ra.
You’ll need to carefully select grinding wheels based on your filament’s composite hardness to prevent material burning or excessive wear.
Wire wheel grinding offers controlled material removal that’s perfect for removing surface contaminants without deforming softer filament cores.
Key progressive grinding parameters to optimize:
- Feed rate and wheel speed – Adjust at each stage to prevent overheating
- Contact pressure – Control to avoid surface damage during refinement
- Grit progression sequence – Plan shifts to minimize heat buildup
Advanced treatments like honing and electrolytic in-process dressing can further enhance your results, enabling mirror-like finishes for high-performance applications. The grinding process relies on bonded abrasives that form effective wheels capable of precise material removal from metal-filled surfaces.
Polishing Compounds and Rotary Tool Applications
While sanding and filing establish the foundation for your metal-filled filament’s surface, polishing compounds and rotary tools deliver the transformative final steps that’ll give your prints an authentic metallic appearance.
You’ll need different compounds for each polishing stage. Start with coarse aluminum oxide, progress to green compound for intermediate work, then finish with rouge or diamond compound for mirror-like results. Apply these using rotary tools at 3000+ RPM with muslin or felt buffs.
| Polishing Stage | Compound Type | Tool/Buff |
|---|---|---|
| Initial | Aluminum Oxide | Loose Fold Buff |
| Intermediate | Green Compound | Muslin Buff |
| Final | Rouge/Diamond | Soft Felt Buff |
Always wear safety glasses and gloves while maintaining consistent pressure and speed throughout the process. Regular maintenance of your polished prints will enhance longevity and preserve their lustrous finish over time.
Creating Patina and Rust Effects on Metal Prints
The polished surface you’ve achieved becomes the perfect canvas for creating authentic-looking patina and rust effects that’ll transform your metal-filled prints into convincingly weathered pieces.
A flawlessly polished surface provides the ideal foundation for developing realistic patina effects that breathe authentic character into metal-filled 3D prints.
You can use common household chemicals like vinegar and hydrogen peroxide to accelerate oxidation and create rich rust patinas. Elevated temperatures and direct sunlight will enhance these chemical reactions, deepening the weathered appearance.
For advanced techniques, consider these approaches:
- Layer different patina colors – Combine rust effects with copper patina using Green Patina Aging Solution for complex, organic appearances.
- Control application distance – Vary spray distance and amount to achieve different patina intensities and textures.
- Mimic natural wear patterns – Focus effects on edges and high-contact areas for authentic weathering.
The patina reaction requires adequate development time to achieve the full authentic weathered appearance you’re seeking.
Always wear safety goggles and gloves when handling chemicals, and create sample boards for experimentation before treating final pieces.
Protective Sealing and Final Touch Techniques
Once you’ve achieved your desired patina or weathered appearance, you’ll need to lock in those effects with proper protective sealing to prevent further oxidation and wear.
Start by cleaning your print with isopropyl alcohol and lightly sanding with fine grit paper to guarantee proper adhesion.
Clear acrylic sprays offer straightforward protection against tarnishing, while two-part epoxy coatings provide durable, glossy finishes for heavy-use pieces.
Apply thin, multiple coats rather than single thick layers to avoid drips.
After sealing, polish with fine abrasives and buff with microfiber cloths to enhance luster. Whether working with fully metal parts produced through debinding and sintering processes or metal-filled composites, proper protective finishing ensures long-lasting results.
Store finished prints in airtight containers with desiccants, avoiding direct sunlight and high temperatures to preserve coating integrity.
Frequently Asked Questions
Can Metal-Filled Filaments Be Printed on Standard FDM Printers Without Modifications?
You can’t print metal-filled filaments on standard FDM printers without modifications. You’ll need to upgrade to a hardened nozzle because standard brass nozzles wear quickly from the abrasive metal powders.
How Do Printing Temperatures Differ Between Various Metal-Filled Filament Types?
You’ll find stainless steel PLA prints at 185-215°C, while MetalFil needs 200-210°C. Bronze and copper filaments require slightly different temperatures due to their unique thermal properties affecting extrusion quality.
What’s the Average Cost Difference Between Metal-Filled and Standard PLA Filaments?
You’ll pay 60% more for metal-filled filaments compared to standard PLA. While standard PLA costs $15-25 per kilogram, metal-filled options typically range from $40-60 due to their complex manufacturing processes.
How Long Do Wear-Resistant Nozzles Typically Last When Printing Metal Filaments?
You’ll get several hundred hours of printing with wear-resistant nozzles when using metal-filled filaments. However, your actual lifespan depends on filament quality, print volume, and how well you maintain the nozzle.
Can Multiple Metal-Filled Filaments Be Mixed Together for Custom Finishes?
You can’t easily mix different metal-filled filaments during printing due to temperature and compatibility challenges. However, you could blend metal powders before filament manufacturing or use multi-material systems for layered effects.
In Summary
You’ve now mastered the essential techniques for transforming your metal-filled prints from rough, unfinished pieces into stunning metallic objects. Remember that patience is key—don’t rush the sanding progression, and you’ll achieve professional results. Whether you’re creating a mirror-like polish or an aged patina effect, these finishing methods will elevate your 3D printing projects to new levels of quality and visual appeal.

Leave a Reply