You can dramatically reduce your 3D print times by increasing layer height to 0.3mm, upgrading to larger 0.6-0.8mm nozzles, and lowering print temperatures by 5-10°C. Reduce infill density to 20-50% using simple grid patterns, increase travel speeds to 150-300mm/s, and select fast-printing materials like PLA or ABS. Enable speed-focused slicer profiles and optimize cooling fan settings for your specific filament. These strategic adjustments can cut print times by up to 50% while maintaining acceptable quality for prototypes and functional parts.
Adjust Layer Height for Maximum Speed
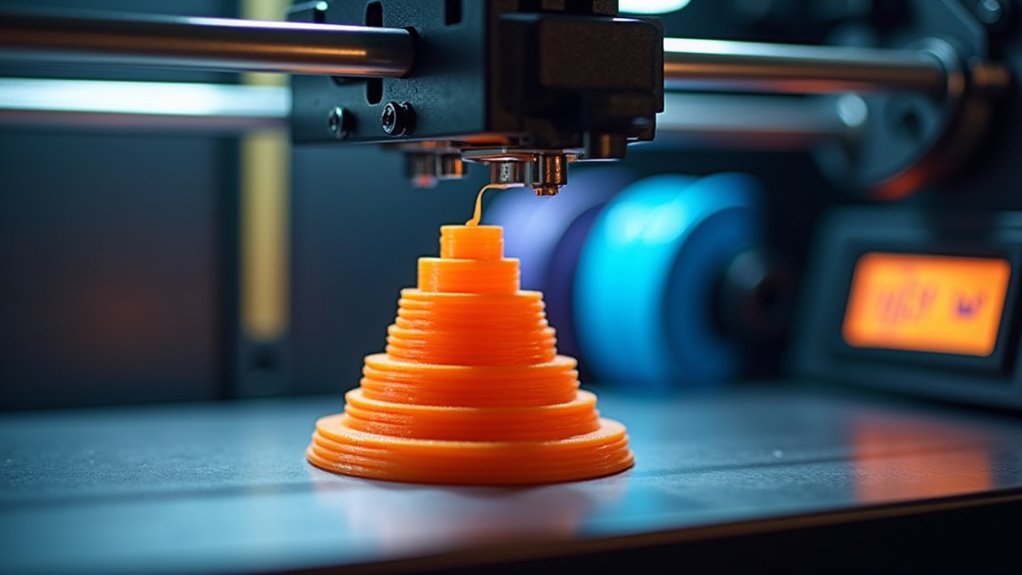
When you want to dramatically reduce your print times, increasing your layer height from the standard 0.2 mm to 0.3 mm offers one of the most effective speed optimizations available.
This adjustment minimizes the total number of layers needed, allowing you to increase print speed considerably while maintaining acceptable quality for draft models.
You can push layer heights to 0.4 mm or higher for maximum speed gains, though this compromises surface finish and detail resolution.
Thicker layers enable your slicer to write faster toolpaths for both infill and walls, creating compound time savings throughout the entire printing process.
Balance speed against your project’s requirements—thicker layers won’t deliver the same detail as thinner ones, but they’re perfect for prototypes and functional parts.
Configure Optimal Print Temperature Settings
While many focus on mechanical adjustments to boost print speed, you’ll find that fine-tuning your temperature settings can deliver substantial time savings with minimal effort.
You can increase your print speed by lowering temperatures 5-10°C below standard ranges, as cooler materials solidify faster between layers. For PLA, aim for 180-220°C; ABS works at 220-250°C; and PET-G prints efficiently between 220-250°C.
However, don’t guess your ideal settings. Run temperature tower calibration tests to determine your printer’s sweet spot for each filament type. Each printer model has unique characteristics, so check manufacturer guidelines alongside your testing results.
Don’t guess your temperature settings—run calibration tests to find your printer’s optimal performance zone for each filament.
This methodical approach guarantees you’ll maximize speed without sacrificing print quality or layer adhesion.
Modify Infill Density and Patterns
Although most beginners default to high infill densities thinking they’ll improve strength, you’ll achieve faster print times by strategically reducing infill to 20-50% for most applications.
Lower infill density directly translates to less material usage and considerably shorter printing durations.
Your choice of infill pattern matters equally for print speed optimization. Simple patterns like Lines or Grids enable quicker printing compared to complex Honeycomb structures due to reduced nozzle movement complexity.
Grid patterns specifically offer superior efficiency over honeycomb designs because they require less intricate head movements.
You can leverage CAD software like Autodesk tools to evaluate and suggest the most efficient infill patterns for your specific designs, streamlining your entire printing process while maintaining adequate structural integrity.
Select High-Speed Compatible Filament Materials
Your choice of filament material greatly impacts print speed capabilities, with certain plastics enabling much faster printing than others. For speed optimization, PLA and ABS are your best options for high-speed printing, supporting speeds of 60-100 mm/s while maintaining quality. These filament materials excel in rapid prototyping scenarios.
| Material | Speed (mm/s) | Best Use |
|---|---|---|
| PLA/ABS | 60-100 | Rapid prototyping |
| Polycarbonate | ~30 | Strong parts |
| PET-G | ~25 | Balanced strength/speed |
For resin printing, Formlabs Draft Resin delivers exceptional results, printing three to four times faster than standard resins. Always consult manufacturer specifications when selecting filament materials, as temperature and speed requirements vary considerably between different plastics and can dramatically affect your overall print performance.
Optimize Travel Speed and Acceleration

Beyond material selection, fine-tuning your printer’s movement settings can dramatically slash print times without sacrificing quality.
You’ll want to boost your travel speed settings to 150-300 mm/s, depending on your printer’s capabilities. This writing speed adjustment alone can considerably reduce overall print duration.
Next, increase your acceleration settings to 500-1000 mm/s², allowing your print head to change direction more rapidly between sections.
Quick Fixes include optimizing jerk settings between 10-20 mm/s for smoother, swifter movements without excessive vibrations.
When you combine higher travel speeds with optimized acceleration, you can achieve up to 30% print time reductions on large prints and increase productivity substantially.
Remember to test these settings carefully—excessively high speeds may cause layer misalignment or poor adhesion.
Reduce Wall Thickness and Perimeter Count
When you reduce wall thickness from the standard 1.2 mm to 0.8 mm, you’ll achieve significant print time reductions while maintaining adequate strength for decorative or non-functional parts.
Most printers default to 2-3 perimeter walls, but you can experiment with single walls for your First Draft prints.
Top Tips for wall optimization:
- Test 0.8 mm thickness first – it balances speed and stability perfectly
- Drop perimeter count to 1 for rapid prototyping and concept validation
- Use the Pomodoro Technique to systematically test different wall settings across printing sessions
- Monitor structural integrity closely when reducing below standard specifications
Thinner walls decrease material usage considerably, creating cost savings alongside faster print speeds.
Reducing wall thickness cuts both material costs and print duration, delivering dual benefits for budget-conscious makers seeking efficiency gains.
This approach works exceptionally well for large-quantity production runs where you’re prioritizing speed over maximum strength.
Minimize Support Structure Generation
You’ll drastically cut print times by strategically positioning your model to minimize support structures.
Start by rotating your design to keep overhangs under 45° and reduce the need for additional material.
Control bridge distances and use chamfers to help your printer span gaps without supports, letting you focus on speed rather than cleanup.
Optimal Print Orientation
Although most 3D printing enthusiasts focus on layer height and speed settings, your print orientation choice dramatically impacts both printing time and material usage by minimizing support structure requirements.
You’ll achieve the best results by positioning your model to avoid overhangs exceeding 45 degrees, which eliminates support needs entirely.
Strategic orientation also improves bed adhesion and prevents warping during complex prints.
Here’s how to optimize your approach:
- Rotate models to align critical features parallel to the build plate for maximum strength
- Use simulation software to visualize potential overhangs before printing begins
- Position the least complex surfaces facing upward when supports are unavoidable
- Prioritize orientations that maximize material efficiency and minimize waste
Smart orientation decisions reduce both print time and post-processing work considerably.
Overhang Angle Limits
Building on smart orientation strategies, overhang angle limits directly determine how much support material your printer generates automatically.
Most slicers trigger support generation when overhangs exceed 45°, markedly increasing print time and filament consumption. You’ll achieve considerably faster prints by redesigning features to stay within 30° or less.
When you can’t avoid steep overhangs, consider bridge printing techniques that allow material sufficient cooling time before the next layer deposits. This approach eliminates supports for spanning gaps.
Additionally, you can leverage print orientation adjustments during the design phase to minimize problematic angles altogether.
Smart overhang management reduces material waste, shortens print duration, and improves surface quality by eliminating support removal marks.
Focus on angle optimization early in your design process for maximum speed gains.
Bridge Distance Control
While overhang optimization reduces problematic angles, bridge distance control tackles horizontal spans that would otherwise require support structures.
You can considerably reduce print times and material usage by adjusting your slicer’s maximum bridge distance settings.
Most slicers let you configure bridge distances between 20mm to 50mm, depending on your material and printer capabilities.
Shorter distances improve accuracy but may generate unnecessary supports for spans your printer can actually handle.
- Set your maximum bridge distance to match your printer’s capabilities through testing
- Optimize cooling and print speeds to enable longer bridging without supports
- Choose simpler infill patterns that naturally support better bridging performance
- Gradually increase bridge distance settings while monitoring print quality results
Configure Nozzle Size for Rapid Extrusion
When you’re looking to dramatically cut down print times, upgrading from the standard 0.4 mm nozzle to a larger 0.6 mm or 0.8 mm option can deliver impressive speed gains.
Larger nozzles extrude thicker layers and higher filament flow rates, allowing more material per pass. This combination can reduce print times by up to 50%, especially for simple geometries and prototypes.
However, you’ll sacrifice print resolution and fine detail capabilities. Reserve larger nozzles for objects that don’t require intricate features.
When switching nozzle sizes, you must recalibrate your printer settings. Adjust temperature and print speed parameters to optimize extrusion flow and prevent clogs.
This hardware change represents one of the most effective methods for achieving rapid extrusion in draft printing scenarios.
Streamline Cooling Fan Speed Settings
You’ll drastically improve your print speeds by fine-tuning your cooling fan settings to match your specific material requirements.
Start with maximum fan speed for PLA prints while reducing it considerably for ABS to prevent warping and layer adhesion issues.
Monitor your temperature control during printing and adjust fan speeds dynamically to eliminate stringing while maintaining ideal layer cooling performance.
Optimal Fan Speed Settings
Since proper fan speed settings directly impact layer adhesion and surface quality, mastering this aspect of 3D printing becomes essential for achieving professional results.
You’ll need to adjust cooling based on your material choice and print geometry to maximize both speed and quality.
Different materials require specific fan speed ranges for ideal results:
- PLA prints: Use 60-100% fan speed for excellent layer cooling and overhang performance
- ABS materials: Keep fan speeds between 20-50% to prevent cracking from rapid temperature changes
- Adaptive cooling: Enable dynamic fan speed adjustments based on geometry features like overhangs and bridges
- Layer-specific settings: Customize fan speeds at different heights using slicer options for progressive cooling management
Monitor your ambient temperature and adjust accordingly for temperature-sensitive materials.
Cooling System Performance Tuning
Although achieving ideal print speeds depends on multiple variables, fine-tuning your cooling system’s performance represents one of the most notable adjustments you can make. You’ll want to implement a cooling fan speed curve that adapts to your print’s specific requirements, providing adequate cooling during critical stages while maintaining proper layer adhesion.
| Material | Recommended Fan Speed |
|---|---|
| PLA | 100% for details |
| ABS | 30-50% to prevent warping |
| PETG | 50-75% balanced approach |
Most slicer software lets you customize fan speeds based on layer heights—use lower speeds for thicker layers and higher speeds for finer details. Regular monitoring and tuning prevents overheating, allowing faster layer deposition while considerably improving your overall print quality and reducing common issues like warping.
Temperature Control Adjustments
While cooling fan adjustments form the foundation of thermal management, temperature control settings work hand-in-hand to maximize your printing speed without sacrificing quality.
You’ll want to fine-tune your cooling fan speeds alongside temperature adjustments to achieve the best fast draft results.
Here’s how to streamline your cooling fan speed settings:
- Layer-based speed control – Set 30-50% fan speed for initial layers, then ramp up to 100% for upper layers to prevent warping while maintaining adhesion.
- Material-specific enhancement – Use temperature tower tests to determine ideal fan speed and temperature combinations for each filament type.
- Speed correlation monitoring – Balance fan speeds with print velocity to guarantee proper layer cooling without disrupting material flow.
- Thermal shock prevention – Gradually adjust fan speeds between layers rather than making sudden changes.
Enable Speed-Focused Slicer Profiles
When you’re looking to maximize your 3D printer’s efficiency, enabling speed-focused slicer profiles can dramatically reduce your print times without sacrificing too much quality.
These pre-configured profiles enhance settings like print speed and infill density specifically for faster output.
Speed-optimized profiles automatically adjust critical parameters like layer height and movement rates to deliver maximum throughput while maintaining acceptable print quality.
In Cura, navigate to the Speed section under Custom settings to modify print speed parameters for your project requirements.
You’ll find these profiles streamline your slicing process while reducing setup time, boosting overall productivity.
Don’t stick with default settings—experiment with various profiles to find the ideal balance between speed and quality that meets your project specifications.
Remember to regularly update your slicer software, as new versions often include enhanced speed-focused features and improvements that’ll further accelerate your printing capabilities.
Frequently Asked Questions
How Do I Maintain Print Quality While Maximizing Speed Settings?
You’ll balance quality and speed by reducing infill to 10-15%, increasing layer height to 0.2-0.3mm, using 0.4mm nozzles, selecting PLA filament, and enabling features like linear advance while maintaining proper cooling and calibrated temperatures.
What Safety Precautions Should I Take When Using High-Speed Printing?
You’ll need proper ventilation since faster printing generates more heat and fumes. Monitor your printer closely for vibrations, guarantee bed adhesion’s secure, and check that cooling fans work effectively at higher speeds.
How Often Should I Calibrate My Printer for Speed Optimization?
You should calibrate your printer monthly for ideal speed performance. If you’re printing frequently at high speeds, calibrate bi-weekly. Always recalibrate after changing filaments, nozzles, or making mechanical adjustments to maintain accuracy.
Can I Use Speed Settings on Detailed Miniatures or Intricate Models?
You shouldn’t use high speed settings on detailed miniatures since they’ll compromise fine features and surface quality. Slow down for intricate models to preserve delicate details, overhangs, and small geometric elements that require precision.
What’s the Optimal Bed Adhesion Method for Fast Printing Speeds?
You’ll want textured PEI sheets or glass beds with adhesion aids like hairspray. They provide strong grip during rapid movements while allowing easy release. Avoid painter’s tape since it can’t handle the stress from high-speed printing motions.

Leave a Reply