You can prevent nozzle jams during long 3D prints by calibrating your nozzle height to 0.1mm, setting proper temperatures (190-220°C for PLA, 210-250°C for ABS), and storing filament in airtight containers with silica gel. Guarantee consistent filament tension, perform regular cold pull cleaning, check cooling fan performance to prevent heat creep, and monitor your print environment temperature. These seven techniques address the root causes of blockages and keep your printer running smoothly throughout extended sessions.
Calibrate Your Nozzle Height and Bed Leveling

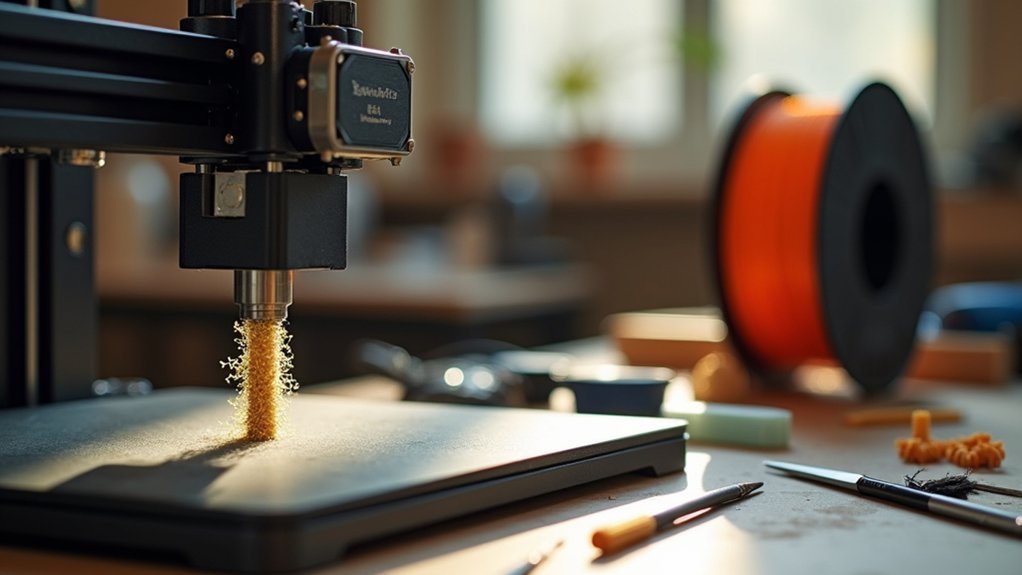
When your nozzle height isn’t properly calibrated, you’ll encounter frustrating jams that can ruin hours of printing work. Proper bed leveling guarantees consistent extrusion and prevents costly mistakes.
Improper nozzle calibration leads to devastating print failures and wasted filament, making precise bed leveling absolutely essential for successful 3D printing.
If your nozzle is too close to the print bed, you’ll experience retrograde extrusion that blocks filament flow. Conversely, excessive distance causes poor adhesion and potential jams.
To calibrate effectively, use software tools like MatterControl alongside hardware adjustments. Measure nozzle height with paper or feeler gauges, targeting an ideal gap of approximately 0.1mm. This precise spacing enables smooth filament extrusion throughout your print.
Don’t forget to check for debris on your print bed before starting. Even small obstructions can disrupt the nozzle’s path during long prints, causing unexpected jams when you least expect them.
Set Optimal Temperature for Your Filament Type
Temperature settings play an equally important role in preventing nozzle jams during your 3D printing projects. Each filament requires specific ideal printing temperature ranges—PLA works best at 190-220°C, while ABS needs 210-250°C.
Setting incorrect hot end temperature causes serious problems: too low creates grinding and filament jams, while excessive heat triggers heat creep and premature softening.
Always consult your filament manufacturer’s guidelines for the temperature of your filament. Monitor the hot end temperature throughout printing, as fluctuations disrupt consistent flow and create a clogged nozzle.
If jams occur mid-print, raise the temperature by 5-10°C above recommended settings to clear blockages. Proper printing temperature management guarantees smooth extrusion and prevents costly print failures.
Ensure Proper Filament Storage and Quality
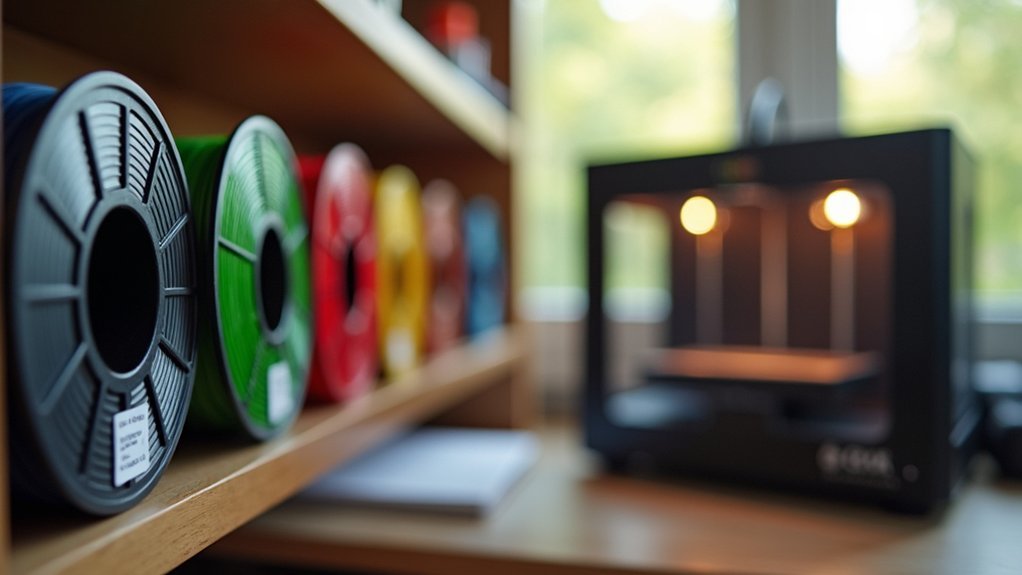
Beyond temperature control, maintaining proper filament storage and quality greatly impacts your printer’s performance and prevents frustrating nozzle jams.
Store your filament in airtight containers with silica gel packets to prevent moisture absorption, which causes inconsistent extrusion and feeding problems. Always choose high-quality filament from reputable suppliers to minimize clogs from impurities or diameter variations.
Regularly inspect your filament for damage like kinks or bends that obstruct hot end feeding. Maintain a clean storage environment away from dust and contaminants that can clog your nozzle during printing.
For older spools showing signs of moisture damage, consider using a filament dryer or dehydrator to restore ideal moisture levels and improve extrusion quality. Proper storage habits guarantee consistently smooth prints without damaged filament complications.
Maintain Consistent Filament Tension and Loading
Although proper filament storage sets the foundation for successful printing, you’ll also need to maintain consistent filament tension and loading to prevent nozzle jams.
Your spool mounting and extruder settings directly impact performance throughout long prints.
Essential steps for ideal filament tension and loading:
- Mount your spool correctly so it spins freely, preventing excessive tension during loading
- Check regularly for obstructions or kinks in the filament path that block smooth feeding
- Adjust spool holder height and angle to maintain minimal tension outside the extruder
- Monitor filament diameter using calipers to guarantee consistency and prevent feeding issues
- Set extruder tension settings to match your filament type, as different materials require different grip levels
These adjustments eliminate common causes of jams and guarantee reliable filament flow.
Perform Regular Cold Pull Cleaning
You’ll want to master the cold pull cleaning technique to keep your nozzle free from debris and material buildup that causes jams.
Start by heating your nozzle to printing temperature, feeding about 10 cm of filament, then cooling it down to the filament’s glass changeover point before pulling it out.
Getting the temperature settings right is essential—if the filament won’t release easily, you’ll need to adjust the temperature to guarantee all residue comes out cleanly.
Cold Pull Method Steps
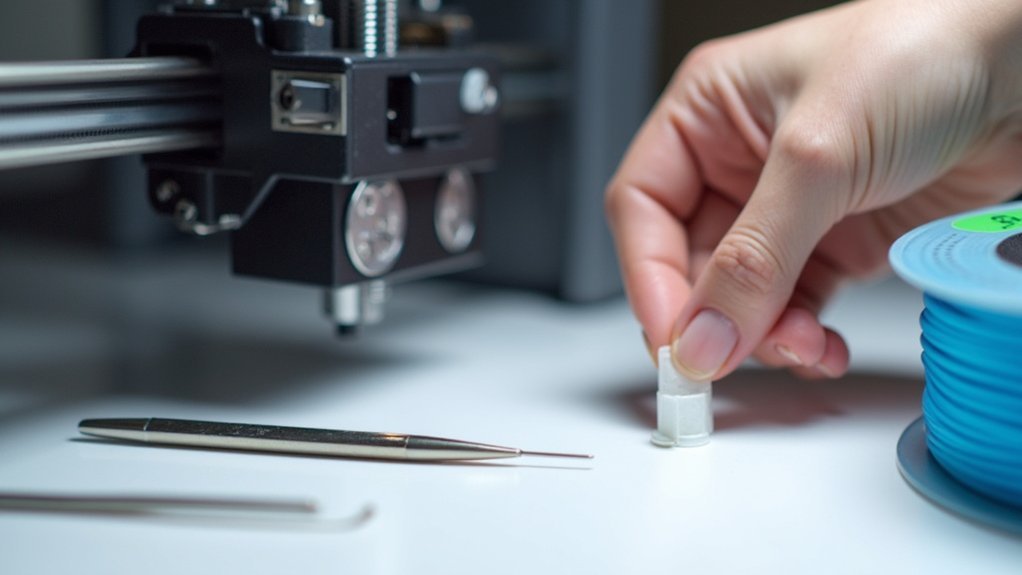
Five simple steps will help you master the cold pull method and keep your nozzle running smoothly.
- Heat and load: Set your nozzle temperature to the printing temperature and feed 10 cm of filament into the hotend until it’s fully melted, ensuring proper filament flow.
- Cool down: Lower temperature to the glass changeover temperature, then cut off any dripping filament and let it cool slightly.
- Execute the pull: Remove filament using steady force until it gives way; adjust temperature if there’s resistance.
- Inspect results: Check the pulled filament for a clean tip without residue, confirming your clogged nozzle is cleared.
- Schedule regular maintenance: Perform cold pulls every few runs to maintain clean nozzle performance and prevent future jams.
Optimal Temperature Settings
When you’re performing cold pulls, getting the temperature right makes the difference between success and frustration. Your hot end needs specific temperatures to effectively remove residue and prevent clogs during the cleaning process.
| Filament Type | Cold Pull Temperature |
|---|---|
| PLA | 90°C |
| ABS | 120°C |
| PETG | 100°C |
| TPU | 85°C |
| Nylon | 130°C |
Setting your nozzle to these ideal temperatures guarantees the filament becomes pliable enough for clean extraction without overheating. Too hot, and you’ll create more residue; too cold, and the pulls won’t effectively clear blockages. Monitor your printing temperature consistently to prevent heat creep, which causes material buildup in your hot end and leads to frequent jams during extended printing sessions.
Check Cooling Fan Performance and Heat Creep
Why does your filament keep jamming even when everything else seems perfect? The culprit’s often heat creep—when excessive heat travels up your hotend, causing filament liquefying in the wrong zone. Your cooling fan and heat sink work together to prevent this disaster.
Here’s what you need to monitor:
- Make sure your cooling fan runs continuously during prints to maintain consistent temperatures
- Inspect the heat sink regularly for dust buildup and obstructions that reduce airflow
- Check ambient temperature inside enclosures, as excessive heat worsens heat creep
- Verify your cooling fan provides adequate airflow to the heat sink assembly
- Conduct routine checks of thermal interface material between components for ideal heat transfer
Proper cooling prevents filament from softening prematurely, eliminating those frustrating mid-print jams.
Monitor Print Environment and Enclosure Temperature
Your cooling fan’s performance directly ties to your printer’s overall thermal environment.
You need to monitor your enclosure temperature carefully, maintaining it between 85°F-90°F to prevent thermal issues that cause nozzle jams during long prints.
Check that your cooling fans operate effectively around the heat sink to avoid overheating filament in the melt zone.
Guarantee proper airflow within your enclosure to prevent heat buildup that leads to filament softening and subsequent jams.
Consider leaving your enclosure door slightly open during extended prints to enhance airflow and reduce heat-related problems.
Regular monitoring of these temperature conditions helps maintain ideal printing conditions and prevents the thermal issues that commonly cause nozzle clogs in long prints.
Frequently Asked Questions
How to Prevent 3D Printer Nozzle From Clogging?
You’ll prevent nozzle clogging by calibrating nozzle height regularly, maintaining proper temperatures for your filament, storing filament properly, performing cold pulls routinely, and ensuring cooling fans work correctly.
Why Does My 3D Print Keep Getting Stuck to the Nozzle?
Your print’s sticking because your nozzle’s too close to the bed, causing poor first layer adhesion. You’re probably printing too hot or your bed temperature’s incorrect, making filament stick to the nozzle instead.
Why Does My Extruder Keep Clogging Mid Print?
Your extruder’s clogging mid-print because you’re experiencing heat creep from poor cooling, running too low temperatures, or using inconsistent filament diameter. Check your cooling fans and temperature settings first.
What Is the Lifespan of a 3D Printer Nozzle?
Your 3D printer nozzle’s lifespan depends on material and usage. Brass nozzles last 50-200 hours, while hardened steel exceeds 500 hours. You’ll extend life through proper maintenance and quality filament.

Leave a Reply