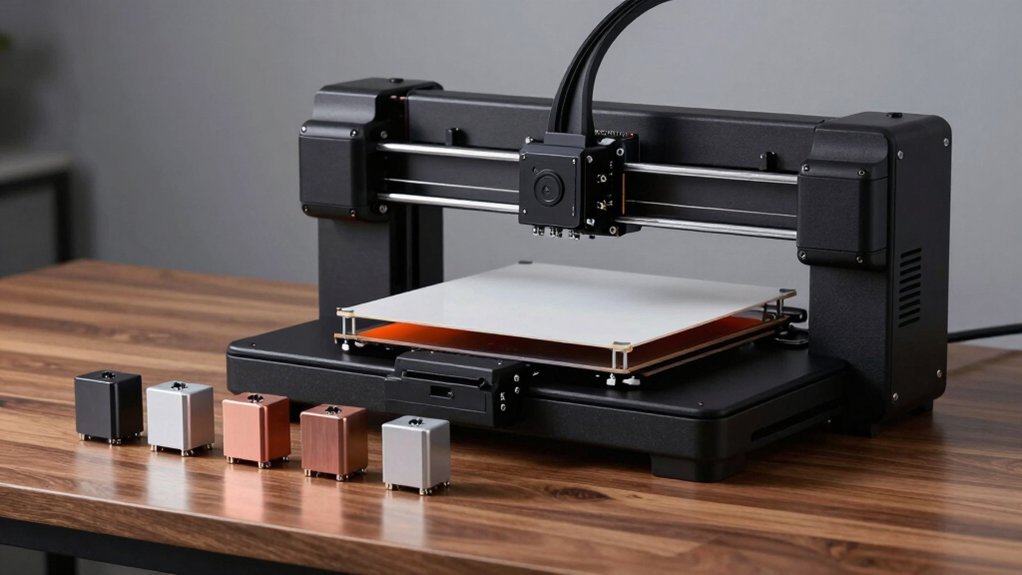
You’ve probably spent countless hours tweaking the first layer, only to end up with uneven prints or missed adhesion. In 2026, seven auto‑leveling sensors promise sub‑0.04 mm precision, plug‑and‑play firmware, and durability that lasts over 100 k cycles. From the Creality CR Touch to the Bambu Lab P1S’s integrated probe, each option tackles common bed‑leveling headaches in its own way. The real question is which sensor aligns with your printer’s hardware and workflow, and how much time you’ll actually save.
| Creality CR Touch Auto-Leveling Sensor for Ender 3 Series | 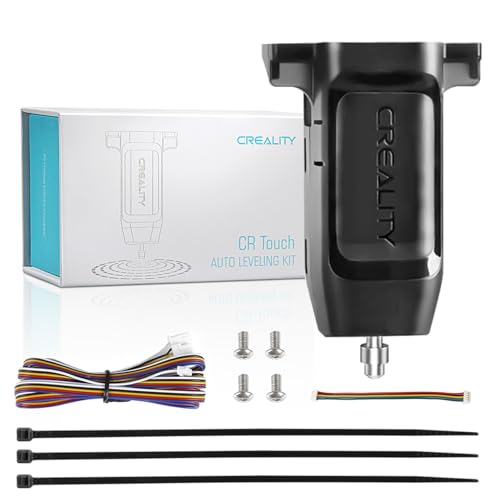 | Premium Precision | Compatibility: Ender‑3 series & CR‑10 Smart Pro | Sensing Technology: Optical + metal probe (CR‑Touch) | Accuracy: ≤0.04 mm | CHECK ON AMAZON | Read Our Analysis |
| Auto Bed Leveling Sensor for Ender 3/CR‑10 Printers | 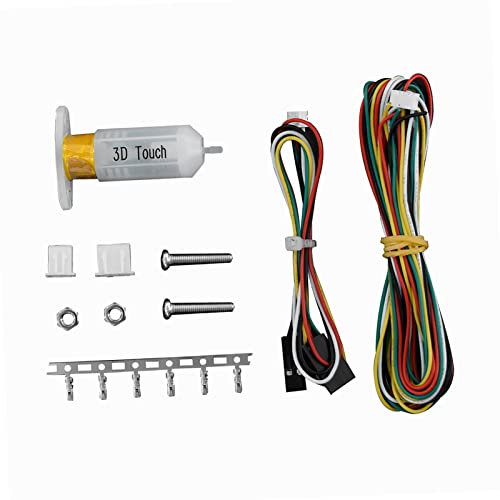 | Budget-Friendly | Compatibility: Ender‑3, Ender‑3 Pro, CR‑10, CR‑10S, Artillery Sidewinder X1 | Sensing Technology: Hall‑effect sensor | Accuracy: Small error (Hall‑effect) | CHECK ON AMAZON | Read Our Analysis |
| BLTouch : Auto Bed Leveling Sensors for 3D Printers |  | Classic Choice | Compatibility: Any 3D printer with BLTouch‑compatible firmware | Sensing Technology: IR/optical probe (BLTouch) | Accuracy: Standard BLTouch accuracy (≈0.01 mm) | CHECK ON AMAZON | Read Our Analysis |
| Creality Ender 3 V3 SE 3D Printer with Auto‑Leveling |  | Integrated Solution | Compatibility: Creality Ender 3 V3 SE (built‑in CR Touch) | Sensing Technology: CR‑Touch (optical/metal) | Accuracy: CR‑Touch accuracy (≤0.04 mm) | CHECK ON AMAZON | Read Our Analysis |
| ELEGOO Neptune 3 Pro 3D Printer with Auto‑Leveling |  | High-Performance | Compatibility: ELEGOO Neptune 3 Pro (built‑in sensor) | Sensing Technology: 36‑point optical sensor | Accuracy: 36‑point sensor (high precision) | CHECK ON AMAZON | Read Our Analysis |
| Creality K2 Plus 3D Printer Combo Multi-Color 600mm/s Auto-Leveling Dual Camera 350³350³350 mm Build Volume |  | Multi‑Color Pro | Compatibility: Creality K2 Plus (built‑in sensor) | Sensing Technology: Strain‑gauge based auto‑leveling | Accuracy: Strain‑gauge compensation (high precision) | CHECK ON AMAZON | Read Our Analysis |
| Bambu Lab P1S Enclosed 3D Printer 16‑Color 500mm/s XYXY Auto‑Leveling Large‑Size |  | Speed Specialist | Compatibility: Bambu Lab P1S (built‑in sensor) | Sensing Technology: Automatic bed‑leveling (sensor type unspecified) | Accuracy: Automatic leveling (precision typical for auto‑sensors) | CHECK ON AMAZON | Read Our Analysis |
More Details on Our Top Picks
Creality CR Touch Auto-Leveling Sensor for Ender 3 Series
If you’re an Ender 3 owner tired of fiddling with paper‑thin sheets and uneven first layers, the Creality CR Touch is the sensor that finally lets you set it and forget it. It mounts on any Ender‑3 series model—Neo, V2 Neo, Max Neo, S1, S1 Plus, S1 Pro, or CR‑10 Smart Pro—without a dedicated bracket. The dual optical‑metal probe samples over 100 000 points, building a virtual plane that auto‑compensates nozzle tilt to ≤0.04 mm accuracy. It works on glass, metal, textured, or uneven beds, slashing calibration time and delivering consistent first layers. At 1.06 × 0.69 × 1.55 in and 0.48 oz, it’s lightweight yet rugged, perfect for frequent or large‑scale prints.
- Compatibility:Ender‑3 series & CR‑10 Smart Pro
- Sensing Technology:Optical + metal probe (CR‑Touch)
- Accuracy:≤0.04 mm
- Detection Count / Lifespan:100,000+ cycles
- Mounting / Installation:No bracket; fits multiple Ender‑3/CR‑10 models
- Physical Size (Dimensions):1.06 × 0.69 × 1.55 in
- Additional Feature:Optical‑metal hybrid probe
- Additional Feature:No mounting bracket needed
- Additional Feature:0.04 mm positioning accuracy
Auto Bed Leveling Sensor for Ender 3/CR‑10 Printers
Looking for a sensor that instantly upgrades your Ender 3 or CR‑10’s first layer? The Irfora Touch‑Sensor Auto Bed Leveling Sensor (LAKUSOS3333) plugs into the printer’s board and uses Hall‑effect detection to map bed height with sub‑millimeter precision. It automatically compensates Z‑height, letting you print on slightly warped surfaces without manual tweaks. Weighing just 0.952 oz and measuring 5.91 × 3.9 × 0.67 in, the white unit fits Ender 3, Ender 3 Pro, CR‑10, CR‑10S, and Artillery Sidewinder X1. Customers rate it 3.6 / 5, and Amazon offers a 30‑day return guarantee.
- Compatibility:Ender‑3, Ender‑3 Pro, CR‑10, CR‑10S, Artillery Sidewinder X1
- Sensing Technology:Hall‑effect sensor
- Accuracy:Small error (Hall‑effect)
- Detection Count / Lifespan:Not specified (Hall‑effect durability)
- Mounting / Installation:Direct mount; compatible with listed printers
- Physical Size (Dimensions):5.91 × 3.9 × 0.67 in
- Additional Feature:Hall‑effect sensing
- Additional Feature:White color finish
- Additional Feature:Amazon 30‑day return guarantee
BLTouch : Auto Bed Leveling Sensors for 3D Printers
The BLTouch stands out for anyone who wants reliable, high‑precision bed leveling without fiddling with manual adjustments—its sensor probes the nozzle at multiple points, then the firmware automatically compensates for any tilt or unevenness. You’ll need firmware that supports BLTouch, and you can choose Simple, Smart, or Precise variants depending on your printer’s capabilities. It works on glass, wood, metal, or other common bed surfaces, so you won’t have to swap hardware when you change material. Before installing, verify your firmware includes the proper configuration; otherwise the sensor won’t communicate. Once set up, the printer continuously adjusts the bed during printing, delivering consistently flat first layers.
- Compatibility:Any 3D printer with BLTouch‑compatible firmware
- Sensing Technology:IR/optical probe (BLTouch)
- Accuracy:Standard BLTouch accuracy (≈0.01 mm)
- Detection Count / Lifespan:Standard BLTouch lifespan (≈100,000 cycles)
- Mounting / Installation:Requires firmware support; standard mounting hole
- Physical Size (Dimensions):Standard BLTouch size (≈1.2 × 0.8 × 1.5 in)
- Additional Feature:Firmware‑required support
- Additional Feature:Simple/Smart/Precise variants
- Additional Feature:Material‑agnostic bed compatibility
Creality Ender 3 V3 SE 3D Printer with Auto‑Leveling
Need the Creality Ender 3 V3 SE’s CR Touch sensor and dual‑Z steel shafts to guarantee a perfectly flat first layer without endless tweaking? You’ll appreciate its 8.66 × 8.66 × 9.84‑inch build volume and 250 mm/s top speed, but the real win is the auto‑leveling system. The CR Touch probe, coupled with a strain‑sensor Z‑offset, maps the bed in seconds, while two 8 mm steel linear shafts eliminate wobble for consistent Z‑height. The sprite direct extruder handles PLA, TPU, PETG, and more without slipping. Pre‑assembled components let you finish setup in three steps—about 20 minutes from box to first print.
- Compatibility:Creality Ender 3 V3 SE (built‑in CR Touch)
- Sensing Technology:CR‑Touch (optical/metal)
- Accuracy:CR‑Touch accuracy (≤0.04 mm)
- Detection Count / Lifespan:CR‑Touch lifespan (≈100,000 cycles)
- Mounting / Installation:Integrated (built‑in) CR Touch
- Physical Size (Dimensions):Not applicable (built‑in)
- Additional Feature:Dual 8 mm steel shafts
- Additional Feature:Strain sensor Z‑offset
- Additional Feature:Pre‑assembly reduces setup time
ELEGOO Neptune 3 Pro 3D Printer with Auto‑Leveling
If you crave hassle‑free first layers, the ELEGOO Neptune 3 Pro’s 36‑point auto‑leveling sensor makes it an obvious pick for the “7 Best Auto Bed Leveling Sensors” list. You’ll value its quick assembly, direct‑drive extruder, and PEI flexible platform that hold a 225 × 225 × 280 mm build volume. Silent STM32‑controlled stepper motors keep noise under 47 dB, while dual lead screws give stable Z‑axis movement. The dual‑gear extruder with a 3:1 ratio feeds filament consistently, reducing clogs. Compatible with PLA, TPU, PETG, and ABS, it also offers filament run‑out detection, power‑loss resume, and a 4.3‑star rating from over a thousand users.
- Compatibility:ELEGOO Neptune 3 Pro (built‑in sensor)
- Sensing Technology:36‑point optical sensor
- Accuracy:36‑point sensor (high precision)
- Detection Count / Lifespan:Not specified (36‑point sensor)
- Mounting / Installation:Integrated (built‑in) sensor
- Physical Size (Dimensions):Not applicable (built‑in)
- Additional Feature:36‑point bed scan
- Additional Feature:Dual lead‑screw Z‑axis
- Additional Feature:Titanium throat tube
Creality K2 Plus 3D Printer Combo Multi-Color 600mm/s Auto-Leveling Dual Camera 350³350³350 mm Build Volume
Looking for a printer that delivers flawless first layers without endless tweaking? The Creality K2 Plus Combo packs a 350 mm cube build volume, dual AI cameras, and a strain‑gauge auto‑leveling system that keeps the bed perfectly flat. Its dual motorized Z‑axes and matrix frame minimize shift, while the step‑servo motors hit 600 mm/s with 30,000 mm/s² acceleration. You’ll enjoy multi‑color prints via the CFS, high‑flow 40 mm³/s extrusion, and a heated chamber for ABS, PETG, and carbon‑fiber filaments. The AM System auto‑detects filament run‑outs, and the built‑in cutter trims spools on the fly.
- Compatibility:Creality K2 Plus (built‑in sensor)
- Sensing Technology:Strain‑gauge based auto‑leveling
- Accuracy:Strain‑gauge compensation (high precision)
- Detection Count / Lifespan:Not specified (strain‑gauge)
- Mounting / Installation:Integrated (built‑in) auto‑leveling
- Physical Size (Dimensions):Not applicable (built‑in)
- Additional Feature:Dual AI cameras
- Additional Feature:Anti‑tilt leveling system
- Additional Feature:Multi‑filament CFS unit
Bambu Lab P1S Enclosed 3D Printer 16‑Color 500mm/s XYXY Auto‑Leveling Large‑Size
The Bambu Lab P1S, with its fully enclosed chassis, 16‑color multi‑material capability, and 500 mm/s CoreXY speed, is the ideal platform for anyone who demands flawless first layers without endless tweaking. You’ll set it up in about fifteen minutes, and the automatic bed‑leveling sensor guarantees a perfectly flat surface every print. Its large build volume lets you tackle big parts, while the CoreXY mechanism delivers rapid, precise motion at 20 000 mm/s² acceleration. You can print PLA, PETG, TPU, ABS, ASA, and more, and the enclosure keeps temperature stable for advanced filaments. Users consistently rate it 4.5 stars, praising its ease of use and reliability.
- Compatibility:Bambu Lab P1S (built‑in sensor)
- Sensing Technology:Automatic bed‑leveling (sensor type unspecified)
- Accuracy:Automatic leveling (precision typical for auto‑sensors)
- Detection Count / Lifespan:Not specified (auto‑sensor)
- Mounting / Installation:Integrated (built‑in) auto‑leveling
- Physical Size (Dimensions):Not applicable (built‑in)
- Additional Feature:CoreXY motion architecture
- Additional Feature:Fully enclosed build chamber
- Additional Feature:16‑color multi‑material capability
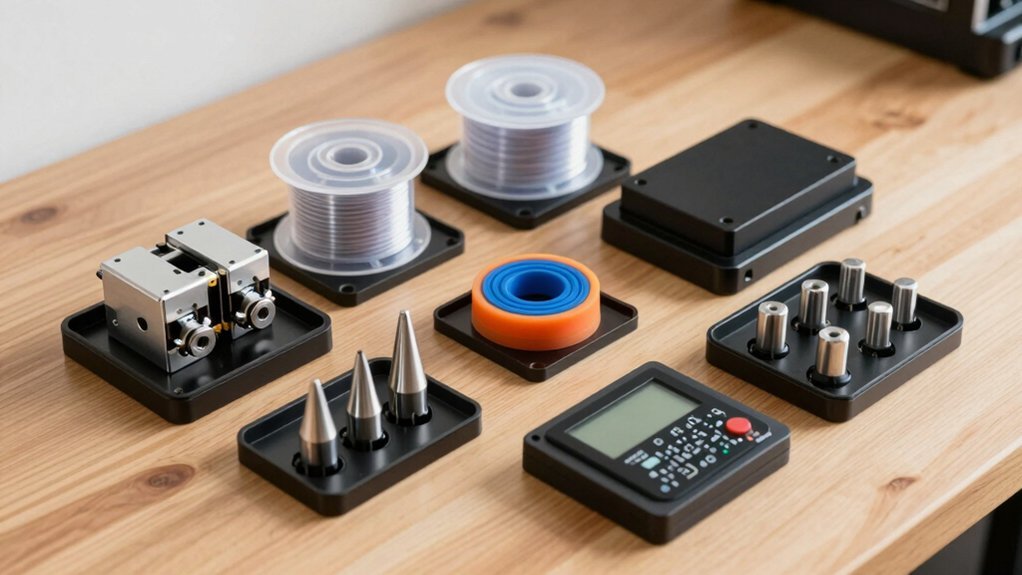
Factors to Consider When Choosing Auto Bed Leveling Sensors for Hassle-Free First Layers
When picking a sensor, check that it matches your printer’s board and bed material, because incompatibility can ruin the first layer. Look for high precision and repeatability numbers, and make sure the mounting system is simple enough to install without extra tools. Finally, verify that the probe’s technology is durable and that its firmware integrates smoothly with your slicer and printer software.
Sensor Compatibility and Bed Type
Why does sensor compatibility matter? Because a mismatched sensor can’t mount correctly, won’t communicate with your board, and will give false readings, ruining the first layer. Choose a sensor that supports your printer family—Ender, CR‑10, Prusa, etc.—so the firmware plug‑ins and wiring match. Next, consider your bed material: glass, textured PEI, or metal. Some probes, especially optical or Hall‑effect types, handle reflective surfaces better, while metal probes work on rough or magnetic beds. If you have a large or uneven platform, pick a sensor offering multi‑point detection and Z‑height compensation; this trims manual leveling time. Finally, aim for a detection resolution of ≤0.04 mm and a high point count to keep first‑layer consistency across any bed type.
Precision and Repeatability Metrics
Mismatched sensors can ruin a first layer, so once you’ve confirmed compatibility and bed type, you need to look at how accurately the probe measures height and how consistently it repeats those measurements. Precision tells you the nozzle‑to‑bed error margin—most good sensors stay under 0.04 mm, giving you a tight first‑layer height. Repeatability shows whether that error stays the same print after print; high repeatability means the sensor reports the same height each time, preventing layer‑by‑layer drift. Multi‑point detection, such as 36‑point grids or 100 k+ samples, smooths out tilt and unevenness, boosting both precision and repeatability. Compensation accuracy refines Z‑offsets across the bed, while sensitivity to magnetic fields, temperature shifts, or bed material can degrade consistency, so choose a sensor with robust environmental tolerance.
Mounting and Installation Ease
Choosing a sensor that mounts easily can save you hours of tinkering before the first print. Look for models that ship with universal brackets or adapters for popular Ender and CR‑10 frames; this reduces the need for custom parts. Plug‑in designs let you snap the probe onto the carriage and connect a single cable, cutting installation to a few minutes. If the sensor relies on a stable, level surface—like optical or inductive types—make sure the mounting plate is rigid and pre‑drilled for your printer’s dimensions. Verify that the firmware supports the sensor out of the box (BLTouch/CR Touch compatibility) so you won’t waste time tweaking config files. Finally, check that the hardware includes all necessary screws and washers to avoid extra purchases.
Probe Technology and Durability
What matters most is how the probe’s underlying technology translates into lasting performance and consistent accuracy. Optical‑plus‑metal probes like CR‑Touch blend light detection with a physical tip, cutting false reads and promising over 100,000 detection cycles. That durability means you won’t replace the sensor after a few months of printing. Hall‑effect sensors, on the other hand, rely on magnetic fields; they’re immune to dust but can drift with temperature changes and nearby magnets. Both types can achieve tight tolerances—often ≤0.04 mm—so your first layer stays uniform. Multi‑point or 3D compensation (e.g., 36‑point grids or massive detection counts) builds a virtual plane, correcting tilt and slight bed imperfections. Choose the technology that matches your environment and how much wear you expect.
Firmware and Software Integration
How well your sensor talks to your printer’s firmware often decides whether the first layer stays perfect or drifts off‑track. First, verify that the sensor’s firmware supports your printer’s native firmware version; BLTouch, CR‑Touch, and Hall‑effect units all need compatible bed‑leveling and Z‑offset code. Next, match the calibration routine—multi‑point, single‑point, or Z‑height offset—to your printer’s zoning and bed topology, because a mismatch yields uneven height. Check whether the sensor can probe automatically during a print or only at start‑up, and confirm it works with your control board without extra kits that could cause conflicts. Finally, read the documentation on firmware updates; you may need to re‑probe, re‑train, or re‑flash after a change to keep the sensor reliable.
Temperature and Magnetic Interference Resistance
When your firmware talks to the sensor, the next hurdle is keeping that communication reliable as the bed heats up and nearby motors hum. Temperature spikes cause thermal expansion that can shift probe height, so you need a sensor that stays accurate across the full 20‑120 °C range typical for 3‑D printers. Look for built‑in temperature compensation or materials with low thermal drift; these keep the calibration intact from warm‑up to cool‑down. Magnetic interference from stepper motors or heating elements can corrupt Hall‑effect or optical readings, so choose a design that shields the sensing element or uses a magnetic‑field‑insensitive technology. Durable coatings further protect the probe during repeated heat cycles, ensuring consistent first‑layer quality without re‑calibration.
Cost‑Effectiveness and Longevity
Choosing a cost‑effective, long‑lasting auto bed leveling sensor means weighing upfront price against durability, compatibility, and future firmware support. You’ll save money if the sensor handles 100,000+ detection cycles and stays within ≤0.04 mm accuracy, because you won’t replace it often. Pick a model that works on textured, glass, metal, or uneven beds; that eliminates buying separate probes for each surface and cuts upgrade expenses. Hall‑effect and optical probes tend to resist magnetic and thermal drift better than cheap metal pins, extending reliable life. If you rely on open‑source firmware or BLTouch‑compatible variants, verify that updates keep the sensor functional—otherwise you risk obsolescence and hidden costs. Balancing these factors maximizes long‑term value.
Support and Documentation Availability
Ever wondered if a sensor’s documentation will actually keep you from endless trial‑and‑error? You should first check the compatibility list and firmware requirements; a clear list means you’ll find the right drivers without hunting. Look for sensors that bundle step‑by‑step setup guides, video tutorials, and troubleshooting sections—these resources cut down on guesswork and keep first‑layer consistency. A dedicated support hub with downloadable manuals, datasheets, and warranty policies signals long‑term backing. High detection counts and sub‑0.04 mm precision specs often accompany detailed user notes, confirming that the manufacturer cares about setup clarity. Finally, favor vendors that provide API references and link to active community forums, ensuring you can access updates and peer‑solved issues whenever they arise.
Frequently Asked Questions
Can Sensor Firmware Be Updated Without Replacing Hardware?
Yes, you can update the sensor firmware without swapping hardware. Just download the latest firmware, connect the sensor to your printer’s controller, flash it via the UI or USB, and reboot.
Do These Sensors Work With Non‑Standard Nozzle Sizes?
Yes, they’ll work with non‑standard nozzle sizes as long as you adjust the probe offset in your firmware. Just update the nozzle‑to‑probe distance, and the sensor will correctly measure the bed.
How Does Sensor Placement Affect Print Speed?
You’ll notice faster prints when the sensor sits close to the nozzle, because the firmware can skip large Z‑adjustments. If it’s far away, more compensation steps slow the feed, reducing overall speed.
Are There Any Known Compatibility Issues With Flexible Build Plates?
You’ll find most sensors work fine with flexible plates, but some magnetic or inductive types can lose accuracy if the plate’s thickness varies, so double‑check firmware settings and calibrate after each plate swap.
What Is the Typical Lifespan of a Sensor Under Continuous Use?
You’ll get about 12‑18 months of reliable operation before wear starts degrading accuracy, assuming you run the sensor continuously and keep it clean; occasional calibration can stretch it a bit further.

Leave a Reply