
You’ll need a compatible HEPA filter, mounting plate, 120mm fan, and M5x12 bolts with heat set inserts for installation. Start by measuring your enclosure’s back panel, maintaining 2-3 inches clearance for proper airflow. Print the filter mount plate face down, insert the HEPA filter into the mount grate, then attach everything to your back panel. Position the fan to pull air through the filter, ensuring negative pressure maintains containment. This guide covers the complete setup process.
Essential Components and Materials for HEPA Filter Installation
Before you begin installing HEPA filters in your printer enclosure, you’ll need to gather several essential components to guarantee a successful setup.
Your primary component is a compatible HEPA FILTER that fits snugly within your mounting system for ideal air filtration performance. You’ll also require a mounting plate to secure the HEPA FILTER properly and a fan for adequate air circulation throughout the enclosure.
A properly fitted HEPA filter, secure mounting plate, and circulation fan form the foundation of effective enclosure air filtration.
For installation hardware, gather M5x12 bolts and heat set inserts to effectively secure the filter and mounting components.
Consider adding activated carbon sheets alongside your HEPA FILTER to enhance capture of volatile organic compounds and odors during printing.
Having all these materials ready assures smooth installation and maintains air quality in your printer enclosure.
Measuring and Preparing Your Printer Enclosure for Filtration
Once you’ve gathered your materials, you’ll need to measure your printer enclosure’s back panel to determine the exact HEPA filter size required for peak performance. Use a measuring tape to record the panel’s height and width dimensions accurately.
Leave at least 2-3 inches of clearance around your printer’s sides and back for proper airflow circulation.
Next, identify ideal ventilation opening locations that’ll create effective air circulation. Position these openings opposite your planned filter location to establish a continuous airflow path. This setup guarantees filtered air moves efficiently through the enclosure.
Verify your enclosure uses non-flammable materials for safety during operation.
Finally, plan easy access routes to the filter mounting area. You’ll want quick replacement capabilities without disrupting your entire printer setup during routine maintenance.
Step-by-Step HEPA Filter Mounting and Assembly Process
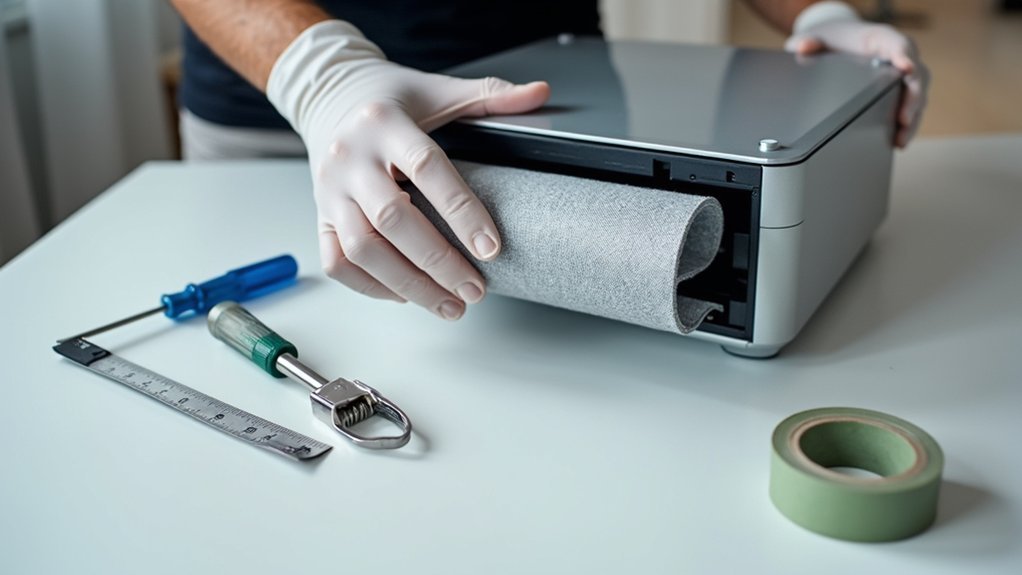
Start your HEPA filter installation by printing the HEPA FILTER MOUNT PLATE face down without supports, ensuring you’ll get excellent print quality and an accurate fit.
Next, securely attach M5x12 bolts to both HOLE FILLER FOR BOLT printed parts to prepare for filter assembly installation.
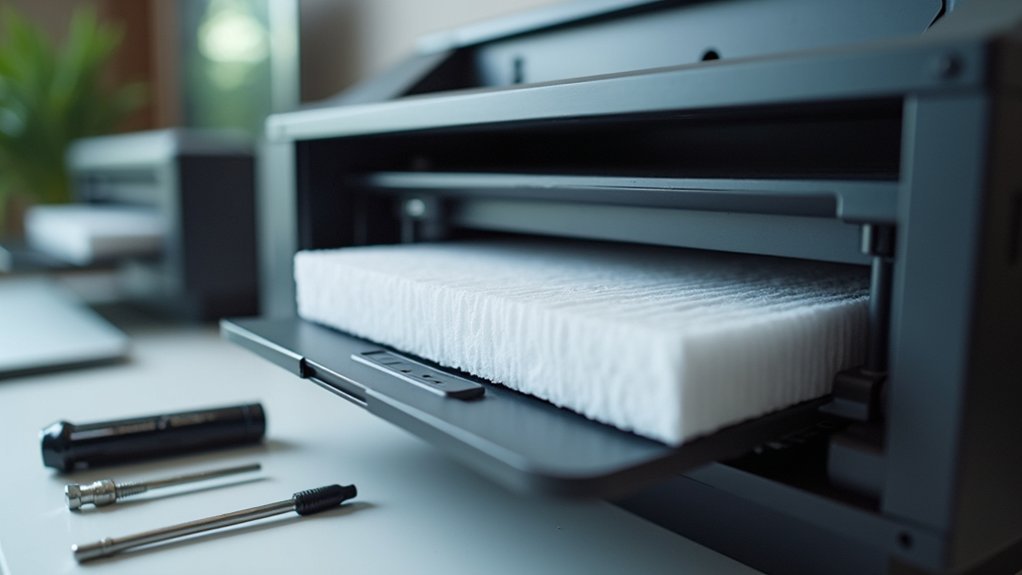
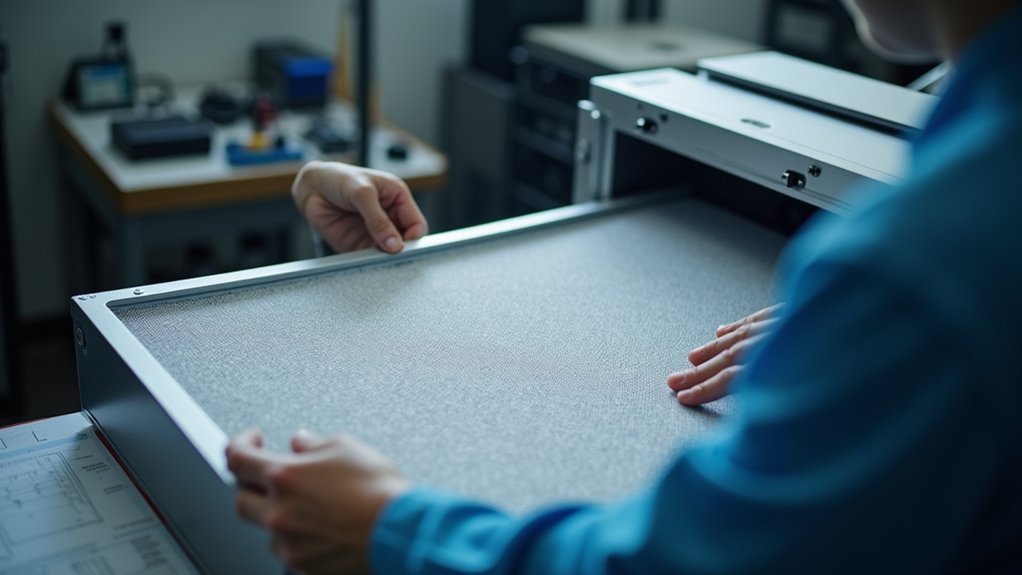
Insert your HEPA filter into the HEPA FILTER MOUNT GRATE, ensuring it’s positioned correctly for maximum particle capture.
Slide the HEPA FILTER MOUNT PLATE over the grate assembly, then mount the entire filter unit onto your enclosure’s back panel using the filament access holes for convenient maintenance access.
Complete the installation by adding a 120mm fan to maintain proper air circulation throughout your enclosure, following the detailed fan assembly guide for precise positioning.
Fan Integration and Airflow Configuration Setup
With your HEPA filter securely mounted, install the 120mm fan according to the Sumo/Delack assembly guide to create controlled airflow that draws contaminated air from your enclosure and pushes it through the filter system.
Successful fan integration requires careful attention to positioning and compatibility.
Configure your airflow setup by:
- Positioning the fan to pull air from inside the enclosure through the HEPA filter, creating negative pressure that contains harmful emissions.
- Checking power compatibility to guarantee your fan operates efficiently without overloading the printer’s power supply or generating excessive noise.
- Monitoring fan speed settings to maintain consistent airflow that matches your printing needs and filter capacity.
- Testing the complete system by observing proper air movement direction and verifying all connections remain secure during operation.
Testing Filter Performance and Maintenance Requirements
After completing your HEPA filter installation, you’ll need to verify the system’s effectiveness through systematic testing and establish a maintenance routine.
Monitor air quality and odors during printing sessions—noticeable smells indicate your filters require attention. Conduct visual inspections regularly, checking for dust accumulation and discoloration that signals reduced efficiency.
For quantitative assessment, measure particulate levels before and after filtration to evaluate filter performance objectively. This testing provides concrete data about your system’s effectiveness in removing airborne contaminants.
Replace filters every 3-6 months depending on usage frequency.
Keep a detailed maintenance log tracking all filter changes and inspections. This documentation helps you understand usage patterns and guarantees timely replacements, maintaining ideal air quality standards in your printing environment.
Frequently Asked Questions
Which Way to Put a HEPA Filter?
You’ll find an arrow or airflow direction label on your HEPA filter. Position it so the arrow points toward the fan or incoming air source. Don’t install it backwards or you’ll reduce filtration effectiveness.
How to Ventilate a 3D Printer Enclosure?
You’ll need active ventilation with exhaust fans to pull contaminated air out while drawing fresh air in. Place intake vents low and exhaust vents high for ideal airflow circulation throughout your enclosure.
What Are the Two Disadvantages of HEPA Filters?
HEPA filters can’t capture gases and odors, requiring additional filtration methods for complete air quality control. They’re also expensive to purchase and replace, with maintenance costs adding up every six to twelve months.
Are HEPA Filters Good for Resin Printing?
Yes, HEPA filters are excellent for resin printing. They’ll capture fine particles and allergens while reducing VOCs and odors. You’ll need proper ventilation and regular filter replacement for maximum effectiveness.


Leave a Reply