You’ll need to select flexible materials like ABS or polycarbonate, then measure panel thickness accurately to choose the right clip variant. Print pins upright without supports for maximum strength while positioning bases sideways with extra perimeters. Calculate proper arm length for snap connections—too short won’t engage, too long creates stress. Reference original part numbers for compatibility and maintain organized inventory by vehicle type. These fundamentals will transform your approach to automotive repair solutions.
Choose the Right Material for Flexibility and Durability
When printing replacement auto clips, you’ll need to select materials that can handle the constant flexing and stress these components endure. ABS, polycarbonate, and unfilled nylon are your best options due to their flexibility and impact resistance, making them perfect for snap connections.
Polypropylene also works exceptionally well because of its low density and excellent chemical resistance, which boosts clip durability.
Pay attention to the Young’s modulus when choosing materials—lower values mean greater flexibility, allowing clips to bend without breaking. Avoid rigid materials like glass and ceramic, as they’ll crack during installation.
Your material choice directly affects both immediate performance and long-term durability under automotive temperature fluctuations and stress conditions.
Measure Panel Thickness Before Selecting Clip Variants
Before you select any replacement clip variant, measure your panel’s exact thickness to guarantee a secure, long-lasting fit. This vital step prevents delays caused by incompatible clips that won’t hold properly.
When you measure panel thickness, you’ll determine which variant works best for your specific application. Use precise measuring tools to get accurate readings.
| Panel Thickness | Clip Version | Diameter Options |
|---|---|---|
| Up to 5mm | Short | 7mm or 8mm |
| Up to 10mm | Long | 7mm or 8mm |
| 5-10mm | Long preferred | Match thickness |
| Under 3mm | Short only | 7mm recommended |
| Over 8mm | Long only | 8mm recommended |
Keep both clip variants available during repairs. This allows quick adjustments when you encounter different panel thicknesses, enhancing your repair efficiency considerably.
Orient Parts Correctly for Maximum Strength
After selecting the right clip variant for your panel thickness, proper print orientation becomes the key factor that determines your clip’s strength and functionality.
Poor orientation can lead to layer separation and weak points that’ll cause premature failure.
Please follow these orientation guidelines for maximum durability:
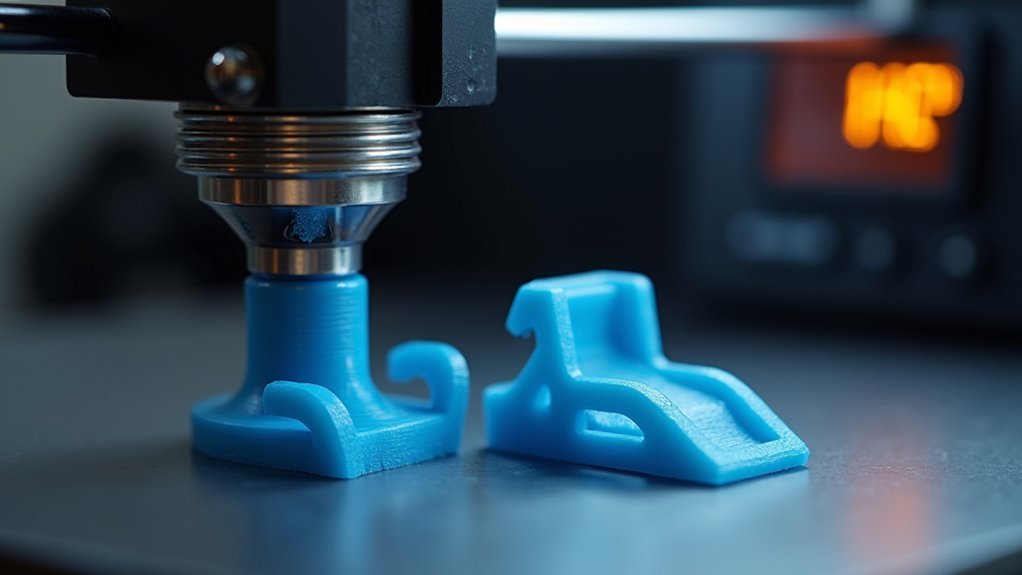
- Print the pin upright without supports – This orientation guarantees peak strength and detail while preventing layer lines from creating weak spots along the pin’s length.
- Position the base sideways during printing – This enhances structural integrity and resistance to bending forces that occur during installation and use.
- Enable extra perimeters for the base component – Use zero infill but multiple outer layers to create a solid foundation while saving material and print time.
Use Proper Support Strategies for Clean Prints
Even with perfect orientation, your auto clips won’t function properly if support material damages critical surfaces or leaves rough finishes where precision matters.
For pin components printed upright, you won’t need supports at all, which preserves detail and creates clean surfaces. When printing bases sideways, use normal grid supports for maximum stability during the printing process. Organic supports work well for pin faces with angles up to 45 degrees, providing gentler contact points that reduce surface damage.
After printing, trim carefully between pins using an x-acto knife or razor blade. Take your time during removal to avoid damaging the components.
Clean separation guarantees your clips will fit properly and function as intended in automotive applications.
Optimize Print Settings for Solid Base Components
While support strategies handle the delicate surfaces of your auto clips, the base components themselves require specific print settings to achieve peak durability.
Your base needs improved configurations that prioritize strength over appearance.
To maximize your base component’s performance:
- Set infill to zero – This reduces material usage and enhances print speed while maintaining structural integrity through increased perimeter walls.
- Add extra perimeters – Multiple wall layers strengthen the base to withstand installation forces and daily use.
- Print sideways orientation – This positioning improves layer adhesion and provides better resistance to shear forces.
Use normal grid support structures for stability during printing.
Like debugging JavaScript code, regularly assess your temperature settings to guarantee maximum adhesion and minimize warping, especially with ABS and nylon materials.
Test Fit Before Final Production Runs
Before you commit to printing dozens of replacement clips, testing a single prototype can save you hours of frustration and wasted material.
Use the original part number (909130067) as your reference for accurate dimensions during the test fit process. Print both short (5mm panel thickness) and long (10mm panel thickness) versions to guarantee compatibility across different body panel applications.
Reference part number 909130067 for precise dimensions and print both 5mm and 10mm versions to ensure universal panel compatibility.
During your test fit, evaluate the clip’s strength and durability by checking for potential weaknesses or misalignments.
Pay attention to how smoothly the clip engages and holds the panels together. Document any feedback and necessary adjustments from your test fit results.
This refinement process guarantees better fit and improved functionality before you move forward with your final production batch, ultimately reducing waste and reprints.
Consider Original Part Numbers for Compatibility
You’ll want to cross-reference the original equipment manufacturer (OEM) part numbers before printing any replacement clips.
These numbers, like Subaru’s 909130067 for fender liner retainers, contain essential specifications that determine whether your printed clip will fit properly.
Always verify the fitment details against the OEM number to avoid compatibility issues during installation.
Cross-Reference OEM Numbers
One vital step guarantees your 3D-printed replacement auto clips will fit perfectly: cross-referencing the original equipment manufacturer (OEM) part number.
When you cross-reference OEM numbers like Subaru’s 909130067, you’ll identify the exact specifications needed for your vehicle’s body panel applications.
This verification process helps you determine essential details:
- Clip diameter requirements – whether you need 7mm or 8mm options in short or long versions
- Panel thickness compatibility – ensuring proper fit for your specific vehicle’s panels
- Application-specific features – matching the original clip’s strength and durability characteristics
Accurate OEM cross-referencing prevents sourcing difficulties, avoids obsolescence issues, and streamlines your replacement process.
You’ll reduce repair delays while ensuring your printed clips match the original manufacturer’s specifications exactly.
Verify Fitment Specifications
Although cross-referencing OEM numbers provides the foundation for compatibility, verifying specific fitment specifications confirms your printed clips will perform correctly in their intended application.
You’ll need to check panel thickness measurements before selecting between short and long clip variants. Short clips accommodate panels up to 5mm thick, while long versions handle panels up to 10mm thick.
Additionally, you must determine the correct diameter requirement—either 7mm or 8mm—for your specific application. Each variant requires distinct “base” and “pin” files, so you’ll download the appropriate files matching your measurements.
Taking time to assess these fitment specifications and thickness requirements prevents installation problems and confirms secure attachment. Proper verification eliminates guesswork and delivers reliable results.
Design Flexing Arms for Effective Snap Connections
You’ll need to carefully calculate the ideal arm length for your snap connection, as too short won’t engage properly while too long creates unnecessary stress.
Consider the material flexibility requirements early in your design process—stiffer materials like ABS need longer arms to achieve the same deflection as more flexible filaments like TPU.
Use finite element analysis or simple test prints to verify your arm geometry provides adequate flex without risking breakage during repeated use.
Optimize Arm Length
Several design strategies can dramatically improve your snap connector’s performance by optimizing arm length and flexibility. When you’re designing replacement auto clips, extending the effective reach of your flexing arms is essential for reliable connections in tight automotive spaces.
To optimize arm length effectively, consider these proven techniques:
- Implement U-shaped folds – These enhance your arm’s reach while maintaining structural integrity throughout repeated use cycles.
- Add strategic notching – Cut notches around the wall surrounding your flexing arm to extend its reach and improve engagement accessibility.
- Design flexible walls – Make the surrounding wall flexible to reduce required arm flexing, improving functionality in confined spaces without compromising durability.
Remember that your material’s Young’s modulus directly affects performance, so choose flexible materials for better snap connection reliability.
Material Flexibility Requirements
When designing replacement auto clips, the material you select determines whether your snap connector will perform reliably or fail under stress. Material flexibility requirements are critical for effective snap connections, as rigid materials like glass or ceramic can’t provide the necessary movement for engagement and disengagement.
| Material | Young’s Modulus | Flexibility Level | Performance |
|---|---|---|---|
| ABS | Low-Medium | High | Excellent |
| Polycarbonate | Low-Medium | High | Excellent |
| Unfilled Nylon | Low | Very High | Excellent |
| Polypropylene | Low | Very High | Excellent |
You’ll need materials with lower Young’s modulus values for greater flexibility. Balance durability with flexibility—overly rigid designs fail during repeated use, while overly flexible designs won’t provide secure connections. These material flexibility requirements guarantee your printed clips perform effectively.
Account for Thermal Expansion in Automotive Environments
Although automotive clips may seem simple, thermal expansion presents one of the most critical challenges you’ll face when 3D printing replacements. Materials like ABS can expand approximately 0.1% for every 10°C temperature increase, dramatically affecting fit and functionality in automotive environments.
To tackle thermal expansion effectively:
- Design with accommodation – Create slightly larger gaps or incorporate flexible features that allow movement without compromising clip integrity.
- Conduct thermal cycling tests – Evaluate your printed clips under varying temperature conditions typical in automotive applications.
- Consult material data sheets – Review specific coefficients of thermal expansion (CTE) for your chosen filament to predict behavior accurately.
Proper thermal expansion planning guarantees your replacement clips maintain functionality across extreme temperature ranges.
Maintain Proper Inventory of Printed Replacement Clips
You’ll need to track which clip sizes and types get used most frequently to avoid running out during critical repairs.
Set clear reorder thresholds for fast-moving inventory like 7mm and 8mm clips, ensuring you’re never caught short when a customer’s vehicle needs immediate attention.
Organize your printed clips by vehicle make or application type, making it easier to grab the right hardware quickly during busy repair schedules.
Track Usage Patterns
Successful inventory management for printed replacement auto clips starts with establishing a systematic tracking approach that monitors usage patterns across all clip variants.
You’ll need to categorize clips by diameter and version while logging each item used during repairs. This data helps you identify fast-moving inventory and adjust stock levels accordingly.
To effectively track usage patterns, implement these essential steps:
- Monitor daily consumption – Log every clip used and note which variants are most frequently needed.
- Analyze historical repair data – Review past usage to project future needs and prevent stockouts.
- Set inventory thresholds – Establish minimum stock levels for each variant to trigger automated restocking.
Utilize software tools for real-time inventory updates and alerts when stock falls below your predetermined thresholds.
Set Reorder Thresholds
Most repair operations benefit from establishing reorder thresholds at 25-30% of maximum inventory capacity, ensuring you’re never caught without essential clips during critical repairs.
When you set reorder thresholds based on average usage rates, you’ll maintain sufficient stock without tying up excessive capital in inventory.
Monitor replacement frequency carefully to determine ideal reorder points. Adjust these thresholds as demand fluctuates throughout different seasons or repair cycles.
Consider implementing a just-in-time approach where you reorder clips as they’re consumed, minimizing waste while guaranteeing availability.
Track your printed clip inventory levels systematically to trigger timely reorders before reaching critical shortages.
Regular threshold reviews help you respond to changing repair volumes and seasonal trends, keeping your inventory management system efficient and cost-effective.
Organize by Vehicle
Once you’ve established your reorder thresholds, organizing your printed clip inventory by vehicle make and model becomes your next priority for efficient repair operations.
You’ll streamline access during repairs by maintaining dedicated sections for each manufacturer like Subaru, Ford, or Toyota. This systematic approach prevents confusion and reduces time spent searching for the right clips.
When cataloging your printed clips, follow these essential steps:
- Reference original part numbers like 909130067 for fender liner retainers to guarantee compatibility.
- Track clip variants by diameter (7mm and 8mm) and length specifications for different panel thicknesses.
- Label storage bins clearly with vehicle make, model, and specific application details.
This organization method transforms your inventory into an efficient system that supports faster repair turnaround times and improved customer satisfaction.
Frequently Asked Questions
What Printers Are Best Suited for Automotive Clip Production?
You’ll want FDM printers with heated beds for automotive clips. Prusa i3, Ultimaker S3, or Bambu X1 work excellently. They’ll handle PETG, ABS, and nylon materials that provide the durability you need.
How Do I Troubleshoot Layer Adhesion Problems During Printing?
You’ll fix layer adhesion by increasing bed temperature, cleaning the print surface thoroughly, slowing print speed, adjusting nozzle height, and ensuring your filament’s dry and stored properly.
What Post-Processing Steps Improve Clip Surface Finish and Strength?
You’ll improve surface finish by sanding with progressively finer grits, then applying acetone vapor smoothing for ABS. Enhance strength through annealing at controlled temperatures or adding epoxy coating to critical stress points.
How Long Do 3D Printed Clips Last Compared to OEM Parts?
You’ll find 3D printed clips typically last 2-5 years versus 10+ years for OEM parts. They’re perfect for temporary fixes, but won’t match original durability in harsh automotive environments.
What Safety Certifications Are Required for Automotive Replacement Clips?
You don’t need specific safety certifications for replacement clips you’re printing yourself. However, you should guarantee they meet basic automotive standards and won’t fail catastrophically during normal vehicle operation.
Leave a Reply