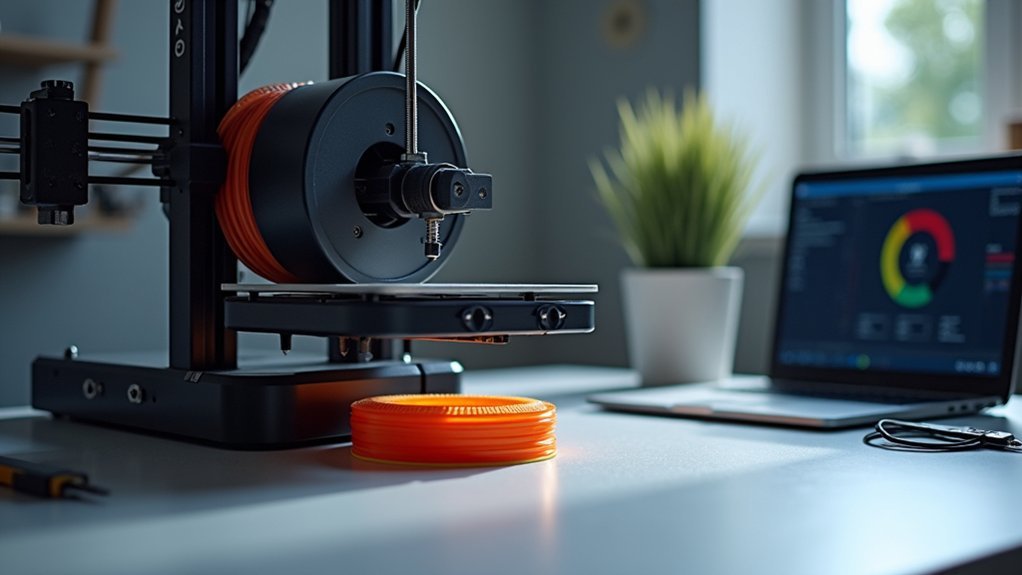
For clean flexible filament prints, you’ll need to configure your printer with a direct drive extruder, use temperatures between 220-240°C for TPU, and print at speeds of 15-20mm/s. Disable retraction or limit it to 0-1mm distance, set your heated bed to 50-60°C, and use 10-20% infill density with simple patterns like lines or grid. Always dry your filament before printing to prevent moisture-related defects. These fundamental adjustments will transform your flexible printing results into professional-quality outputs.
Understanding Flexible Filament Properties and Characteristics

Flexibility sets these specialized filaments apart from rigid materials like PLA and ABS. When you’re working with flexible materials like TPE and TPU, you’ll notice their rubber-like properties that allow bending and stretching without breaking.
TPU offers shore hardness ratings between 60A to 90A, with softer formulations providing greater stretchability for your projects.
Softer TPU formulations with lower shore hardness ratings deliver the highest flexibility and stretch capabilities for demanding applications.
These filaments are hygroscopic, absorbing moisture from air that causes printing issues like popping and sizzling. You’ll need to dry them properly before use.
Their unique flow characteristics require specific filament settings adjustments, including reduced retraction lengths and slower speeds. Understanding these properties helps you optimize printing temperature and other parameters for successful prints, whether you’re creating phone cases, RC wheels, or protective equipment.
Essential Printer Hardware Requirements for TPU and TPE
Before you can successfully print with TPU and TPE, you’ll need to guarantee your 3D printer has the right hardware configuration. A direct drive extruder is essential since it minimizes filament travel distance, preventing jams and ensuring smooth extrusion.
You’ll also want to upgrade to a larger nozzle size like 0.6mm or 0.8mm to improve flow and reduce clogs.
Your heated bed should maintain temperatures around 50-60°C for proper adhesion and warping prevention. A well-maintained build plate with PEI coating or textured surface greatly enhances first layer quality.
Finally, properly adjust your feeder tension to grip the filament securely without crushing it. This balance is vital for flexible materials that can easily deform under excessive pressure.
Optimal Temperature Settings for Different Flexible Filament Types
Once your printer hardware is properly configured, achieving the right temperature settings becomes critical for successful flexible filament printing.
Proper temperature calibration is the foundation of quality flexible filament prints once hardware setup is complete.
For TPU, set your nozzle temperature between 220°C and 240°C to guarantee proper layer adhesion and smooth flow. TPE requires slightly higher temperatures, typically 230°C to 250°C, for peak extrusion without quality issues. Soft PLA works best at 210°C to 225°C, maintaining flexibility while guaranteeing clean prints.
When starting with new filament rolls, begin at 235°C and adjust in 5°C increments based on print quality observations. Monitor your printer’s extrusion behavior continuously during printing.
If you notice oozing or poor melting, make incremental temperature adjustments. These print settings require careful calibration since proper temperature control directly affects your filament’s performance and final print quality.
Print Speed Configuration for Maximum Quality Control
You’ll need to establish the right print speed range to maintain control over your flexible filament’s extrusion quality.
Start with speeds between 10-20mm/s, then adjust based on how your specific filament responds to temperature changes.
Fine-tune both speed and temperature together since they directly impact each other’s effectiveness in preventing jamming and achieving consistent layer adhesion.
Optimal Speed Range Selection
When printing with flexible filaments, selecting the right speed becomes critical for achieving professional-quality results. Your ideal speed range should fall between 10mm/s and 30mm/s, with 15-20mm/s delivering the cleanest outcomes for most flexible 3D printing filaments.
Start at the lower end and gradually increase your printing speed while monitoring print quality closely. Slower speeds reduce nozzle pressure, ensuring consistent extrusion and preventing jams or under-extrusion issues.
While you can push some filaments to 40mm/s maximum, exceeding this threshold often causes poor layer adhesion and stringing problems.
Test different speeds systematically, making small adjustments and evaluating each print’s finish and structural integrity. Remember that finding your printer’s sweet spot with specific filament types requires experimentation and careful observation.
Speed-Temperature Correlation Adjustments
Finding your ideal speed range represents just one piece of the puzzle—you’ll need to balance print speed with temperature settings to achieve consistent, high-quality results.
When you reduce your speed to the recommended 10-20mm/s range, you can often increase your temperature set between 220°C and 240°C to enhance filament flow. Make these adjustments in 5°C increments while monitoring your print quality closely.
Lower speeds create less pressure in the nozzle, allowing higher temperatures to work effectively without causing issues. This correlation guarantees proper layer adhesion and clean lines.
Test different speed-temperature combinations during initial prints to identify your best settings, as each flexible filament responds differently to these paired adjustments.
Retraction Settings Adjustment and Disable Techniques

Since flexible filaments behave differently than rigid materials, you’ll need to take a completely different approach to retraction settings. The elastic properties of flexible materials make them prone to stretching and binding during retraction movements, often resulting in filament jam issues.
For most flexible filament prints, completely disabling retraction prevents under-extrusion and jamming. If you’re using a direct drive extruder and must enable retraction, keep distances extremely low at 0-1mm with slower speeds around 10-15mm/s.
| Setting | Bowden Tube | Direct Drive |
|---|---|---|
| Distance | 0mm (disabled) | 0-1mm |
| Speed | N/A | 10-15mm/s |
| Alternative | Skirt/prime blob | Skirt/prime blob |
Monitor your extruder temperature closely, as insufficient heat prevents proper melting during retraction movements, creating clogs.
First Layer Adhesion and Bed Surface Preparation
After optimizing your retraction settings to prevent jamming, the next challenge lies in getting your flexible filament to stick properly to the print bed.
Start by thoroughly cleaning your bed surface, removing any dust or grease that could compromise first layer adhesion. Blue painter’s tape or PEI-coated surfaces work exceptionally well with flexible materials.
Level your bed accurately and fine-tune the Z-offset for proper first layer squish.
Apply a thin layer of glue stick or specialized adhesive like Magigoo to enhance bonding on smooth surfaces. Configure your first layer height to 100% with 150% width, then reduce your print speed to 50-60% of normal settings.
Set your bed temperature around 50°C and monitor that essential first layer closely.
Extrusion Multiplier Calibration for Consistent Flow
You’ll need to master extrusion multiplier calibration to achieve consistent filament flow and prevent under or over-extrusion issues.
Start by understanding how this setting controls the amount of material your printer pushes through the nozzle, then use single-wall test prints to measure actual versus expected line widths.
Once you’ve gathered this data, you can fine-tune your flow settings by making incremental adjustments until your prints show proper material deposition.
Understanding Extrusion Multiplier Basics
When your 3D printer consistently produces prints with gaps, weak layer adhesion, or dimensional inaccuracies, the culprit is often an improperly calibrated extrusion multiplier.
This critical setting controls how much filament your printer pushes through the nozzle during printing.
For flexible filaments, you’ll typically need values between 1.0 and 1.2 due to their elastic properties.
Here’s what different values mean:
- Values below 1.0 – Reduce filament flow, often causing weak layer adhesion and gaps
- 1.0 – Standard baseline representing 100% of calculated filament flow
- 1.0-1.2 – Ideal range for flexible filaments to compensate for elasticity
- Above 1.2 – May cause over-extrusion, leading to stringing and dimensional issues
Understanding these basics guarantees you’ll achieve consistent flow and quality prints.
Calibration Testing Methods
Several calibration methods can help you achieve precise extrusion multiplier settings for flexible filaments. Start by printing a single-wall cube or specialized calibration object to measure actual filament output. Use calipers to measure the printed line width and compare it against your expected width.
| Test Method | Adjustment Range | Expected Outcome |
|---|---|---|
| Single-wall cube | ±10-15% | Consistent width |
| Flow tower | 5% increments | Ideal density |
| Line width test | ±0.1mm precision | Accurate dimensions |
| Multi-temperature | Variable settings | Stable flow |
| Speed variation | Different rates | Consistent quality |
Adjust your extrusion multiplier in 5% increments through your slicer settings. These calibration testing methods require multiple test prints since flexible filaments react differently to temperature and speed changes, affecting filament flow. Document each adjustment for future reference.
Fine-Tuning Flow Settings
Three critical adjustments determine the success of your extrusion multiplier calibration: baseline measurement, incremental testing, and verification prints. Start with values between 1.1 to 1.2 for flexible materials, then fine-tune through methodical testing to achieve ideal print quality.
Your calibration process requires these essential steps:
- Dry your filament completely before testing, as moisture creates inconsistent flow characteristics that skew calibration results.
- Print single-wall test patterns to measure actual line width against expected dimensions.
- Adjust the extrusion multiplier incrementally by 0.05 intervals until achieving target thickness.
- Verify settings with complex geometry to confirm consistent performance across different print features.
Recalibrate whenever switching filament brands or types, since flow characteristics vary greatly between materials.
This systematic approach guarantees reliable extrusion multiplier settings for consistent, high-quality flexible filament prints.
Infill Density and Pattern Selection for Flexibility
While flexible filaments offer unique printing possibilities, you’ll need to adjust your infill settings considerably to maximize their bendable properties. Lower infill density around 10-20% enhances flexibility by allowing better bending and compression without breaking.
You’ll want to stick with simple infill patterns like lines or grid rather than complex ones. These straightforward patterns provide adequate strength while minimizing warping and distortion risks during printing.
Avoid complex infill patterns such as gyroid or honeycomb, as they create additional pressure that can cause jams and under-extrusion with flexible filaments.
Instead, increase your top solid layers to guarantee surface integrity while maintaining overall flexibility. Monitor your print quality continuously and adjust infill settings based on your specific design requirements and filament characteristics to achieve the ideal balance between flexibility and strength.
Layer Height and Width Parameter Optimization
Once you’ve refined your infill settings, you’ll need to fine-tune layer height and width parameters to achieve exceptional print quality with flexible filaments.
For ideal results, configure these essential parameters:
- Layer height: Set between 0.1mm to 0.2mm for enhanced detail while maintaining strong adhesion between layers.
- Layer width: Use 100-120% of your nozzle diameter to guarantee sufficient material extrusion and prevent gaps.
- First layer height: Adjust to 0.2mm-0.3mm for solid foundation and proper squish against the build surface.
- First layer width: Increase to 150% of nozzle diameter for superior bed adhesion.
Experiment with these settings to find your best balance between print speed and detail quality.
The first layer parameters are particularly vital since they establish the foundation for your entire print’s success.
Cooling Fan Settings and Thermal Management
Thermal control becomes your most critical factor when printing flexible filaments, as these materials demand a delicate balance between heat retention and controlled cooling.
You’ll need to keep your cooling fan settings off or at minimal speeds to prevent warping and maintain proper extrusion flow. Excessive cooling creates poor layer adhesion that compromises your print’s structural integrity.
Set your hot end temperature between 220°C and 240°C for ideal melting and consistent material flow. Your bed temperature should remain around 50-60°C to guarantee strong first layer adhesion while minimizing warping throughout the print process.
Experiment with gradual cooling adjustments since each flexible filament brand responds differently.
Monitor your print quality closely after each modification to find the perfect thermal balance for your specific material.
Support Material Configuration and Gap Settings
You’ll need to optimize your support gap settings to prevent supports from fusing too tightly to your flexible prints, making removal nearly impossible.
Start by setting your support material gap to at least 0.3mm and reducing support density to 10-15% for easier detachment.
Configure interface layer settings in your slicer to create smoother contact surfaces that won’t damage your flexible material during support removal.
Support Gap Optimization
When printing with flexible filaments, setting an appropriate support gap becomes critical for preventing damage during post-processing.
You’ll need to carefully balance accessibility with structural integrity to guarantee clean removal without tearing your print.
Optimize your support gap settings using these guidelines:
- Set minimum 0.3mm gap – This baseline prevents supports from bonding too tightly to your flexible material.
- Increase gap for highly flexible materials – Ultra-soft filaments require larger gaps (0.4-0.6mm) to avoid permanent adhesion.
- Adjust based on model complexity – Simple designs tolerate tighter gaps, while intricate shapes need looser settings.
- Configure breakable support material – Use lower density patterns or different materials to enhance removal ease.
You’ll achieve better results by regularly testing different gap configurations specific to your chosen flexible filaments and design requirements.
Material Removal Techniques
Three fundamental approaches define successful support removal from flexible filament prints: mechanical separation, thermal assistance, and chemical dissolution.
You’ll achieve the cleanest results by combining proper support material gap settings with appropriate removal techniques. Start with gentle twisting motions to separate support structures from your model, working systematically from outer edges inward.
If you’ve maintained that essential 0.3mm gap, supports should detach without excessive force. For stubborn sections, apply slight heat using a hair dryer to soften the connection points.
When using breakaway materials, leverage their designed fracture points for clean removal. Always work slowly with flexible prints since rushing can cause tears or permanent deformation in your model’s surface.
Interface Layer Settings
Since interface layers serve as the critical bridge between your support structures and flexible filament prints, configuring them properly determines whether you’ll achieve clean removal or struggle with damaged surfaces.
Your interface layer settings require specific adjustments for flexible filaments to guarantee ideal results:
- Increase solid interface layers – Add 2-3 extra solid layers above your standard settings to improve adhesion between supports and print surfaces while maintaining smooth finishes.
- Maintain proper gap distances – Set interface gaps to at least 0.3mm to allow flexible material expansion without bonding permanently to supports.
- Reduce interface density – Lower density to 10-20% prevents excessive material contact that complicates removal.
- Monitor expansion compatibility – Verify your settings accommodate the material’s natural flex characteristics during printing processes.
Bowden Vs Direct Drive Extruder Considerations
How does your extruder type affect flexible filament printing?
Direct drive extruders are your best choice for flexible filaments because they minimize the distance between motor and hotend. This reduces jamming risks and gives you better extrusion control.
Short motor-to-hotend distance in direct drive systems prevents flexible filament jams and delivers superior extrusion precision.
Bowden extruders create challenges with their longer PTFE tubes, causing filament movement delays and increased resistance that lead to under-extrusion or clogs.
If you’re stuck with a Bowden setup, you’ll need significant adjustments. Lower your print speeds to around 20mm/s and reduce or disable retraction completely to prevent filament compression.
You’ll also need to experiment with feeder tension and print temperatures.
Direct drive systems handle higher retraction settings like rigid materials, making them far more forgiving for flexible printing.
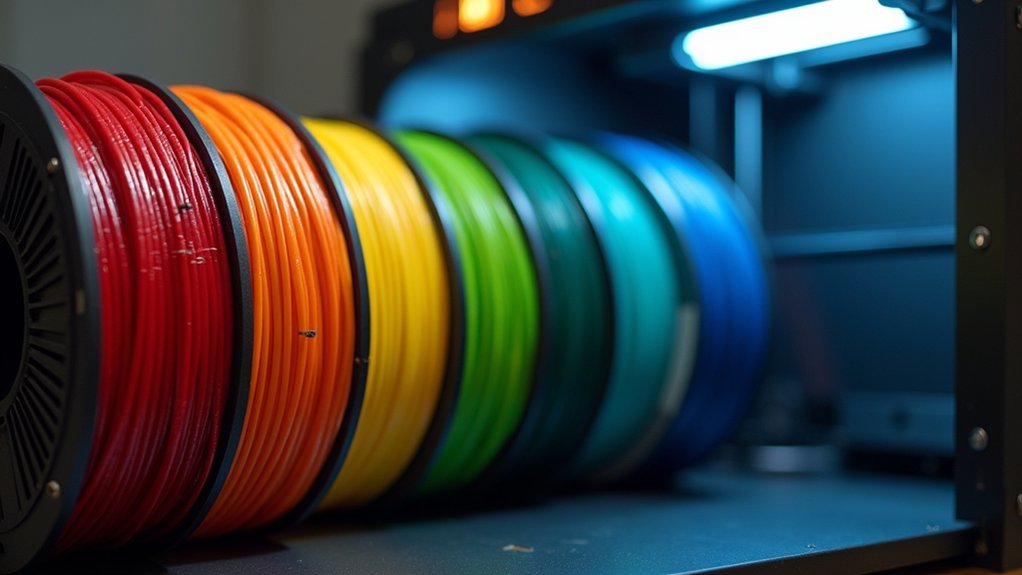
Filament Storage and Pre-Print Drying Methods
You’ll need to store your filaments properly and dry them before printing to achieve ideal results.
Moisture is flexible filament’s biggest enemy, so creating the right storage environment and recognizing when drying’s necessary becomes essential for print quality.
Let’s examine how to set up proper storage conditions, implement effective drying techniques, and identify telltale signs that your filament has absorbed too much moisture.
Proper Storage Environments
While moisture might seem like a minor concern, it’s actually one of the biggest enemies of flexible filaments and can destroy your print quality before you even start.
Creating proper storage environments prevents moisture absorption that leads to popping, sizzling, and inconsistent prints.
To maintain ideal humidity levels, follow these storage practices:
- Store filaments in cool, dry locations away from humidity sources
- Use airtight containers with desiccant packs to control moisture exposure
- Seal filaments in vacuum-sealed bags for long-term storage
- Monitor storage areas regularly to guarantee consistent environmental conditions
You’ll need to check your filament’s condition before each print.
If you notice bubbling or sizzling during extrusion, your material has absorbed moisture and requires immediate drying to restore its printing properties.
Effective Drying Techniques
When your filament has already absorbed moisture despite proper storage, you’ll need to actively remove it using proven drying techniques. Set your conventional oven to 135°F and dry the filament for six hours to eliminate absorbed water.
For superior results, consider investing in a vacuum oven or dedicated filament dryer like PrintDry, which provides more controlled drying conditions.
Listen for telltale signs during printing—sizzling or popping sounds indicate moisture presence and require immediate attention.
Before starting any print, verify your filament is completely moisture-free, as residual water weakens molecular structure and compromises layer adhesion.
Implementing these effective drying techniques prevents common issues like stringing and under-extrusion, dramatically improving your overall print quality and ensuring consistent results.
Moisture Detection Signs
Recognizing moisture contamination early saves both time and material costs in your printing projects.
When flexible filaments experience moisture absorption, they’ll exhibit distinct warning signs that you’ll need to address before continuing your prints.
Watch for these key indicators of moisture contamination:
- Audio cues – Popping and sizzling sounds coming from your nozzle during extrusion
- Visual defects – Bubbling or steam emerging from the hotend while printing
- Extrusion problems – Inconsistent flow rates and irregular filament output
- Surface quality issues – Poor layer adhesion and rough surface finish on completed prints
You’ll notice these symptoms become more pronounced as moisture levels increase.
Don’t ignore early warning signs, as they’ll progressively worsen your print quality and waste material if left unaddressed.
Troubleshooting Common Print Quality Issues
Even with proper initial settings, print quality issues can emerge during your filament printing journey, requiring systematic troubleshooting to identify and resolve underlying causes.
Start by adjusting your extruder temperature incrementally, beginning around 235°C and modifying in 5°C steps based on observations. If you’re experiencing stringing or poor layer adhesion, reduce your print speed to 20-30 mm/s while maintaining ideal nozzle temperature.
Disable retraction completely for flexible filaments to prevent jams and oozing. When prints dislodge from the bed, increase bed temperature to 60°C and apply glue or specialized adhesion products.
Regularly recalibrate E-steps and monitor for sparse layers or disconnected infill, which indicate temperature inadequacy or incorrect settings.
Frequently Asked Questions
What Are the Best Print Settings for TPU?
You’ll want to print TPU at 15-30 mm/s with a 0.6mm+ nozzle, disable retraction, set temperatures at 220-240°C, and use a heated bed at 50-60°C with adhesive.
What Are the Settings for Soft PLA Print?
You’ll want 210-225°C temperature, 20-40 mm/s speed, and disable retraction completely. Set your extrusion multiplier to 1.1, use 150% first layer width, and print at 100% first layer height for best results.
Why Is My TPU Print Not Smooth?
Your TPU print isn’t smooth because you’re likely using improper temperature settings, high retraction values, or printing too fast. You’ll need to adjust these settings and make certain your filament’s properly dried.
How to Make PLA Prints More Flexible?
You can make PLA prints more flexible by reducing infill density to 10-20%, lowering print speed to 20-30 mm/s, increasing nozzle temperature to 210-230°C, and slightly raising your extrusion multiplier.

Leave a Reply