
You can fix filament grinding by increasing your hot end temperature by 5-10°C, reducing print speed by 50%, and adjusting extruder tension so the drive gear grips firmly without crushing the filament. Check your retraction settings, keeping distance under 7mm and speed between 30-50mm/s. Clean your nozzle regularly, use high-quality filament stored in dry conditions, and inspect for clogs or mechanical wear. These thorough solutions will transform your printing reliability.
Understanding Filament Grinding Causes and Symptoms
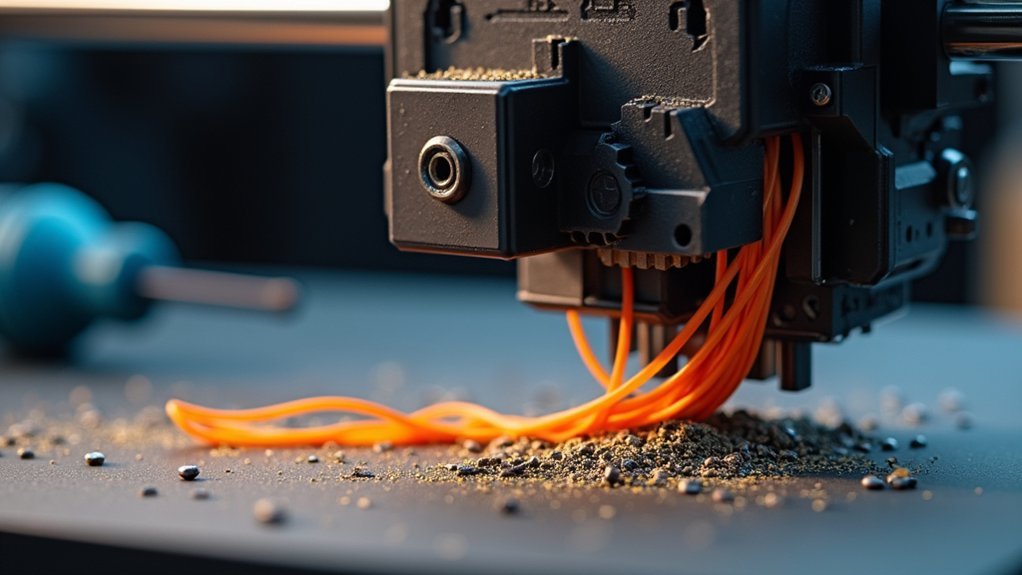
When your 3D printer’s extruder drive gear struggles to grip and push filament through the hotend, you’ll encounter the frustrating problem known as filament grinding.
This grinding creates distinctive symptoms you can’t ignore: inconsistent extrusion patterns during printing, visible filament shavings accumulating around your extruder, and frequent nozzle clogs that halt your projects.
Several factors cause filament grinding. Incorrect extruder temperatures prevent proper filament flow, forcing the drive gear to work harder.
Wrong extruder temperatures force your drive gear to overwork, creating the perfect conditions for filament grinding problems.
Diameter inconsistencies in your filament create feeding problems that stress the extruder mechanism. Poor quality filament often leads to blockages that increase back-pressure on the drive system.
Understanding these causes helps you identify when filament grinding occurs, allowing you to address issues before they damage your extruder or ruin prints.
Temperature Settings and Heat Management
Since proper temperature control directly affects filament flow, you’ll need to fine-tune your heat settings to eliminate grinding problems.
Start by increasing your hot end temperature by 5-10°C to guarantee adequate filament melting before extrusion. Low temperatures create high viscosity, causing flow resistance that leads to grinding.
Check your filament’s datasheet for recommended temperature settings and stay within that range. Each material requires specific temperatures for peak melting.
Monitor for heat creep, which occurs when insufficient cooling causes the hot end to overheat, leading to jams and grinding.
Maintain proper cooling around your hot end to prevent heat creep.
Regularly clean your nozzle at melting temperature to remove clogs that impede extrusion and contribute to grinding issues.
Print Speed Optimization

Although temperature control is essential, enhancing your print speed plays an equally important role in preventing filament grinding. When you run your printer too fast, you’ll overwhelm the extruder and prevent adequate filament melting, creating increased viscosity and flow resistance that leads to grinding.
Excessive print speeds overwhelm extruders and create flow resistance, making proper speed calibration crucial for preventing filament grinding issues.
Reducing your default print speed by 50% can greatly alleviate grinding issues by minimizing rapid extruder motor rotation. Slower speeds give your hot end more time to properly melt filament, ensuring smoother extrusion.
- Evaluate the relationship between your print speed and hot end capabilities
- Monitor print speed settings across different filament types and materials
- Start with 50% reduction from default speeds when experiencing grinding
- Adjust speeds based on filament viscosity and melting characteristics
- Test ideal settings to prevent under-extrusion and grinding issues
Extruder Tension Adjustment
You’ll need to find the sweet spot for your extruder tension to prevent filament grinding while maintaining reliable feed.
Start by adjusting the pressure between your drive gear and filament—too loose causes slippage, while too tight crushes and strips the material.
Test different tension levels systematically to identify what works best for your specific filament and extruder combination.
Identifying Proper Tension Levels
When your extruder grips filament too tightly, it’ll crush and grind the material, but insufficient tension causes slippage that prevents consistent extrusion.
Finding the sweet spot requires understanding what proper extruder tension looks like in practice.
You’ll know you’ve achieved ideal tension when the drive gear maintains firm contact without deforming the filament. Test this by manually feeding material through the extruder while observing the gear’s engagement.
- Visual inspection: Check for indentation marks on the filament without deep gouges or crushing
- Manual feed test: Filament should move smoothly through the extruder with consistent resistance
- Gear engagement: Drive gear teeth should grip firmly without excessive bite depth
- Resistance feel: Moderate pressure when pushing filament manually indicates proper tension
- Performance monitoring: Consistent extrusion without skipping or grinding during prints
Adjusting Extruder Gear Pressure
Dialing in your extruder tension requires a methodical approach that balances firm filament grip with gentle handling. Start by tightening your extruder gear tension screw until it contacts the filament, then back it off approximately one full turn. This prevents excessive pressure that strips filament while maintaining adequate grip.
Test your adjustment by manually pushing filament through the extruder gear assembly. It should move smoothly without requiring excessive force, indicating proper tension without grinding risk.
If you’re using dual gear extruders, adjust each gear independently for enhanced control and reduced grinding likelihood.
Remember to readjust tension when switching filament types or diameters, as different materials require varying pressure levels for ideal extrusion performance.
Testing Tension Balance
After making your initial tension adjustments, you need to verify that your settings actually work under real printing conditions.
Start with a test print using your most commonly used filament type. Watch for consistent filament feeding without grinding sounds from the extruder motor.
- Monitor extrusion consistency – Look for smooth, even material flow without gaps or over-extrusion
- Listen for grinding noises – Any clicking or grinding indicates excessive tension crushing the filament
- Check for skipped steps – Inconsistent layers suggest insufficient grip causing slippage
- Test different filament types – Each material may require slight tension adjustments for peak performance
- Observe feed rate changes – Sudden speed variations indicate tension imbalance issues
Fine-tune your settings based on these observations.
Retraction Settings Configuration
Your retraction settings play an essential role in preventing filament grinding, and getting them right requires careful attention to both speed and distance parameters.
You’ll want to keep your retraction distance under 7mm maximum while reducing retraction speeds by about 10mm/s from your current settings for best performance.
If you’re still experiencing grinding issues, try cutting your retraction speed in half to reduce the stress on your extruder mechanism.
Optimal Retraction Speed
When retraction speed exceeds ideal levels, the extruder gear can slip against the filament surface, creating the grinding marks that plague many 3D printing projects. Your best retraction speed should stay within 30-50 mm/s for most printer configurations to minimize stress on both extruder and filament.
- Set maximum retraction speed between 30-50 mm/s to prevent excessive force on filament
- Reduce speed by 10 mm/s increments when grinding occurs to find your sweet spot
- Balance retraction distance (1-7 mm) with speed to avoid filament slippage
- Test incremental adjustments systematically rather than making dramatic changes
- Monitor prints actively for correlations between speed settings and grinding patterns
Finding your printer’s best retraction speed requires patience and methodical testing, but it’ll eliminate grinding issues permanently.
Maximum Distance Limits
While retraction speed plays an essential role in preventing filament grinding, setting your maximum retraction distance correctly is equally important for maintaining smooth extruder operation.
You should keep your maximum distance limits between 5-7 mm for most 3D printers, as exceeding these parameters considerably increases your risk of filament grinding and clogs.
When you use hostile retraction settings with excessive distances, you’re creating unnecessary tension in your filament that can strip material and cause your extruder gear to lose grip.
You’ll want to adjust your retraction settings incrementally, testing each change to find the ideal balance.
Watch for grinding noises or inconsistent extrusion during printing, as these signs indicate your distance settings need fine-tuning to prevent extruder damage.
Nozzle Cleaning and Maintenance
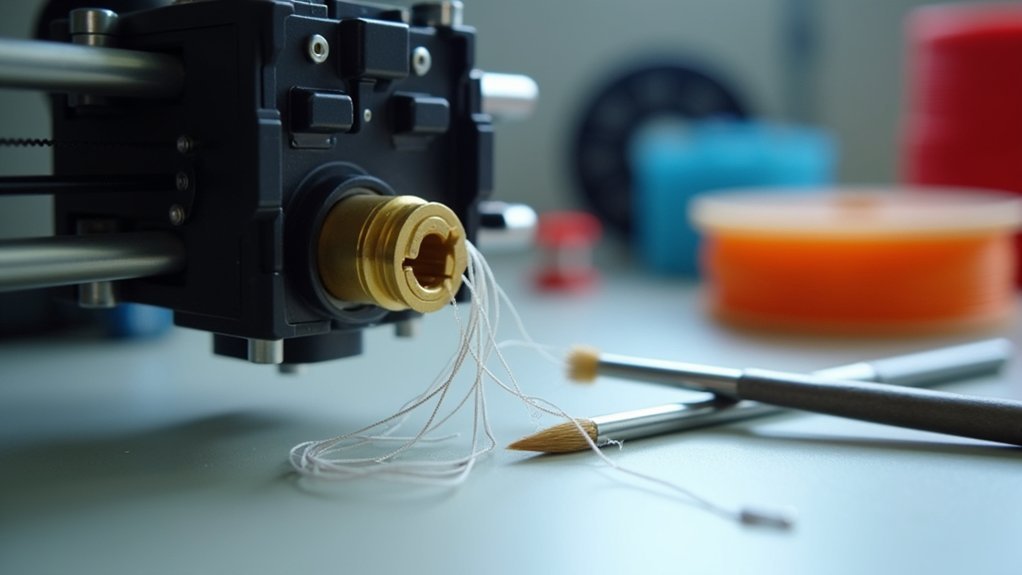
Although filament grinding often stems from extruder problems, a clogged or dirty nozzle frequently causes the back-pressure that leads to these issues in the first place.
Regular nozzle cleaning prevents blockages that force your extruder to work harder, ultimately causing gear slippage and filament grinding.
Proper nozzle maintenance requires heating the nozzle to your filament’s melting temperature before cleaning.
You’ll need to carefully clear debris using a fine wire or needle, being cautious not to push particles into the heat break.
Essential nozzle cleaning practices include:
- Inspect nozzles regularly for visible clogs or reduced filament flow
- Heat nozzle to proper temperature before attempting any cleaning procedures
- Use fine wire or acupuncture needles to gently remove obstructions
- Run cleaning filament cycles between different material changes
- Schedule routine maintenance every few prints for peak performance
Filament Quality and Storage
Even after fixing extruder mechanics and maintaining clean nozzles, poor filament quality can still trigger grinding issues that frustrate your printing efforts.
You’ll need high-quality filament with consistent diameter to guarantee smooth feeding through your extruder. Always use calipers to verify your filament matches your printer’s specifications, as diameter inconsistencies cause feeding problems.
Store your filament in dry environments to prevent moisture absorption, which makes filament swell and creates clogs. If you’ve exposed filament to humidity, dry it before printing since moisture creates bubbles during extrusion and degrades print quality.
Regularly inspect your filament for knots, tangles, or breaks that can disrupt consistent feeding. These simple quality checks prevent grinding issues and maintain reliable extrusion performance.
Mechanical Component Inspection
Five critical mechanical components require your immediate attention when diagnosing filament grinding problems. Your extruder’s performance depends on these parts working harmoniously together.
When any component fails, you’ll experience inconsistent feeding, slippage, or complete blockages that damage your filament.
- Extruder gears – Remove dust and debris that accumulates between teeth, preventing proper grip.
- Thumbscrew tension – Adjust to balance compression without over-tightening or allowing slippage.
- Bowden tube – Inspect for internal notches or damage creating friction points.
- Filament path – Verify correct loading and eliminate knots or tangles obstructing flow.
- Nozzle condition – Clean with fine wire or needle to remove clogs impeding extrusion.
Regular inspection prevents minor issues from escalating into costly repairs.
Preventive Maintenance Strategies
Beyond identifying and fixing immediate problems, implementing a structured maintenance routine protects your 3D printer from future filament grinding incidents.
You’ll want to regularly clean your extruder and hotend to prevent clogs that cause grinding. Store your filament in dry, humidity-controlled environments since moisture absorption leads to poor extrusion and degradation.
Conduct routine checks on mechanical components, focusing on drive gears and tension settings to guarantee proper engagement.
Regular mechanical inspections of drive gears and tension settings ensure optimal filament engagement and prevent costly grinding damage.
You’ll reduce filament grinding risks considerably by using high-quality filament with consistent diameter specifications.
Monitor and adjust printing conditions like temperature and speed regularly to maintain ideal performance. This proactive approach reduces strain on your extruder and prevents the grinding issues that plague many 3D printer operators.
Frequently Asked Questions
Why Is My Extruder Grinding Filament?
Your extruder’s grinding filament because you’ve got improper gear tension, high retraction settings, poor-quality filament, a clogged nozzle, or insufficient temperature. Check these factors and adjust accordingly.
How Do You Reduce Filament Grinding?
You’ll reduce grinding by increasing extruder temperature 5-10°C, lowering print speed by 50%, adjusting gear tension properly, cleaning your nozzle regularly, and checking filament quality for consistency issues.
Why Does My Extruder Keep Breaking Filaments?
Your extruder’s breaking filaments because you’ve got excessive gear tension, high retraction settings, insufficient heating, poor quality filament, or nozzle clogs blocking flow and causing grinding.
Why Is My 3D Printer Making a Grinding Sound?
Your 3D printer’s grinding sound means the extruder gears can’t grip or push filament properly. Check for nozzle clogs, increase temperature, reduce retraction settings, or verify you’re using quality filament.
Leave a Reply